
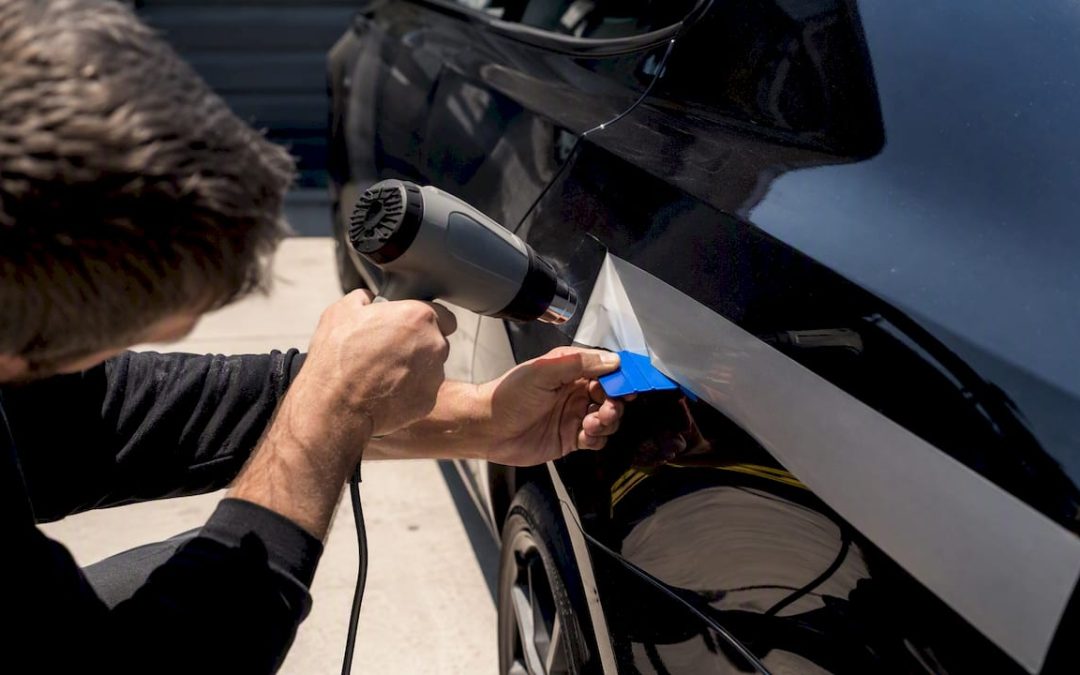
Yes, you can remove most car decals yourself without damaging the paint. The safest method is heat plus a slow, low-angle peel, followed by a solvent to clean up adhesive residue and a wax or sealant to protect the clear coat. A small sticker takes a short time to remove; a large, old decal can take several hours including aftercare. Stop immediately and call a professional if the paint starts lifting, the decal feels fused to the clear coat, or you’re working on an expensive or antique finish.
Key Takeaways
Heat first, peel slow, clean the residue, and protect the clear coat: that four-step sequence is what separates a clean removal from a paint repair bill.
| Point | Details |
|---|---|
| Heat is non-negotiable | Apply a hair dryer 6–8 inches from the surface for 30–60 seconds per section before peeling. |
| Plastic tools only on paint | Metal blades scratch clear coat instantly; reserve single-edge razors for glass surfaces only. |
| Test solvents first | Spot-test Goo Gone, isopropyl alcohol, or 3M Adhesive Remover on a hidden area before applying to a visible panel. |
| Old decals carry more risk | Multi-year decals are more likely to have fused with the clear coat and may require professional removal and polishing. |
| Customsignstoday for hard jobs | Professional removal, paint correction, and replacement vinyl decals are available for stubborn or high-risk situations. |
Table of Contents
- What tools and supplies do you need before you start?
- Can you remove car decals from painted panels step by step?
- How do you remove decals from glass and rear windows?
- What special precautions apply to plastic bumpers and vinyl wraps?
- How do you remove sticky adhesive residue safely?
- How long does removal take, and when should you hire a pro?
- What mistakes do most owners make when removing decals?
- Can you peel off a car decal and reuse it?
- Signage pros’ tips that make DIY removal much safer
- Customsignstoday handles the jobs that are too risky to DIY
- Sources
What tools and supplies do you need before you start?
Getting the right tools together before you touch the decal saves you from making a mid-job run to the hardware store, or worse, grabbing the wrong thing in a pinch.
Essential tools:
- Hair dryer (preferred for DIY) or a heat gun on its lowest setting
- Plastic scraper, plastic razor blade, or a stiff plastic card
- Microfiber towels (at least two)
- Fishing line or dental floss for bonded emblems
Chemicals to have ready:
- Goo Gone Automotive (citrus-based adhesive remover)
- 70% isopropyl alcohol
- 3M Adhesive Remover as a backup option
- pH-neutral car wash soap and a spray bottle of water
Aftercare supplies:
- Clay bar
- Polishing compound (for ghosting or UV shadow)
- Car wax or paint sealant
| Supply | Purpose | Paint-Safe? |
|---|---|---|
| Hair dryer | Softens adhesive before peeling | Yes |
| Plastic scraper / plastic razor | Lifts edges without scratching clear coat | Yes |
| Goo Gone Automotive | Dissolves petroleum-based adhesive residue | Yes, when neutralized |
| 70% isopropyl alcohol | Removes light residue and neutralizes solvents | Yes |
| 3M Adhesive Remover | Cuts through stubborn adhesive | Yes, spot-test first |
| Metal razor blade | Fast on glass only | Never on paint |
Pro Tip: Always spot-test any solvent on a hidden area first — inside a door jamb works well. Inspect with angled light for any haze before applying it to a visible panel.
Work in the shade and in a well-ventilated area. A hot panel in direct sun dries solvents too fast, and fumes from adhesive removers build up quickly in an enclosed space.
Can you remove car decals from painted panels step by step?
Chemical Guys recommends warming the decal with low, even heat before peeling as the single most important step to prevent vinyl tearing and clear coat damage. Here is the full sequence.
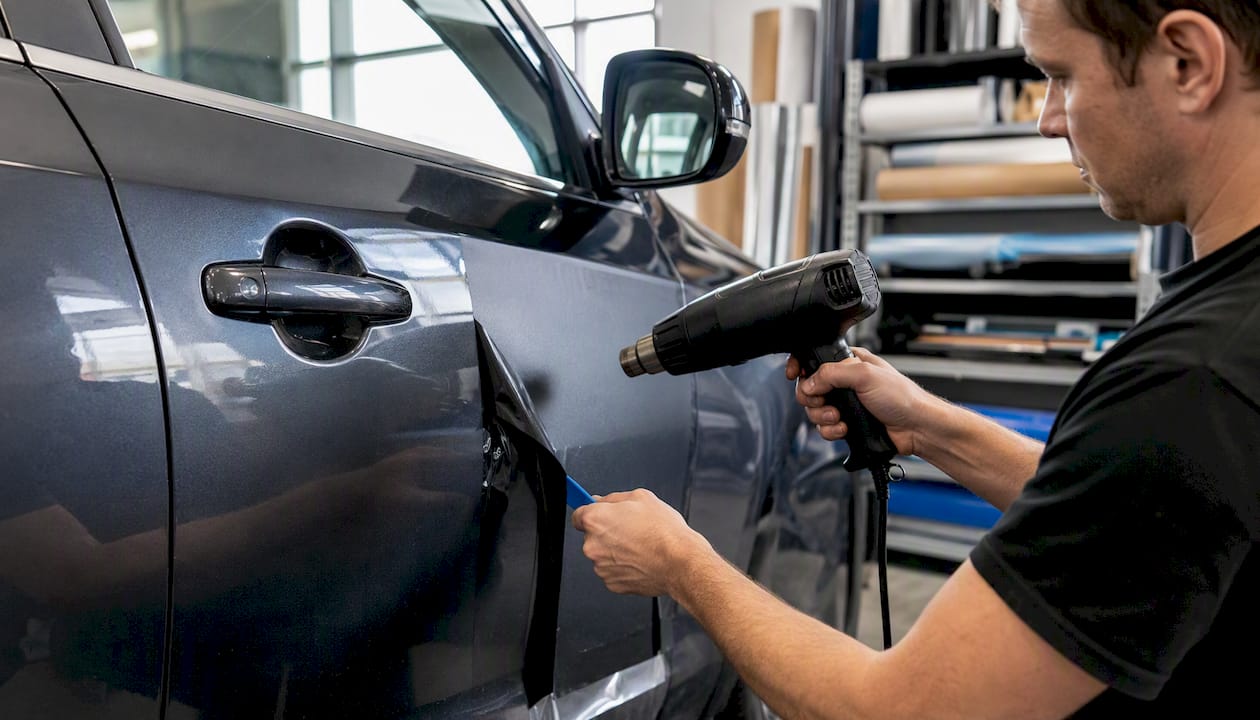
1. Wash and dry the area. Grit under a scraper or your fingernail will scratch the clear coat. A quick rinse and dry takes two minutes and prevents a costly mistake.
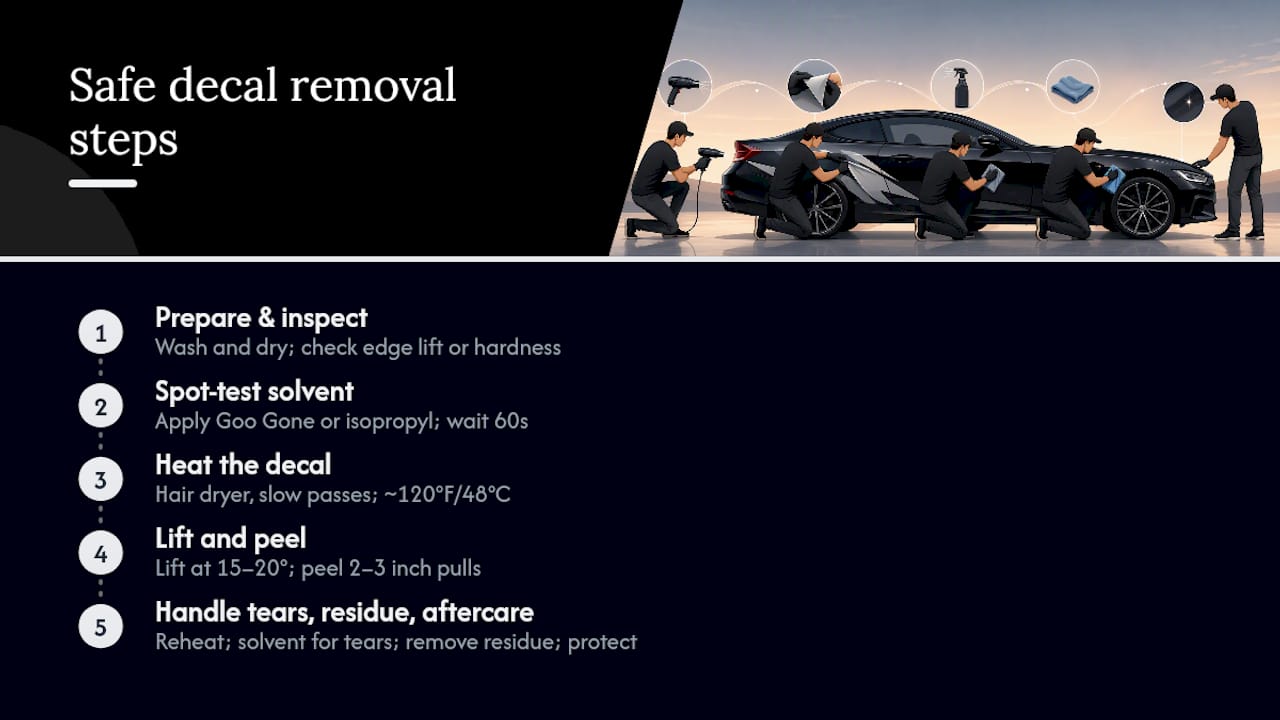
2. Inspect the decal. Check the edges. If they’re lifting slightly, the adhesive is still pliable. If the edges are rock-hard and the decal looks almost painted on, expect more resistance and budget extra time.
3. Spot-test your solvent. Apply a small amount of Goo Gone or isopropyl alcohol to a hidden area. Wait 60 seconds, wipe off, and check for haze under angled light.
4. Apply heat. Hold the hair dryer several inches from the surface and work in slow passes for about half a minute to a minute per section. The goal is warm to the touch, not hot. Engineerskill that a household hair dryer gives safer temperature control than a heat gun, with detailing professionals pointing to roughly 120°F/48°C as a useful surface target.
5. Lift an edge. Use a plastic scraper or your fingernail at a low angle (roughly 15–20 degrees) to get under one corner.
6. Peel in 2–3 inch pulls. Keep the angle low and pull back slowly, almost parallel to the surface. Reheat ahead of the peel every few inches. Rushing is the fastest way to tear the vinyl and leave adhesive embedded in the clear coat.
7. If the decal tears. Stop pulling. Reheat the area, apply a small amount of adhesive remover, let it dwell for 30–60 seconds, and then continue in smaller sections. CarXplorer confirms that switching to solvent and proceeding slowly is the right call when adhesive splits, rather than increasing force.
8. Remove residue. Apply Goo Gone Automotive to the sticky patch, let it sit for 30–60 seconds, then wipe in straight overlapping passes with a clean microfiber towel.
9. Aftercare. Run a clay bar over the area to pull out any embedded contamination. If a faint outline (UV shadow) remains, a light polish will remove it. Finish with a coat of wax or sealant to protect the exposed clear coat. CARFAX’s three-step workflow — loosen, peel, remove residue, and protect — is the framework professionals use for a reason: skipping the protection step leaves the clear coat vulnerable.
How do you remove decals from glass and rear windows?
Glass is more forgiving than paint, which means you have more tool options and less risk of permanent damage.
A single-edge razor blade is acceptable on glass but never on painted surfaces. Hold it at a low angle, use a few drops of soapy water as lubricant, and work in short strokes. Heat still helps: warm the decal first to soften the adhesive, then slide the blade under the edge. For stubborn edges, threading dental floss behind the decal and sawing gently can separate it cleanly.
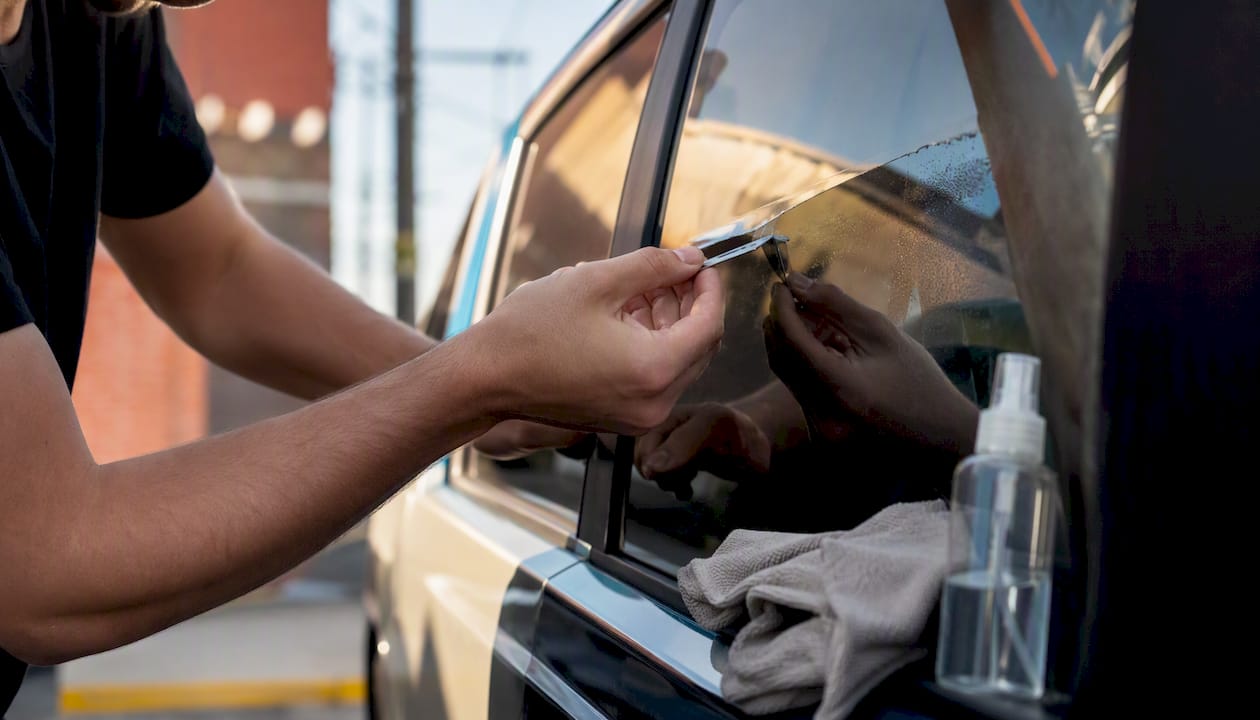
Two things to watch on rear windows: defroster lines and window tint. Keep the razor blade away from the thin heating elements printed on the glass, and avoid soaking tinted windows with solvent, since some adhesive removers can lift or cloud aftermarket tint film. A fresh blade and soapy lubricant, combined with careful mechanical scraping, handles most rear window decals without chemicals at all.
Finish with a spray of window cleaner and a wipe of isopropyl alcohol to clear any residue or lubricant film.
What special precautions apply to plastic bumpers and vinyl wraps?
Plastic trim and vinyl wraps have lower heat tolerance than painted steel panels. Too much heat warps plastic and can pull a wrap’s edge away from the vehicle permanently.
- Keep the hair dryer moving constantly on plastic; never hold it in one spot for more than a few seconds.
- Use lower heat settings and shorter passes than you would on a painted panel.
- Prefer adhesive solvent over heat when working near plastic trim edges.
- Plastic scrapers distribute pressure more evenly than fingernails and reduce the risk of gouging soft plastic.
- For partial vinyl wraps, stop if you see the wrap edge beginning to lift. Pulling a decal off a wrapped panel can take the wrap with it.
- Full vinyl wrap removal is best left to a professional. The adhesive on a multi-year-old wrap can bond aggressively to the underlying paint, and improper removal risks delamination.
Stop the job entirely if you see visible softening or warping of the plastic, paint delamination at the decal edge, or adhesive that appears fused to the clear coat rather than sitting on top of it.
How do you remove sticky adhesive residue safely?
Once the decal is off, the residue is usually the harder part. Three products cover most situations.
Goo Gone Automotive is the go-to for most painted surfaces. It’s citrus-based, dissolves petroleum-based adhesive without aggressive scrubbing, and is safe for clear coat when you neutralize it afterward. Apply, let it dwell 30–60 seconds, wipe in straight passes, then follow with isopropyl alcohol.
It evaporates quickly and leaves no film.
3M Adhesive Remover is the heavy-duty option for thick, stubborn deposits. Spot-test first — it’s effective but slightly more aggressive than citrus-based products.
| Solvent | Best For | Dwell Time | Paint-Safety Note |
|---|---|---|---|
| Goo Gone Automotive | Most painted surfaces, general residue | 30–60 seconds | Neutralize with IPA after use |
| 70% isopropyl alcohol | Light residue, post-solvent wipe | 15–30 seconds | Safe; evaporates cleanly |
| 3M Adhesive Remover | Thick or stubborn adhesive deposits | 30–45 seconds | Spot-test on hidden area first |
- Always wipe in straight overlapping passes, not circular motions. Circles create micro-swirls in the clear coat.
- Inspect the area under angled light after wiping. Any haze means the solvent needs to be neutralized and the area polished.
- Never use acetone, nail polish remover, or unknown household solvents on painted surfaces without testing. They can strip clear coat in seconds.
How long does removal take, and when should you hire a pro?
A small bumper sticker on a modern car takes 10–30 minutes from start to finish. A large dealer decal or a multi-year-old vinyl graphic with significant adhesive buildup runs 1–3 hours once you include residue removal and aftercare.
Professional removal typically costs $50–$150 for a single decal or sticker, depending on size and condition. Full fleet rebranding or wrap removal with paint correction can run several hundred dollars per vehicle, though exact pricing varies by shop and market.
Red flags that mean stop and call a pro:
- Paint or clear coat lifts when you pull the decal edge.
- The adhesive appears fused to the clear coat rather than sitting on top.
- Ghosting or UV shadow remains after polishing and requires compounding.
- The vehicle has an enamel or single-stage paint finish (common on older vehicles), which is more vulnerable to solvent damage.
- The vehicle is under warranty and the manufacturer’s terms restrict DIY work.
Older decals carry more risk. Multi-year sun exposure bonds the adhesive more deeply to the clear coat, and the vinyl itself becomes brittle. The Track Ahead notes that as decal age increases, so does the likelihood of paint lifting and the need for polishing or touch-up. For fleet rebranding, full wrap removal, or any job where paint correction is likely, a professional saves money in the long run.
What mistakes do most owners make when removing decals?
The most common errors are also the most damaging, and most of them happen in the first 60 seconds.
- Using a metal razor blade or knife on paint. Metal edges create micro-scratches and can gouge clear coat instantly. Plastic tools only on painted surfaces.
- Pulling without enough heat. Cold adhesive tears the vinyl and leaves chunks of glue bonded to the paint. Heat first, every time.
- Pulling at too steep an angle. A high pull angle concentrates stress on the adhesive bond and causes tearing. Keep the peel angle low, almost parallel to the panel.
- Using acetone or unknown solvents without testing. Acetone strips clear coat. Test every solvent on a hidden area before applying it to a visible panel.
- Working in direct sun on a hot panel. Solvents evaporate before they can work, and the panel surface gets too hot to control heat application accurately.
- Skipping the aftercare step. A UV shadow left unpolished and unsealed will oxidize faster than the surrounding paint and become more visible over time.
Clear coat behaves like a thin, hard shell. Once it’s scratched or etched, the damage is visible under any light. Patience and the right tools cost nothing compared to a paint correction or respray.
Can you peel off a car decal and reuse it?
Rarely, and usually not worth trying. Most pressure-sensitive vinyl decals are designed for one application. The adhesive backing loses tack the moment it’s pulled from a surface, and the vinyl itself often stretches or distorts during removal.
If you want to attempt it: heat the decal slowly and peel at the lowest possible angle to minimize stretching. Store it flat on a clean, smooth surface, adhesive side up, and apply it to the new surface within a few hours before the adhesive dries out further.
The practical reality is that UV exposure embrittles the vinyl over time, and contamination on the adhesive side prevents a clean rebond. A custom vinyl decal replacement is almost always cleaner, faster, and more reliable than trying to reuse an old one. Magnetic signs are a good alternative for business vehicles where you need to swap branding regularly without any adhesive at all.
Signage pros’ tips that make DIY removal much safer
Professionals who install and remove vehicle graphics daily have a few habits that separate a clean result from a paint repair bill.
Surface temperature matters more than heat source. The goal is a warm panel, not a hot one. Pros check by touch: if the surface is uncomfortable to hold your hand against, it’s too hot. Pull back the heat source and let it cool slightly before peeling.
Peel angle and pacing are everything. The Chemical Guys guide recommends reapplying heat every few inches and finishing with a clay bar and protection. Pros treat those steps as non-negotiable, not optional.
Inspect under oblique light. After residue removal, hold a flashlight or work light at a low angle to the panel. Haze, ghosting, or adhesive traces that are invisible under overhead light show up immediately. Address them before waxing, not after.
For bonded emblems, fishing line or dental floss threaded behind the emblem and sawed gently through the foam adhesive backing separates it cleanly without any prying force on the paint.
When installers encounter a decal that’s been on a vehicle for five or more years, especially on single-stage or enamel paint, the standard recommendation is professional removal. The adhesive chemistry changes over time, and what looks like a simple peel job can turn into a paint correction job in under a minute if the clear coat is compromised.
Pro Tip: Before applying any wax or sealant after removal, run a clay bar over the entire panel, not just the decal area. Overspray, rail dust, and embedded grit around the edges will show through the wax if you skip this step.
The patience factor most DIYers underestimate
Heat control and pacing are the two things that separate a clean removal from a damaged panel. Every experienced installer has seen a vehicle come in after a rushed DIY attempt — vinyl torn, adhesive ground into the clear coat, and the owner wondering why it looked so easy online. The fix is always the same: slow down, keep the heat moving, and never pull harder than the adhesive is willing to release. If a decal resists after reheating twice, that’s the signal to switch to solvent and smaller sections, not to increase force. And if you’re working on a vehicle with a warranty, check the terms before you start. Some manufacturers’ warranties include paint coverage that a DIY removal could complicate.
Customsignstoday handles the jobs that are too risky to DIY
Some decals come off cleanly in 20 minutes. Others have been baking on a fleet vehicle for six years and are practically part of the paint. For the second kind, Customsignstoday offers professional removal and replacement services that protect your vehicle’s finish and get the job done right the first time.

The team uses controlled heat tools, professional-grade adhesive extraction, and paint correction and waxing as standard finishing steps, not afterthoughts. Whether you need a single stubborn decal removed, a full fleet rebrand, or new vehicle lettering applied after a clean removal, Customsignstoday covers it. If you’re replacing what comes off with fresh custom vinyl decals, the same team handles design, production, and installation. Get a quote and find out what professional removal actually costs for your vehicle.
Sources
- How To Remove Decals From Car Paint Safely | Chemical Guys
- How to Remove Bumper Stickers and Decals – CARFAX
- Engineerskill
- How To Get Car Dealer Decals Off Complete Step by Step Guide – CarXplorer
- How To Remove Car Decals the RIGHT Way | Shopmonkey

