Did you know that poorly installed outdoor signs are up to 50 percent more likely to fail during severe weather? Proper installation does more than make a sign look good. It protects your investment, keeps people safe, and ensures your message stands strong season after season. Each step, from site inspection to final mount, impacts both durability and compliance, giving your signage its best chance to shine and last.
Table of Contents
- Step 1: Assess Installation Site And Prepare Materials
- Step 2: Mark Placement And Ensure Level Alignment
- Step 3: Install Mounting Hardware Securely
- Step 4: Position And Attach Outdoor Signage
- Step 5: Inspect Installation And Test Durability
Quick Summary
| Key Point | Explanation |
|---|---|
| 1. Assess Site Conditions Thoroughly | Examine surface material, obstacles, and regulations to ensure proper fit and compliance before installation begins. |
| 2. Mark Placement Accurately | Use levels and precise markings to ensure proper alignment and visibility of the sign before securing it. |
| 3. Install Hardware with Care | Select appropriate materials and apply consistent torque to ensure strength and stability of mounting hardware during installation. |
| 4. Position Sign Precisely | Align sign with pre-marked points, verifying that it is level and secure using mounting brackets accurately. |
| 5. Conduct Post-Installation Inspection | Check all mounting points and sign stability to ensure it can withstand environmental factors for long-term safety. |
Step 1: Assess Installation Site and Prepare Materials
Before you start mounting any outdoor signage, you need a solid game plan for site assessment and material preparation. This initial step determines the success of your entire installation project.
Begin by thoroughly examining your installation location. According to the National Park Service Step by Step Signing Guide, early planning and site collaboration are critical. Walk the entire area where you intend to place your sign and look for key factors: surface material, potential obstacles, sun exposure, wind patterns, and structural integrity.
Your site assessment checklist should include:
- Measuring precise installation dimensions
- Checking surface compatibility for mounting
- Evaluating potential environmental challenges
- Identifying local zoning regulations and restrictions
As recommended by the NYC Department of Buildings, verify all local compliance requirements before purchasing materials. Some areas have strict guidelines about sign size, placement, and visual impact.
Pro Tip: Take multiple photographs of your installation site from different angles. These visual references will help you plan mounting strategies and communicate requirements with your installation team.
Once you understand your site conditions, gather all necessary materials. Select mounting hardware appropriate to your specific surface material whether it is wood, concrete, metal, or brick. Stock up on backup supplies like extra screws, anchors, and weatherproof sealants to address unexpected challenges during installation.
Ready for the next phase? Your comprehensive site assessment prepares you to move confidently into materials selection and precise sign mounting.
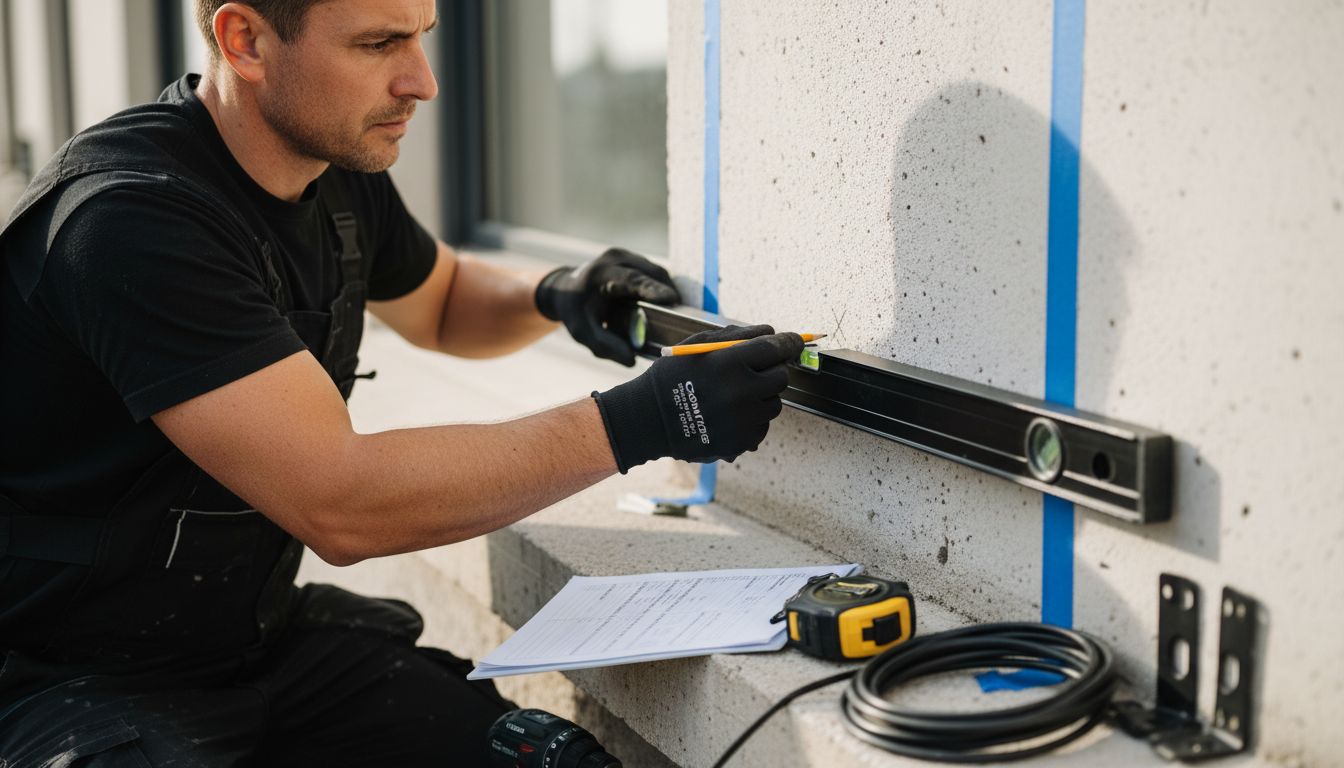
Step 2: Mark Placement and Ensure Level Alignment
With your site assessed and materials ready, the next crucial step is marking precise sign placement and guaranteeing perfect alignment. Your goal is to create a professional installation that looks sharp and functions effectively.
According to the Federal Highway Administration, accurate placement is fundamental to maintaining visibility and safety standards. Start by using a long level tool to identify the most stable and appropriate mounting surface. Avoid areas with significant surface variations or potential obstructions.
Your placement marking process should involve several strategic steps:
- Use a pencil or removable chalk for initial markings
- Confirm horizontal and vertical alignment using a professional grade level
- Mark drill points precisely where mounting hardware will attach
- Double check measurements from multiple reference points
The National Park Service guide recommends carefully considering environmental factors during placement. Look for potential wind tunnels, sun glare zones, or areas with frequent moisture that might impact sign stability.
Pro Tip: Always measure twice and mark once. Preliminary measurements can save you significant time and prevent costly repositioning mistakes.
When marking drill points, use a tape measure and create small reference marks that are easily visible but can be covered or erased after installation. Consider using painter’s tape to create temporary alignment guides that won’t damage your surface.
Ready to move forward? Your precise placement markings set the foundation for a professional and perfectly aligned outdoor sign installation.
Here’s a comparison of key steps in the outdoor sign installation process:
| Step | Main Actions | Purpose |
|---|---|---|
| Site Assessment & Prep | Measure space Evaluate obstacles Check regulations |
Ensure correct fit and legal compliance |
| Mark Placement & Align | Mark drill points Use level Double-check alignment |
Achieve straight, visible placement |
| Install Mounting Hardware | Drill pilot holes Use proper anchors Apply sealant |
Secure sign for stability and durability |
| Position & Attach Sign | Align with mounts Attach brackets Check leveling |
Complete visible installation accurately |
| Inspect & Test | Check tension Test durability Photograph for records |
Guarantee safety and long-term performance |
|
Step 3: Install Mounting Hardware Securely
Now comes the critical moment of actually securing your mounting hardware with precision and strength. Your goal is to create an installation that withstands environmental challenges and maintains sign stability for years to come.
According to the Federal Highway Administration, securing mounting hardware requires meticulous attention to detail and understanding of structural requirements. Begin by selecting hardware specifically designed for your surface material and sign weight.
Your hardware installation process should include:
- Selecting corrosion resistant screws or bolts
- Matching hardware size to mounting surface
- Using appropriate anchors for different surface types
- Applying consistent torque when tightening hardware
As outlined by the NYC Department of Buildings, certain complex installations might require licensed professionals. For DIY projects, ensure you understand the specific load requirements and structural limitations of your mounting surface.
Pro Tip: Use a torque wrench to apply consistent pressure when installing hardware. Uneven tightening can create structural weaknesses that compromise sign stability.
Start by drilling pilot holes slightly smaller than your mounting hardware to prevent surface cracking. Apply weatherproof sealant around drill points to prevent moisture infiltration. Verify that each mounting point is level and securely fastened before proceeding.
Ready for the next phase? Your carefully installed mounting hardware creates a rock solid foundation for your outdoor signage.
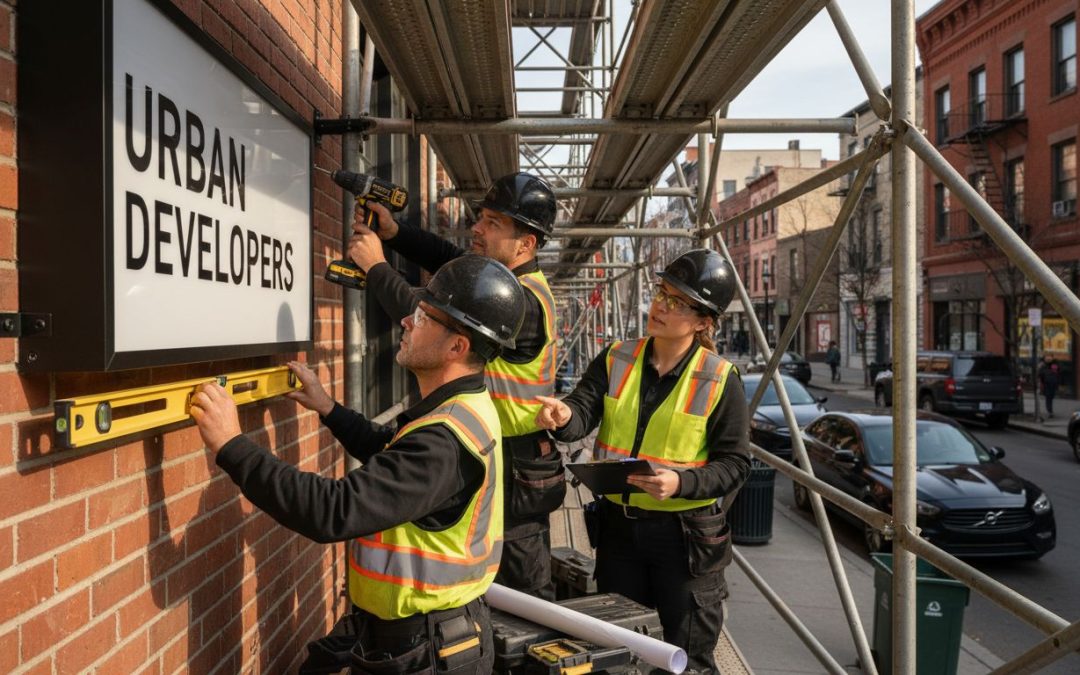
Step 4: Position and Attach Outdoor Signage
With your mounting hardware securely in place, it is time to carefully position and attach your outdoor signage. This final installation stage requires precision and attention to ensure a professional and lasting result.
According to the Federal Highway Administration, proper positioning is crucial for maintaining visibility and meeting safety standards. Carefully align your sign with the pre marked mounting points, ensuring that it sits perfectly level and flush against the mounting surface.
Your sign attachment process should include:
- Checking alignment from multiple angles
- Using appropriate mounting brackets or hardware
- Verifying sign is centered and straight
- Applying additional stabilization if needed
The National Park Service guide emphasizes following the approved sign plan meticulously. Start by gently placing the sign against the mounting hardware and verifying its position before making final attachments.
Pro Tip: Have a second person assist you during sign positioning. An extra set of eyes can help ensure perfect alignment and catch potential issues.
Secure the sign using the designated mounting points, applying consistent pressure to each attachment. If your sign requires multiple mounting points, work systematically from one side to the other to maintain even positioning. Check the sign’s stability by gently testing its resistance to movement.
Ready for the finishing touches? You have now successfully positioned and attached your outdoor signage with professional precision. Learn more about exterior signage techniques in our guide to outdoor signs for businesses.
Step 5: Inspect Installation and Test Durability
With your sign now installed, the final critical phase involves thoroughly inspecting your work and testing its durability against potential environmental challenges. Your goal is to ensure long lasting performance and safety.
According to the Federal Highway Administration, post installation inspection is essential for verifying structural integrity and identifying potential weaknesses before they become significant problems.
Your comprehensive inspection process should include:
- Checking all mounting points for consistent tension
- Verifying sign is perfectly level from multiple angles
- Testing sign resistance to simulated wind and movement
- Examining surface contact and potential friction points
The National Park Service guide recommends systematically testing how your sign will respond to different environmental conditions. Simulate potential stress scenarios by gently applying pressure and observing the sign’s response.
Pro Tip: Document your initial inspection with photographs. These will serve as a baseline for future maintenance checks and help track any changes over time.
Carefully inspect all hardware connections looking for any signs of misalignment or potential stress points.
Pay special attention to areas where the sign interfaces with mounting surfaces. Apply a weatherproof sealant around attachment points if any small gaps are visible.
Ready to ensure your sign stands the test of time? You have now completed a professional grade installation. For more insights, explore our guide to exterior signage basics.
Make Your Outdoor Signage Installation Effortless and Durable
Installing outdoor signage can be challenging when you need to balance precise placement, secure mounting, and long-term durability. This guide highlights key concerns like correct site assessment, alignment, and hardware installation that can make or break your sign’s performance. Avoid costly mistakes that come from poor mounting or weather damage by planning carefully and choosing the right materials.

Are you ready to take the stress out of your outdoor signage project and ensure lasting results? Explore our comprehensive custom sign options at Uncategorized and discover how we tailor solutions that withstand the elements and meet your exact specifications. Visit https://customsignstoday.us to request a free quote or speak with our experts. Start your signage journey today for a professional look that stands the test of time.
Frequently Asked Questions
How do I assess my installation site for outdoor signage?
Begin by walking the entire installation area to check for surface material, obstacles, sunlight, and wind patterns. Measure the precise dimensions and ensure compliance with local regulations before proceeding with materials selection.
What materials do I need for mounting outdoor signage?
Gather mounting hardware suited to your surface material, such as corrosion-resistant screws or bolts. Also, stock up on backup supplies like extra anchors and weatherproof sealants to handle unexpected challenges during the installation.
What steps should I take to ensure my sign is aligned properly?
Use a professional-grade level during installation to check for horizontal and vertical alignment. Mark drill points carefully and double-check measurements from multiple reference points to prevent costly repositioning mistakes.
How can I test the durability of my installed outdoor sign?
After installation, check all mounting points for tension and verify that the sign is level. Test its resistance to simulated wind and movement by gently applying pressure to ensure it remains stable in various conditions.
What should I do if my sign shows signs of misalignment after installation?
If you notice misalignment, mark where adjustments are needed and carefully remove the sign. Recheck your mounting points for level and reattach the sign, ensuring that each attachment is securely fastened to maintain stability.
How often should I inspect my outdoor signage for maintenance?
Conduct a thorough inspection every six months to a year, checking for signs of wear or damage, especially after harsh weather events. Document the condition with photographs to track changes and address any repairs needed promptly.