

Your complete event marketing checklist starts with signage
Every event marketing checklist worth following puts signage at the center. Not as an afterthought, but as the physical infrastructure that shapes how attendees navigate, engage, and remember your brand. The steps below cover every critical signage decision, from budget to installation, using 2026 industry best practices.
Core signage checklist at a glance:
- Define your signage budget, allocating 5–10% of your total event costs, as recommended by industry standards.
- Map the venue and identify every placement point
- Assign one function per sign: directional, informational, or experiential
- Confirm ADA compliance for fonts, contrast, and mounting height
- Lock design files at least 2–3 weeks before freight or delivery deadlines
- Schedule a pre-event walkthrough with someone unfamiliar with the space
- Verify permits and venue installation rules before ordering
- Align all signage visuals with your master brand guidelines
- Plan QR codes and social sharing elements into the design phase
- Prepare a contingency kit with extra mounting supplies and blank signs
How to budget for event signage without wasting money
Industry standards recommend allocating 5–10% of your total event budget to signage, with the heaviest spend concentrated on high-impact zones. That means your main entrance, stage backdrop, and registration area get priority funding. Secondary signs, like session room labels or restroom arrows, can be produced cost-effectively without cutting corners on the pieces attendees photograph.
Practical cost-saving moves that don’t hurt quality:
- Order in bulk to reduce per-unit costs
- Use reusable sign holders with interchangeable printed inserts
- Design modular templates you can repurpose across multiple events
- Time your order during a printer’s slower period for potential discounts
Signage budget reality check: Skimping on your main entrance banner to save $200 can undermine the entire first impression your brand makes. Spend where attendees look first.
Pro Tip: Get at least three quotes before committing. Print pricing varies widely, and a local provider often beats national chains on turnaround time and price for regional events.
What types of event signage actually do different jobs
Every sign at your event should have exactly one job. Mixing functions on a single sign creates visual clutter and slows attendees down. The three functional categories are directional, informational, and experiential, and each serves a distinct purpose in the attendee journey.
Directional (wayfinding) signage guides people from parking to check-in to sessions. Banners, floor graphics, and outdoor event signage with bold arrows belong here. These signs reduce friction and keep crowds moving.
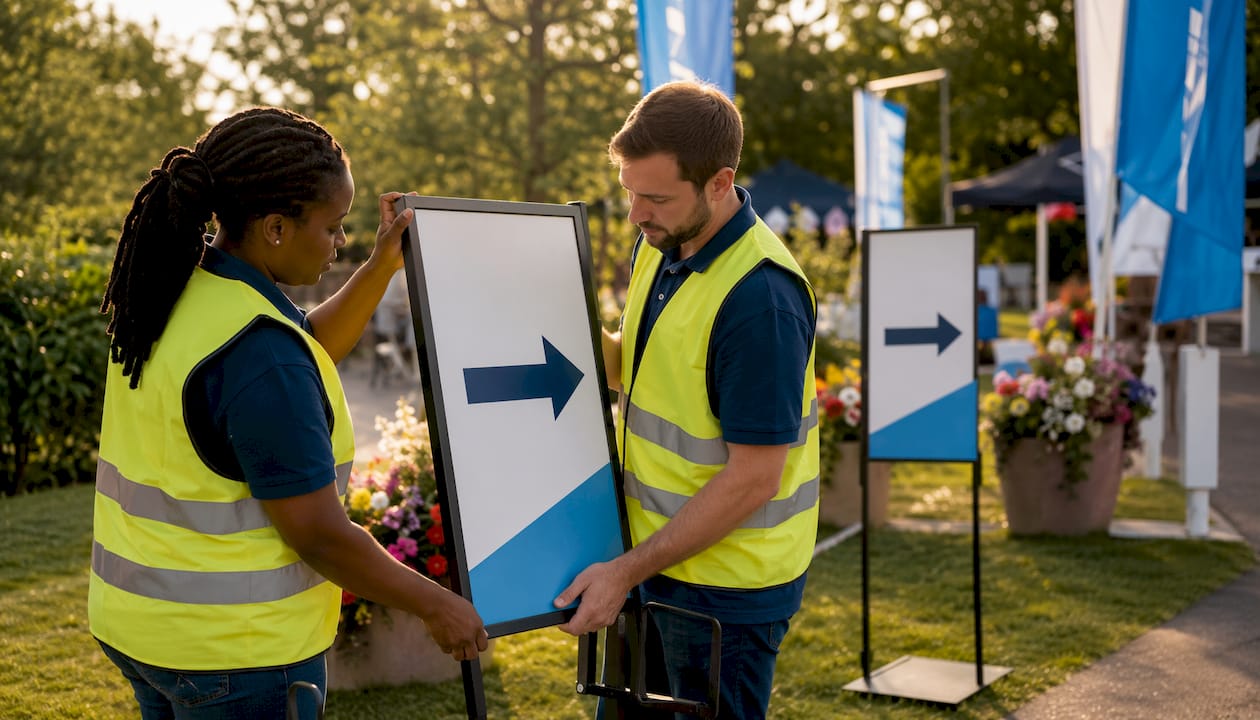
Informational signage answers questions before attendees ask them. Schedules, speaker bios, sponsor boards, and session room labels all fall into this category.
Experiential signage builds brand memory. Photo walls with branded hashtags, step-and-repeat backdrops, dimensional foam board displays, and fabric tension backwalls turn passive attendees into active brand ambassadors. Signage that integrates social sharing elements extends your brand reach organically long after the event ends.
Pro Tip: Label every sign in your production plan with its function before you design it. If you can’t name the one job it does, cut it or combine it with another sign.
Design best practices that make signage readable and ADA-compliant
Clear design is not a style preference. It’s a functional requirement. ADA guidelines require high contrast between text and background, and sans-serif fonts for all directional and informational signs. That standard exists because it works for everyone, not just attendees with visual impairments.
Key design rules for 2026 events:
- Use sans-serif typefaces (think clean, open letterforms) for all wayfinding text
- Maintain strong contrast ratios, dark text on light backgrounds or vice versa
- Keep primary messages to seven words or fewer on any sign meant to be read while walking
- Choose matte or fabric tension displays over glossy finishes to eliminate glare under convention center LED lighting
- For step-and-repeat backdrops, position your primary logo 5–6 feet from the ground so it appears correctly in portrait photos
- Include a branded hashtag in the lower corner of photo-friendly signage
Accessibility insight: Compliance with ADA signage standards isn’t just a legal requirement. It signals to every attendee that your brand pays attention to detail, which improves brand respect and overall event reputation.
Pro Tip: Build a message hierarchy into every sign: one promise, one proof point, one action. If a sign tries to say three things at equal size, it says nothing.
Material choice matters as much as design. Fabric works for large backwalls because it travels well, photographs cleanly, and avoids the glare that rigid glossy panels create. Rigid panels suit demo labels and product zones. For outdoor events, UV-resistant vinyl and weather-rated substrates prevent fading and warping over a multi-day run.
Planning your signage timeline so nothing gets rushed
Late approvals and missing installation plans are the single biggest source of costly last-minute signage errors. Build your timeline backward from event day and protect every deadline.
A reliable signage preparation sequence:
- 8–10 weeks out: Complete your venue map and finalize the full signage list
- 6–8 weeks out: Lock all copy and messaging; begin design
- 4–5 weeks out: Approve final design files; submit print-ready files to your vendor
- 2–3 weeks out: Confirm delivery dates and installation logistics with the venue
- 1 week out: Pack a contingency kit with tape, zip ties, extra mounting hardware, and blank backup signs
- Day before: Conduct a full walkthrough with someone who hasn’t seen the venue layout
Pre-event walkthroughs by fresh eyes catch signage gaps that planners miss after weeks of familiarity with the space. Walk every route an attendee might take, from the parking lot to the keynote hall, and mark any junction where someone might hesitate.
For complex installs, especially overhead or outdoor mounting, hire a professional installation team. They carry the right tools, know venue-specific rules, and hold the insurance that protects you if something goes wrong.
How good signage moves the needle on your event outcomes
Events with a clearly defined marketing plan, including a signage strategy, see a 30% increase in attendance and 20% more leads. Signage is a direct contributor to both numbers because it shapes first impressions, reduces confusion, and creates the photo moments that extend your reach on social media.
Brand recall builds through repetition at the right moments. When your visual language appears consistently at every decision point, from the parking lot entrance to the keynote stage, attendees absorb your brand without consciously trying to. That consistency is what separates a forgettable event from one people talk about afterward.
Unique QR codes on different signs let you track which locations drove the most traffic and engagement. After the event, a post-event walkthrough of the venue reveals blind spots where signage was ignored or where crowds got confused. That data directly improves your next event’s signage plan. Pair QR tracking with social media tag monitoring to see which backdrops generated the most organic sharing.
Permits and compliance you need before installation day
Venue and local regulations can stop a signage install cold if you haven’t done the paperwork. Most convention centers and outdoor event spaces require written approval for any sign mounted to walls, ceilings, or exterior structures. Outdoor banners often require a city or county permit, particularly for anything visible from a public right-of-way.
Check these compliance points before you order:
- Venue rules: Confirm approved mounting methods (no adhesive on certain wall surfaces, weight limits for hanging signs)
- Local permits: Research city requirements for temporary outdoor signage at least 4–6 weeks before the event
- Fire codes: Large fabric backdrops and hanging signs may need flame-retardant certification
- ADA placement: Mounted signs must meet height and clearance standards under the Americans with Disabilities Act
- Rigging approvals: Overhead hanging signs at convention centers typically require venue-approved riggers, and rigging labor costs can exceed the sign’s print cost
Skipping permit research is a budget risk, not just a compliance one. A sign pulled down by venue staff on event morning is money lost with no recourse.
How to align signage with your overall event brand
Signage should balance brand messaging with attendee navigation needs so neither function undermines the other. The practical way to achieve that balance is to build a single visual style guide before any sign goes to design, then apply it without exception across every piece.
Your brand alignment checklist:
- Lock your color palette, typeface, and logo usage rules before design begins
- Apply the same visual system to directional signs, informational boards, and experiential backdrops
- Use consistent terminology across all signage so attendees aren’t reading three different names for the same session room
- Brief every vendor, including your print shop and installation team, on the brand guide
When 3D visualization tools are part of your pre-event planning, 3D visualization for trade shows can help you preview how signage will look in context before a single panel is printed. That preview catches scale and color problems that flat mockups miss entirely.
Every sign, from a small table tent to a 10-foot hanging banner, should look like it belongs to the same family. When that cohesion holds, your brand stops being a guest at the event and starts feeling like the environment itself.
Key Takeaways
Effective event signage requires a clear budget, one function per sign, ADA-compliant design, a locked timeline, and brand consistency applied across every piece.
| Point | Details |
|---|---|
| Budget allocation | Allocate 5–10% of your total event budget to signage, prioritizing entrances and stage areas. |
| One function per sign | Assign each sign a single role: directional, informational, or experiential, to prevent visual clutter. |
| ADA-compliant design | Use sans-serif fonts and high contrast on all directional and informational signs per ADA guidelines. |
| Timeline discipline | Lock print files 2–3 weeks before delivery; late approvals create costly last-minute errors. |
| Measure with QR codes | Place unique QR codes on different signs to track which locations drive the most engagement. |
Ready to build signage that works as hard as your event does?
Customsignstoday produces custom banners, backdrops, floor graphics, directional signs, and face change signs built for the demands of live events. Whether you need a full venue signage package or a single high-impact backdrop, the team at Customsignstoday can turn your brand guidelines into print-ready pieces that hold up from setup through teardown. Request a custom sign quote and get your event signage plan started today.

