
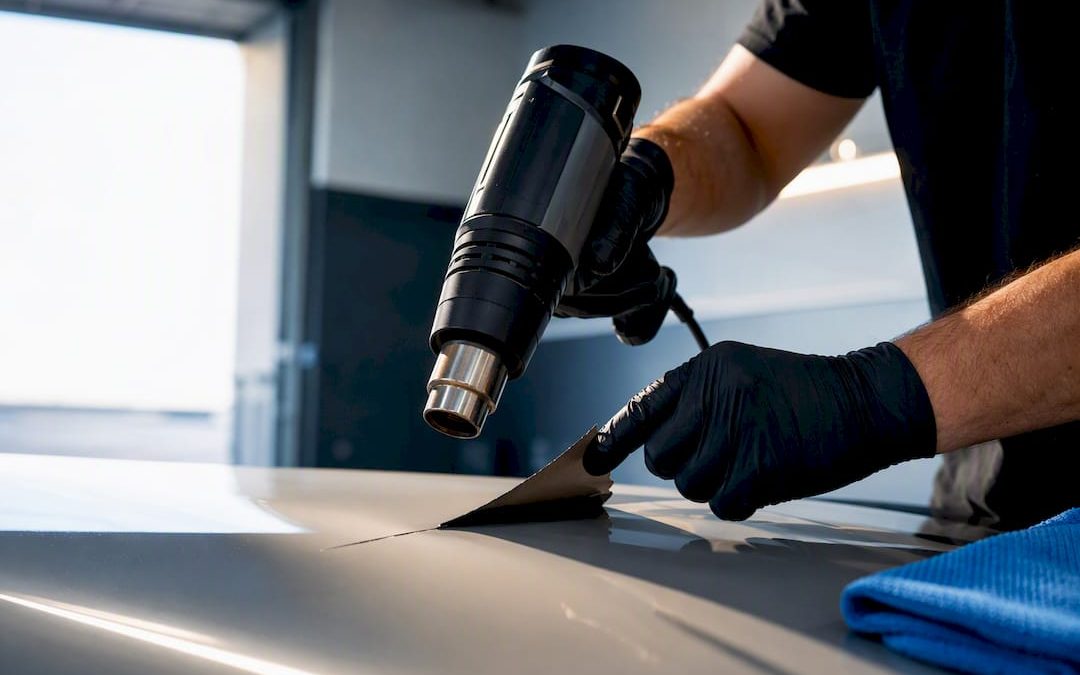
The safest, fastest way to remove vinyl stickers is to warm the adhesive with a hair dryer or low heat gun, peel slowly with a plastic tool at a shallow angle, then dissolve whatever residue is left with a citrus degreaser or isopropyl alcohol. Paint needs the gentlest touch, glass tolerates a razor blade if you’re careful, and plastic or fabric usually just needs soap, alcohol, or a little patience. The surface-specific steps below tell you exactly how long to heat, how hard to press, and which products to skip entirely.
TL;DR:
- Heat is most effective for vinyl decals on painted surfaces, but must be carefully applied for only 30 to 60 seconds at a time to avoid damage.
- Using a plastic trim wedge or old credit card to peel at a shallow angle minimizes the risk of gouges on delicate surfaces like paint or glass.
- Solvents such as citrus degreaser or isopropyl alcohol should be used with proper dilution and dwell times, and never with acetone or harsh industrial chemicals on painted areas.
- Glass removal allows the use of a razor blade when kept wet with soapy water and used at a shallow angle, but should be avoided on coated or tinted glass to prevent cracking.
- Large, aged vinyl decals or full vehicle wraps are best left to professionals to prevent costly damage from improper DIY removal methods.
Table of Contents
- How Do You Choose the Right Sticker Removal Technique?
- Removing Vinyl Decals From Painted Surfaces and Car Panels
- Can You Remove Vinyl Stickers From Glass Safely?
- Best Way to Peel Off Stickers From Paper, Plastic, and Fabric
- What Products Actually Dissolve Vinyl Adhesive?
- Which Tools Keep You From Damaging the Surface?
- How Do You Check for Leftover Residue and Restore Protection?
- Professional Removal Tips From Custom Signs Today
- Why the Cautious, Staged Approach Actually Pays Off
- When It’s Time to Call in a Professional
- Sources
- FAQ
How Do You Choose the Right Sticker Removal Technique?
Surface and sticker age decide the method, not personal preference. A decal that’s been baking on a car hood for three summers behaves nothing like a price tag stuck on a jar yesterday.
- Heat (hair dryer or heat gun): best for painted surfaces, vehicle panels, and any vinyl that’s still flexible; softens the adhesive so it lifts instead of tearing.
- Solvents (citrus degreaser, isopropyl alcohol, vinegar): best for dissolving leftover adhesive residue after the sticker itself is gone, or for loosening paper labels on glass and plastic.
- Mechanical scraping (plastic wedge or trim tool): best for lifting an edge and peeling once heat has done its job; never use metal on paint.
- Eraser wheel: best for large, aged, or fleet-scale vinyl where heat and scraping would take hours.
Quick decision checklist: check the surface (paint, glass, plastic, fabric), estimate the sticker’s age (fresh vinyl peels easier than sun-baked vinyl), and gauge the scale (one bumper sticker versus a full vehicle wrap changes everything). Mismatching method to surface is the single biggest reason people end up with scratches, gouges, or a hazy patch where the decal used to be.
Removing Vinyl Decals From Painted Surfaces and Car Panels
Painted surfaces and vehicle panels carry the highest risk of visible damage, which is exactly why this deserves the most careful sequence. Clear coat is thin, and heat, solvents, or the wrong tool can dull it permanently.
Start in the shade or a garage. Direct sunlight heats the panel unevenly and makes the vinyl brittle in some spots while leaving it stubborn in others. Wash the area first so grit under your tool doesn’t scratch the paint as you work.
- Heat the decal. Hold a hair dryer or heat gun 6 to 8 inches from the surface and apply steady heat for 30 to 60 seconds at a time, moving in small circles so you don’t scorch one spot.
- Lift an edge. Once the vinyl feels warm and slightly pliable, slide a plastic trim wedge or an old credit card under one corner.
- Peel low and slow. Pull at a 15 to 30-degree angle, keeping the pull close to the surface rather than straight up. A steep angle tears the vinyl and leaves adhesive stuck to the paint.
- Reheat as you go. Work in sections a few inches wide. If the vinyl starts resisting, stop and reheat that spot for another 30 seconds rather than forcing it.
- Treat the residue. Mix a citrus-based adhesive remover at a 10:1 water-to-product dilution, spray it on the sticky outline, and let it sit for 30 to 60 seconds.
- Wipe clean. Use a microfiber towel in straight, overlapping passes rather than circles, flipping to a clean section of the towel often so you’re not smearing dissolved adhesive back onto the panel.
Pro Tip: Keep a spray bottle of plain water nearby while heating. If a spot ever feels too hot to comfortably rest your hand on, it’s too hot for the clear coat too.
Sustained surface temperatures above roughly 80°C start to risk clear coat damage, so keep the heat source moving instead of parking it on one spot. If you’re removing a decal in direct sun on a dark-colored car, the panel may already be close to that threshold before you even pick up the dryer.
Once the residue is gone, run a clay bar over the area to lift any microscopic adhesive left behind, follow with a light polish if the spot looks dull, then apply wax or sealant. Wait at least 24 hours before applying new vinyl to the same panel so the surface has time to fully cure.
Never reach for acetone, nail polish remover, or a metal razor blade on painted surfaces. Acetone can strip clear coat, and metal scrapers gouge paint in a single careless pass, something that’s expensive to fix and impossible to fully undo. For decal work near body lines or panel gaps, step-by-step paint-safe guidance covers the trickier edge cases heat alone won’t solve.
Can You Remove Vinyl Stickers From Glass Safely?
Glass is more forgiving than paint, which is why a razor blade becomes a legitimate option here when it never should be near paint. The one real danger is thermal shock: pouring boiling water or aiming a torch at cold glass can crack it outright.
- Heat method: run a hair dryer over the decal for 30 to 60 seconds, then peel at a low angle just like you would on paint. This works well on car windows, storefront glass, and household windows alike.
- Razor method (plain glass only): use a brand-new blade at a shallow 15-degree angle, keep the glass wet with soapy water as a lubricant, and let the water do the sliding work instead of forcing the blade. This approach is safe on plain glass but should never touch tempered, tinted, or coated glass, since uneven heat or an aggressive scrape can crack it.
- What to avoid: boiling water, propane torches, or any extreme or uneven heat source. Glass expands and contracts fast, and a sudden temperature swing is what actually causes the crack, not the sticker removal itself.
- Residue cleanup: white vinegar, a commercial adhesive remover like Goo Gone, or isopropyl alcohol all work well on the sticky outline left behind. Spray, let it sit a few minutes, then wipe with a clean cloth.
If you’re dealing with a window decal near tinted film, tint-safe removal timing matters more than the glass itself, since tint film scorches at temperatures glass shrugs off.
Best Way to Peel Off Stickers From Paper, Plastic, and Fabric
Non-painted household items are the most forgiving category, and most jobs here need nothing more exotic than what’s already in your kitchen cabinet.
- Paper labels on jars and bottles: soak in warm soapy water for 10 to 15 minutes; for stubborn glass jars, add a spoonful of washing soda to the water to loosen the glue faster.
- Plastic containers and ceramics: wipe with white vinegar or rubbing alcohol, letting it sit for a few minutes before peeling.
- Sticky residue on plastic or metal: apply a thin layer of cooking oil, wait 10 to 15 minutes, then lift the residue and wash the surface with soapy water to cut through the oil afterward.
- Fabric: always spot test on an inside seam first, then dab rubbing alcohol onto the adhesive before laundering as usual.
Watch the material before you reach for a solvent. Rubbing alcohol can dull certain painted plastics, and oil left too long on porous or untreated surfaces can leave a stain that outlasts the sticker ever did.
What Products Actually Dissolve Vinyl Adhesive?
Vinyl adhesives generally fall into two families: rubber-based, which is common on cheaper stickers and shipping labels, and acrylic, which is what most quality automotive and signage vinyl uses because it holds up to weather. Rubber-based glue breaks down easily with alcohol or vinegar. Acrylic adhesive is stickier and more heat-resistant, which is why citrus degreasers, formulated specifically to cut through petroleum-based acrylic bonds, tend to outperform alcohol on car decals and window graphics.
| Product | Best surface | Dilution / prep | Dwell time |
|---|---|---|---|
| Citrus degreaser | Paint, clear coat | 10:1 water to product | 30 to 60 seconds |
| Isopropyl alcohol | Glass, plastic, metal | Use undiluted | 1 to 3 minutes |
| White vinegar | Glass, ceramics, plastic | Use undiluted or soak a cloth | 5 to 15 minutes |
| Cooking oil | Plastic, metal residue | Thin layer, no dilution | 10 to 15 minutes |
Whatever product you choose, apply it, wait out the dwell time, then wipe in straight overlapping passes rather than scrubbing in circles. Circular scrubbing just redistributes dissolved adhesive instead of lifting it off the surface, and it’s the fastest way to leave swirl marks in a painted finish.
Pro Tip: Always test any solvent on a hidden patch of the surface first, especially colored plastics and vinyl wraps. Some pigments react to alcohol and citrus solvents by fading or clouding within seconds.
Never use acetone, MEK, or other harsh industrial solvents on paint or delicate plastics. They work fast because they’re aggressive, and that same aggression strips clear coat and clouds plastic lenses just as easily as it dissolves glue.
Which Tools Keep You From Damaging the Surface?
The tool matters almost as much as the technique. A plastic scraper and a metal one can produce completely different outcomes on the exact same panel.
- Plastic trim wedges and old credit cards: the safest all-around choice for lifting vinyl edges on paint, glass, and plastic without scratching anything.
- Wrapped microfiber over a card edge: adds a buffer layer when you’re working near a delicate finish or a factory decal you want to protect.
- Razor blades: safe only on plain glass, never on paint or coated plastic, since metal edges cut straight through a clear coat in one pass.
- Eraser wheel tools: a specialist option, fitted to a drill and run at a moderate, steady pressure, that mechanically grinds off vinyl and most of the adhesive without any chemical exposure. These are popular with fleet operators and sign shops because they turn a two-hour scrape-and-solvent job into a fifteen-minute pass.
Pro Tip: If you’re renting or buying an eraser wheel for a one-time job, run it at the manufacturer’s recommended RPM for painted surfaces and finish with an isopropyl alcohol wipe to clear the rubber particulates left behind.
Wear gloves any time you’re working with citrus degreaser, alcohol, or vinegar for more than a few minutes, and open a garage door or window when using solvents indoors. Dispose of solvent-soaked rags in a sealed container rather than a regular trash bin, since some citrus and alcohol residues are mildly flammable while still wet.
How Do You Check for Leftover Residue and Restore Protection?
Adhesive residue is often invisible under normal light and only shows up as a faint haze when you tilt the panel toward a low-angle light source, like a flashlight held almost flush with the surface. If you see a shadow or a slightly different sheen where the sticker used to be, there’s still adhesive left.
Run a clay bar over the spot, folding it to a clean face every few passes so you’re not just pushing contamination back into the paint. Use a spray lubricant or soapy water to keep the clay gliding rather than dragging. If the area still looks dull afterward, a light polish restores gloss, but stop there. Aggressive compounding removes clear coat along with the haze, which trades one problem for a worse one.
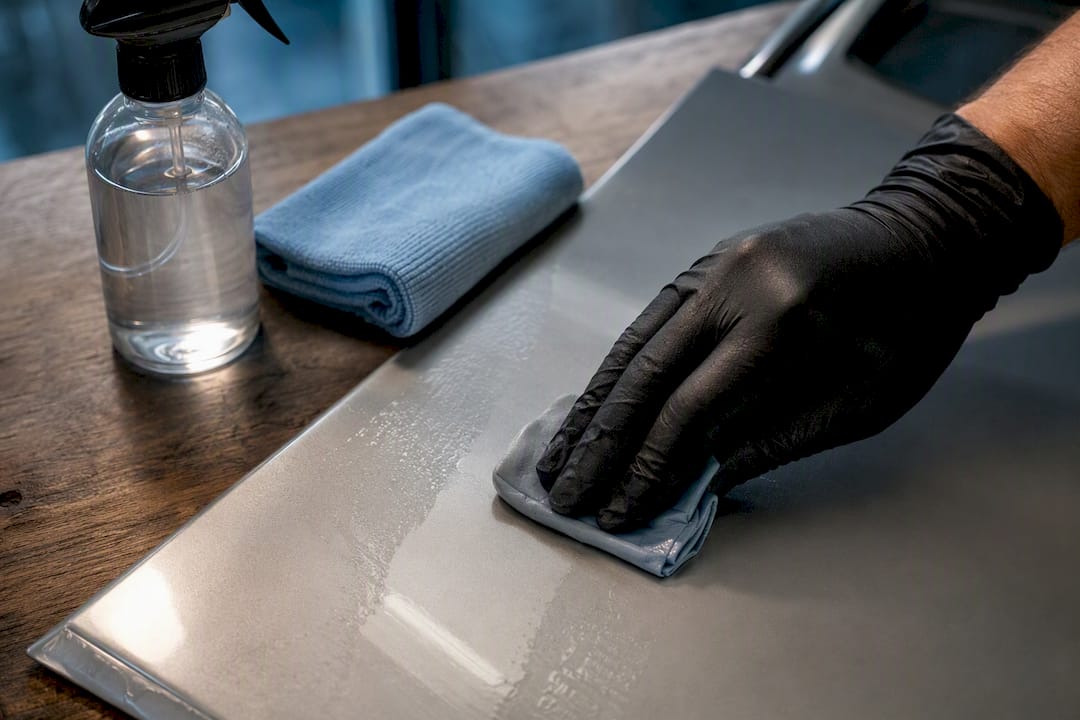
Finish with a coat of wax or a synthetic sealant to protect the freshly cleaned paint. If you’re planning to apply new vinyl to the same spot, give the surface at least 24 hours to fully cure before doing so.
Professional Removal Tips From Custom Signs Today
Sign installers deal with adhesive removal daily, and the timings that matter most rarely change: 30 to 60 seconds of heat per section, a 10:1 citrus degreaser dilution, and straight microfiber wiping passes instead of circles. Window decals near tint film need the shorter end of that heat range, since tint scorches well before glass does.
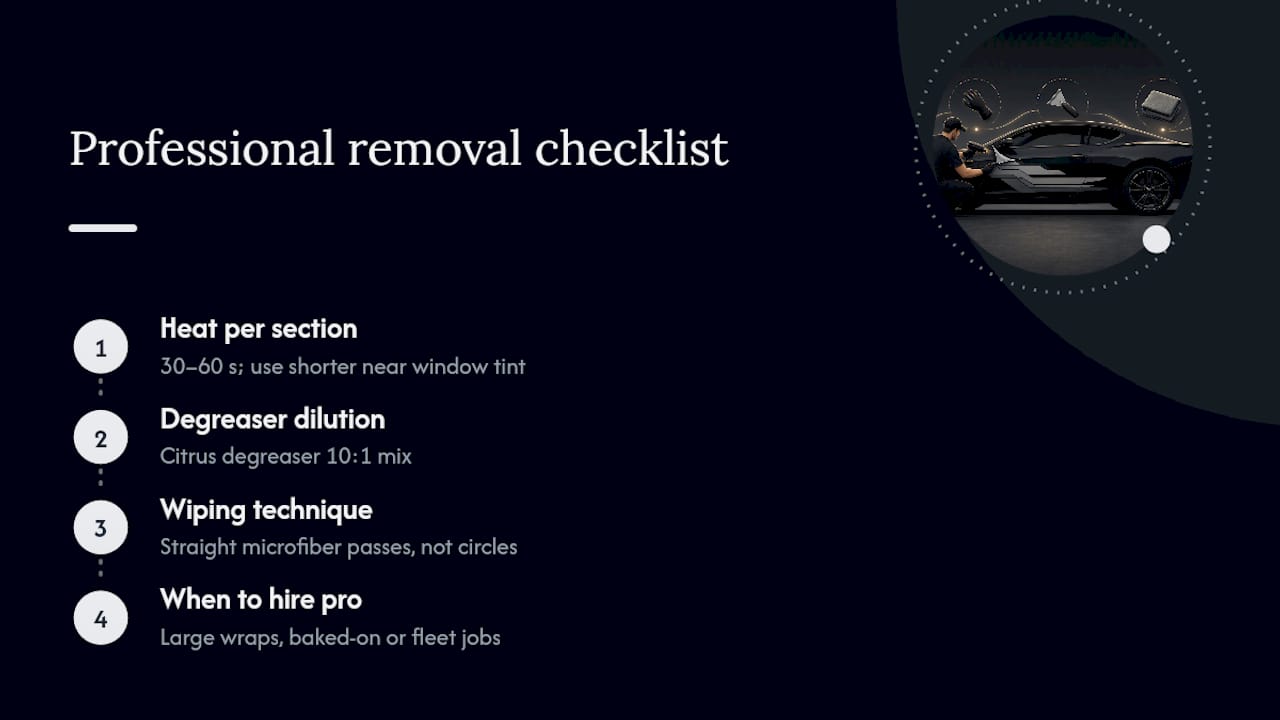
Large vehicle wraps, decals that have been baked on for several years, or fleet-scale jobs are usually worth handing to a professional. The adhesive on aged vinyl often bonds harder than fresh vinyl, and a full wrap covers enough surface area that one mistake compounds across the whole panel. For readers weighing that decision, detailed vinyl removal guidance covers what a professional pass typically includes.
Why the Cautious, Staged Approach Actually Pays Off
Most sticker removal damage comes from rushing: cranking the heat too high, grabbing a metal scraper because it’s what’s on hand, or skipping the residue step and scrubbing bare adhesive with a dry rag. Every step in the sequence above exists to prevent one specific failure mode.
Following the full workflow, heat, peel, dissolve, decontaminate, costs you an extra ten minutes but protects a finish that costs hundreds to repair. Test on a hidden spot first, and if the surface is expensive or the decal has clearly been there for years, call a professional instead of guessing.
— Yossi
When It’s Time to Call in a Professional
Some jobs just aren’t worth the DIY risk. A full vehicle wrap covering years of oxidation, a fleet of company vans that all need the same graphics stripped and reapplied, or a decal on tinted glass where one overheated pass ruins a film that costs more than the removal itself, these are situations where a mistake gets expensive fast.

Professional signage providers handle exactly this kind of work: safe removal from painted panels and glass, full decontamination and light polishing afterward, and reapplication if you’re refreshing the graphics rather than just stripping them. Because the same team often handles design, fabrication, and installation, there’s no guesswork about whether a surface is ready for new vinyl or needs another round of prep first. If you’re staring at a decal you’re afraid to touch yourself, request a quote for professional sign removal and get a straight answer on what your surface actually needs before you reach for a hair dryer.
Sources
- How To Remove Decals From Car
- How to Remove Vinyl Decals from Vehicles and Equipment | MontiPower
- 10 Ways to Remove Stickers & Sticker Residue
- How to Remove Stickers From Glass Without Damaging It
FAQ
Does Vinegar Remove Vinyl Adhesive?
Yes. White vinegar breaks down many vinyl adhesives on glass, plastic, and ceramics when you soak a cloth in it for 5 to 15 minutes before wiping, though it works more slowly than a dedicated citrus degreaser on tougher automotive vinyl.
Can You Use a Hair Dryer to Remove Car Decals?
Yes, a hair dryer held 6 to 8 inches from the surface for 30 to 60 seconds per section softens the adhesive enough to peel the vinyl at a low angle without damaging the clear coat.
Is It Safe to Use a Razor Blade on Vinyl Stickers?
Only on plain, untreated glass, using a new blade at a shallow angle with a soapy water lubricant. Never use a razor or any metal scraper on painted surfaces or tinted, tempered, or coated glass.
How Long Should You Let Adhesive Remover Sit Before Wiping?
Most citrus degreasers and isopropyl alcohol need 30 seconds to a few minutes of dwell time, while a vinegar soak works best after 5 to 15 minutes, depending on how thick or aged the residue is.
Should You Call a Professional for Large Vinyl Removal Jobs?
Full vehicle wraps, fleet-scale decal removal, and heavily aged vinyl are usually better handled by a professional like Custom Signs Today, since the risk of scratching or clouding a large surface area rises sharply with scale.

