

TL;DR:
- A sign proof is a client-approved preview that authorizes printing or fabrication, emphasizing the importance of careful review. It can be digital or physical, with hard proofs needed for color-critical or large-format jobs to ensure fidelity. Approving proofs without thorough checking can result in costly reprints and delays.
A sign proof is the client-approved preview of your exact artwork and production parameters that authorizes printing or fabrication. The moment you receive one, do three things before anything else: check every word for spelling, confirm the dimensions match your order, and review the color preview. If the job is color-critical or large-format, request a hard proof before you sign off. Skipping that step is how expensive reprints happen.
- Check spelling and all contact details
- Confirm dimensions and scale are correct
- Review color preview; flag any brand-color concerns
- For large-format or color-critical jobs, request a physical substrate sample
Table of Contents
- What is a sign proof, and what are the two main types?
- Why skipping the proof step costs you money
- How to review a proof: your checklist
- Color matching: when do you actually need a hard proof?
- How the approval process works
- What to expect for timeline and cost
- Common mistakes and how to avoid them
- Questions to ask your sign vendor about proofs
- Key Takeaways
- The part of proofing most buyers underestimate
- Customsignstoday makes the proof process straightforward
- Useful sources
What is a sign proof, and what are the two main types?
Not all proofs are equal. A soft proof is a digital file, usually a PDF with ICC-simulated color, delivered by email. It is fast, typically free, and perfectly adequate for checking layout, spelling, and basic color relationships. A hard proof is a physical match print or substrate sample produced on the same material and press technology as the final job. It shows you exactly how ink sits on vinyl, aluminum, or foam board, including how gloss or matte lamination shifts perceived color.
Soft proofing is the industry standard for quick approvals, but hard proofs remain the right call when precise color matching and substrate effects matter. A contract proof produced on the actual press technology can even serve as a binding color reference for the production run.

| Factor | Soft proof | Hard proof |
|---|---|---|
| Fidelity | Layout and color simulation | Actual ink on actual substrate |
| Cost | Usually free | Fee, sometimes credited to order |
| Lead time | 1–48 hours | 1–5 business days |
| Best for | Spelling, layout, basic color | Brand colors, photos, large-format |
| Substrate/finish check | No | Yes |
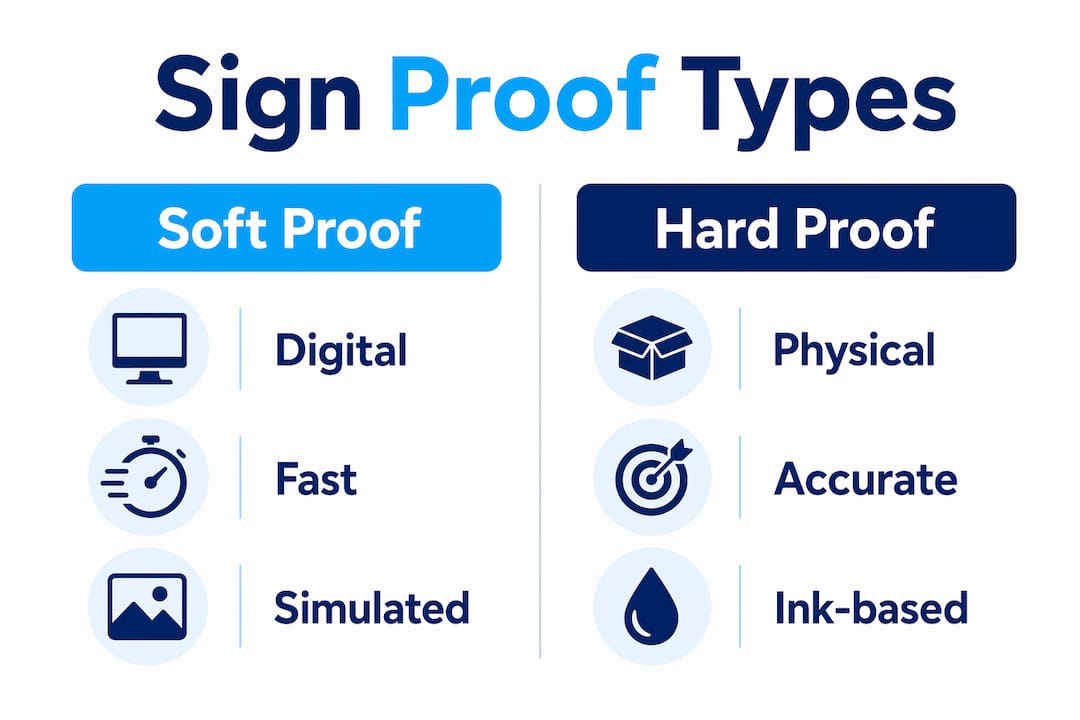
Decision rule: if the sign is large, highly visible, or carries brand colors or product photography, request a hard proof.
Why skipping the proof step costs you money
Proof approval is the documented authorization for production, and professional shops commonly require it before scheduling press time or cutting materials. That signature is not a formality. It shifts responsibility for the final artwork to you.
The risks of approving without a careful review are concrete: misspellings on a 4×8 banner, a phone number one digit off, a logo scaled to the wrong size, or a finish that looks nothing like you expected. Proofs let you verify layout, text, logos, sizing, and finish before committing to a large-format run. Once production starts, reprints are typically non-refundable. Proof review is also a key quality control checkpoint in a broader process that spans design, material selection, and installation.
How to review a proof: your checklist
Run through every item below before you reply with approval. One missed line can mean a full reprint.
- Spelling and typography: read every word aloud, including taglines and fine print. Check font consistency.
- Contact details: phone numbers, URLs, addresses. One transposed digit is a common, costly error.
- Dimensions and scale: compare the stated dimensions against your order confirmation. A scaled-down PDF can hide a size error.
- Bleed and trim: confirm artwork extends to the bleed line and no critical content sits inside the trim zone.
- Resolution and image quality: for large-format signs, images should be at least 100 DPI at final size. Pixelation visible on screen will be worse in print.
- Color notes: flag any RGB images that need CMYK conversion. Reds and blues shift most dramatically.
- Font outlines and linked files: confirm all fonts are outlined or embedded so no substitution occurs at the RIP stage.
- Hardware clearances: check that drill holes, grommets, and mounting points clear all text and logos.
- Installation notes: verify site-specific measurements, especially for wall-mounted or post-mounted signs. Get those numbers from your installer before you sign off.
Record every change request in writing. PDF annotation tools, timestamped email threads, and signed proof copies all work. Keep the final signed proof as your production authorization.
Pro Tip: Print the soft proof at a reduced scale and hold it at arm’s length. If small text is hard to read at that distance, it will be unreadable on a sign viewed from 20 feet.
Color matching: when do you actually need a hard proof?
Color is where sign proofing gets technical fast. The two systems you will encounter most are PMS (Pantone) spot colors and CMYK process printing. PMS colors are mixed inks that hit a precise target; CMYK builds color from four process inks. Converting a PMS brand color to CMYK can shift it noticeably, especially on textured or uncoated substrates.
ICC profiles and FOGRA/ISO printing conditions make color more predictable by standardizing how devices interpret and reproduce color. Spectrophotometers measure the actual printed output against those standards. Even so, material texture, gloss or matte lamination, and backlit versus front-lit viewing all change how a color reads to the eye.
Concrete triggers for requesting a hard proof:
- Brand logos or corporate colors where a color shift would be noticeable or embarrassing
- Product photography where skin tones or food colors must look natural
- High-visibility signage on storefronts, vehicles, or trade show displays
- Specialty substrates such as brushed aluminum, textured vinyl, or backlit film
Reviewing sign materials before you order helps you anticipate which substrates are most likely to require a physical sample. For large prints, the most practical approach combines a soft proof for layout with a small hardcopy on the chosen substrate for finish verification.
Always check a hard proof under the same lighting conditions where the sign will be installed. A color that looks perfect under fluorescent office light can read differently in direct sunlight or under warm retail lighting.
How the approval process works
Most shops follow a straightforward workflow: initial proof, client markup, revised proof, final sign-off. One to three rounds is typical. Here is what that looks like in practice:
- Receive the initial proof via email or a vendor portal. Review it against your checklist the same day.
- Submit consolidated feedback in one round rather than piecemeal. Scattered change requests add rounds and delay production.
- Review the revised proof carefully. Do not assume a change was made correctly; check the specific item again.
- Give written final approval. A dated email reply or a signed PDF both work. Keep a copy.
- Confirm who is authorized to sign. For site-mounted or compliance-critical signs, loop in facilities or legal before the final sign-off.
Signed proofs serve as the printer’s protection and the client’s confirmation and are commonly required before production scheduling begins. Keep dated, signed proofs and a change log for every project. That file is your evidence if a dispute arises.
What to expect for timeline and cost
Planning a sign order means building proof time into your schedule, not treating it as a same-day step.
| Proof type | Typical lead time | Typical cost |
|---|---|---|
| Soft proof (PDF) | 1–48 hours | Usually free |
| Hard proof / substrate sample | several days | Fee varies; often credited to order |
| Each revision round | Adds additional days | May incur charge after included rounds |
| Rush or specialty substrate | Add extra days | Premium applies |
Many vendors provide soft proofs at no cost, while hard proofs or substrate samples carry a fee that is sometimes credited against the final job. Rush requests, specialty materials, and extra revision rounds all push both cost and delivery out. Factor those variables into your project schedule before you place the order, not after.
Common mistakes and how to avoid them
- Approving without checking bleed and trim. A logo clipped by a trim line is the most common fixable error that gets missed on screen.
- Missing small text legibility at distance. What reads fine at 100% zoom on a monitor may be invisible on a sign viewed from across a parking lot.
- Ignoring substrate and finish effects. Matte lamination desaturates colors; gloss adds contrast. Neither shows on a soft proof.
- Forgetting hardware clearances. A grommet through a phone number or a drill hole through a logo face happens more than it should.
Pro Tip: For very large pieces, ask your vendor for a scaled section print on the actual substrate. A 12×12-inch sample of a 10-foot banner tells you more about finish and color than any PDF.
Before you give final approval, confirm installer measurements for any wall-mounted, post-mounted, or parking lot sign. Coordinating with your installation team, or with site contractors handling parking lot striping and surface prep, prevents clearance conflicts that only show up on installation day.
Questions to ask your sign vendor about proofs
Go into the conversation with specific questions. Vague answers are a red flag.
Do you provide hard proofs, and is color guaranteed? A reputable vendor will tell you clearly whether their hard proof is a color-guaranteed contract proof or a best-effort sample. “We’ll do our best” is not a guarantee.
How many revision rounds are included, and what do additional rounds cost? Most shops include one to two rounds. Know the policy before you start marking up.
Are proof fees credited to the final order? Many vendors credit hard proof costs against the job total. Confirm this in writing before you approve the fee.
Who must sign for production authorization? Clarify this early, especially for multi-location businesses or jobs that require facilities or compliance sign-off.
What file formats and color profiles do you require? Expect answers like PDF/X-1a, outlined fonts, CMYK at 300 DPI for close-viewing signs, or 100 DPI at final size for large-format. Vague file requirements often mean color surprises later. Review the artwork preparation steps before submitting files to avoid back-and-forth.
Get the vendor’s proof policy confirmed in a dated email or stated on the proof header itself. That document is your reference if expectations diverge.
Key Takeaways
A sign proof is the binding production authorization: approve it only after running a full checklist, and always request a hard proof for color-critical or large-format jobs.
| Point | Details |
|---|---|
| Proof = production authorization | Signing a proof transfers artwork responsibility to you; errors after approval are typically non-refundable. |
| Soft vs hard proof | Soft proofs (PDF) are free and fast; hard proofs verify actual color on substrate and are worth the fee for brand-critical jobs. |
| Run the full checklist | Check spelling, dimensions, bleed/trim, resolution, hardware clearances, and installation measurements before approving. |
| Build in lead time | Soft proofs take 1–48 hours; hard proofs take 1–5 business days; each revision round adds 1–2 more days. |
| Customsignstoday | Provides both soft and hard proof options with a clear revision policy — request a free quote to start the proofing process. |
The part of proofing most buyers underestimate
Most buyers treat the proof as a final formality rather than the most important decision point in the whole order. That is backwards. By the time a proof arrives, the vendor has already set up the file, selected the substrate, and queued the job. The proof is your last real chance to catch anything, and the window is short.
What actually causes expensive reprints is not ignorance of the process. It is the habit of approving quickly because the sign “looks fine” on a laptop screen at 50% zoom. Colors look different on a calibrated monitor than on a glossy substrate in afternoon sun. Small text that passes a casual glance fails the 20-foot test. Hardware placements that seem obvious on a PDF turn out to conflict with a wall bracket nobody measured.
The buyers who avoid reprints are the ones who slow down at the proof stage, loop in the installer before final sign-off, and keep a signed copy of every approved proof on file. That last step costs nothing and has saved more than a few projects when a vendor dispute came up months later.
Customsignstoday makes the proof process straightforward
Getting a sign built right starts with a proof you can actually trust. Customsignstoday provides both digital soft proofs and physical substrate samples, so you can verify layout on screen and confirm color and finish on the real material before a single panel goes into production. Revision rounds are clearly defined upfront, and proof fees on hard samples are credited toward your final order.
Whether you need custom signs for a storefront, a construction site, or a vehicle fleet, the process starts with a proof that gives you full visibility before production begins. Request a free quote today and get your first soft proof within 48 hours.
Useful sources
Proof purpose and production authorization
- Why You Must Sign a Design Proof Before Printing — Print Shop
- The Importance of Quality Control with Your Signage Maker
Proof types and digital workflows
- Print Proofing in a Digital Age — Sign Shop
- What Is a Print Proof? Guide for Professional Printers — Cevagraf
Color management and ICC/FOGRA standards
- Why Proofs Are Important Before Having Large Signs Made — Trouw Banners
File preparation and artwork specs
- Artwork & File Preparation Guide — Signage Works NZ

