{
“@type”: “Article”,
“image”: {
“url”: “https://csuxjmfbwmkxiegfpljm.supabase.co/storage/v1/object/public/blog-images/organization-6408/1771634891071_image.png”,
“@type”: “ImageObject”,
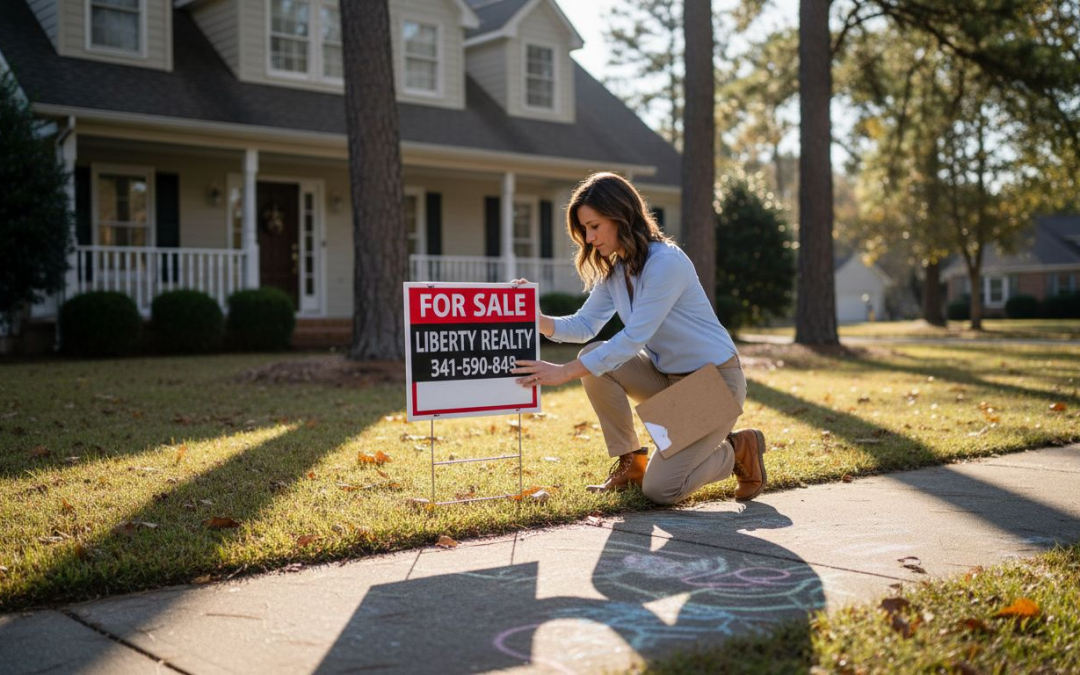
“caption”: “Agent installing real estate sign outside home”
},
“author”: {
“url”: “https://customsignstoday.us”,
“name”: “Customsignstoday”,
“@type”: “Organization”
},
“@context”: “https://schema.org”,
“headline”: “Step by Step Real Estate Signage for Property Success”,
“publisher”: {
“url”: “https://customsignstoday.us”,
“name”: “Customsignstoday”,
“@type”: “Organization”
},
“inLanguage”: “en-US”,
“articleBody”: “Discover step by step real estate signage with this easy guide for agents. Learn how to plan, install, and verify signs to boost property visibility and leads.”,
“description”: “Discover step by step real estate signage with this easy guide for agents. Learn how to plan, install, and verify signs to boost property visibility and leads.”,
“datePublished”: “2026-02-21T00:48:26.791Z”
}
Every American real estate agent knows that a well-placed sign can transform property interest overnight. In cities across the United States, visibility is everything when competing for buyer attention. This article guides you through selecting, designing, and installing signage that actually delivers results, using proven strategies and professional recommendations so your listings stand out in crowded urban markets.
Table of Contents
- Step 1: Assess Property Needs And Select Sign Types
- Step 2: Design And Customize Real Estate Signage
- Step 3: Install Signs Securely At Target Locations
- Step 4: Verify Signage Placement And Quality
Quick Summary
| Key Point | Explanation |
|---|---|
| 1. Assess Property Needs Before Sign Selection | Evaluate physical characteristics and marketing goals to determine the best signage strategy for your property. |
| 2. Choose Sign Designs for Maximum Visibility | Ensure signs have bold fonts and high contrast to be easily readable from a distance. |
| 3. Verify Installation Permits and Methods | Check local regulations and secure permits before installation to avoid legal issues and fines. |
| 4. Regularly Inspect Sign Placement and Quality | Assess visibility and condition of signs periodically to ensure ongoing effectiveness and maintenance needs. |
| 5. Get Feedback on Sign Design Before Production | Test mock-up designs with colleagues or potential clients to gauge their effectiveness in communication. |
Step 1: Assess Property Needs and Select Sign Types
Before you order a single sign, you need to understand what your property actually requires. This step determines whether your signage strategy succeeds or wastes money on the wrong solution. Take time to evaluate your property’s unique conditions, location, and marketing goals before selecting sign types.
Start by analyzing your property’s physical characteristics and visibility challenges. Walk around the property at different times of day to observe sight lines, foot traffic patterns, and where potential buyers naturally look. Notice which areas receive direct sunlight, which are shaded, and where weather exposure is most intense. These observations directly influence which sign materials and styles will perform best.
Next, identify your primary marketing objectives for this property. Are you trying to attract drive-by traffic from a busy street? Do you need directional signs for a complex property or subdivision? Are you targeting foot traffic in an urban area? Your goal shapes everything about sign selection, from size to placement to messaging style.
Understanding your property’s unique conditions and marketing goals is the foundation for selecting signage that actually delivers results.
Consider the various sign types available based on your property type and goals. Common options for real estate include:
- Yard signs for suburban properties and neighborhoods
- Building-mounted signs like fascia or wall signs for commercial properties
- Directional signs for larger properties or subdivisions
- Digital signs for high-traffic areas requiring frequent updates
- Window signs for storefront properties or open house events
- Projecting signs that extend from the property for enhanced visibility
Evaluate local regulations before narrowing your choices. Different municipalities have restrictions on sign size, height, placement, and even material type. Check zoning laws, homeowner association rules, and municipal codes for your specific area. Some restrictions eliminate certain sign options entirely, so confirming these early saves time and prevents costly mistakes.
Once you understand the physical constraints and available options, match sign types to your property’s visibility needs. A property on a quiet residential street needs different signage than one on a major commercial corridor. A townhouse community needs different solutions than a single-family home. Your assessment should identify which sign types will maximize visibility for your target audience in your specific location.
Pro tip: Document your property assessment with photos from different angles and times of day, then compare them against your chosen sign types to verify they’ll actually be visible from where buyers approach the property.
Here’s a quick comparison of common real estate sign types and their best use cases:
| Sign Type | Ideal Property Type | Key Advantage |
|---|---|---|
| Yard Sign | Single-family residential | Easy, affordable visibility |
| Building-mounted | Commercial and retail spaces | High branding impact |
| Directional Sign | Large or complex properties | Improved wayfinding |
| Digital Sign | Urban/high-traffic locations | Real-time updates |
| Window Sign | Storefront or open house | Direct walk-in appeal |
| Projecting Sign | Urban properties, storefronts | Enhanced sidewalk visibility |
Step 2: Design and Customize Real Estate Signage
Now that you know what sign types fit your property, it’s time to design signage that actually catches attention and communicates effectively. Good design isn’t about looking pretty—it’s about making sure potential buyers notice your sign and remember your listing.
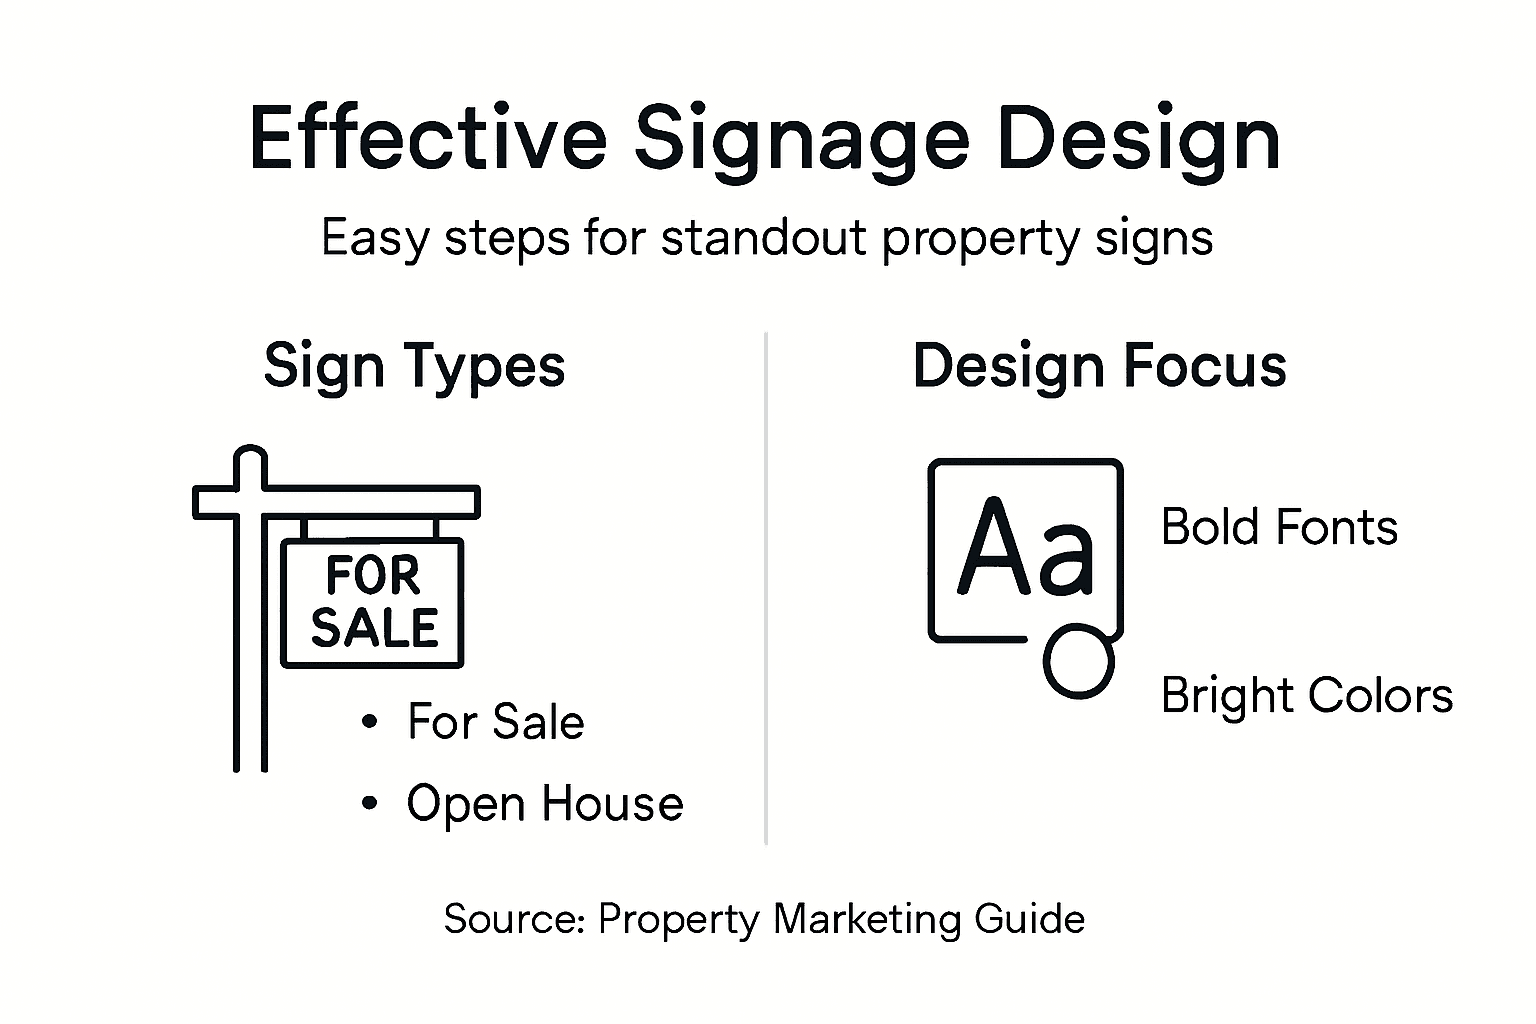
Start with the fundamentals of effective signage design. Your sign must be readable from a distance, which means choosing fonts that are bold and easy to scan. Thin, decorative fonts might look nice, but drivers passing at 35 miles per hour won’t be able to read them. Use sans-serif fonts like Arial or Helvetica in larger sizes to maximize clarity.
Color selection matters more than you might think. High contrast between text and background makes signs readable from farther away. Black text on white or yellow backgrounds works reliably. Avoid color combinations that blend together, like dark blue text on a black background. Your sign should pop visually without being overwhelming.
Your sign’s design directly impacts whether buyers even notice it as they drive or walk past your property.
Incorporate your branding strategically into the design. Include your company logo, name, and contact information, but don’t let them dominate the sign. The property address or main headline should be the visual focus, with your branding supporting it. Potential buyers need to know which property the sign represents before they think about contacting you.
Choose customization options that match your property and market. Consider these elements:
- QR codes linking to property listings or virtual tours
- Photo frames displaying property images for open houses
- Weather-resistant materials appropriate for your climate and exposure
- Illumination options for properties in shadowed areas or nighttime visibility
- Directional arrows pointing to property entrances for complex locations
Work with a professional sign designer who understands real estate marketing. They can optimize your design for readability, visibility, and brand consistency. Share your property photos, target audience details, and any specific messaging you want to emphasize. A good designer will create multiple layout options for you to review before production begins.
Test your design mockup at different distances and lighting conditions. Ask colleagues to view it from across the room or from a moving vehicle if possible. Can they read the key information quickly? Does the design look professional and trustworthy? This testing step catches design issues before you invest in production.
Pro tip: Create 2-3 design variations and test them with your top colleagues or clients to see which resonates most strongly before committing to full production.
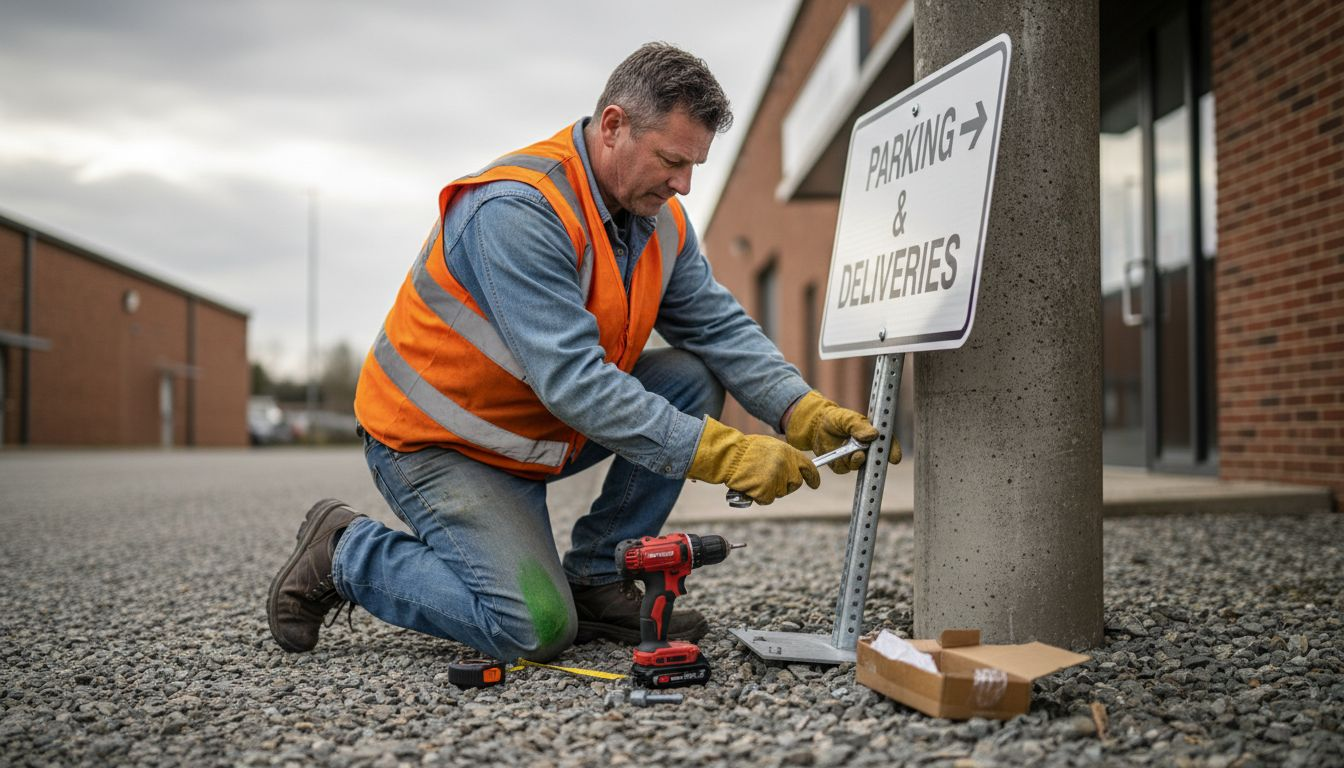
Step 3: Install Signs Securely at Target Locations
Proper installation makes the difference between a sign that lasts for years and one that fails or becomes a liability. This step involves choosing the right installation method, securing permits, and executing the installation safely and legally.
Before you install anything, verify local requirements. Check with your city or county planning department about sign permit requirements, placement restrictions, and any installation specifications. Different jurisdictions have different rules about setback distances, heights, and where signs can be placed. Installing without proper permits can result in fines or forced removal of your sign.
Understand local sign codes and regulations that govern placement and installation standards. These codes exist to protect public safety, visibility, and neighborhood aesthetics. Review zoning restrictions for your specific property type and location. Some areas prohibit ground-mounted signs in certain zones or require signs to be set back specific distances from the street.
Obtain all necessary permits before installation begins. This step takes time but protects you legally and ensures your sign meets local standards. Most permit applications require sign specifications, property location details, and installation plans. Submit these documents to your planning department and wait for approval before scheduling installation.
Skipping the permitting process might save time upfront, but violations can cost thousands in fines and forced removal.
Choose installation methods based on your sign type and property characteristics. Consider these approaches:
- Ground-mounted stakes for yard signs with concrete footings for stability
- Wall or fascia mounting for building-attached signs using appropriate anchors
- Pole mounting for directional or larger signs requiring structural support
- Magnetic mounting for temporary applications on metal surfaces
- Weighted bases for portable signs that need flexibility
Hire professional installers for anything beyond basic stake installation. Real estate sign professionals understand proper anchoring, weather resistance, and safety protocols. They have equipment, experience, and insurance to handle installation correctly. This investment prevents damage to your property and ensures signs remain secure during storms or high winds.
Verify installation quality once the sign is in place. Check that it’s level, secure, and positioned exactly where you wanted it. Walk around the property to confirm visibility from key sight lines and distances. Take photos documenting the installation for your records.
Schedule regular maintenance inspections, especially before severe weather seasons. Look for loose fasteners, fading, or damage that requires repairs. Weather-resistant signs still need occasional attention to remain effective long term.
Pro tip: Keep your installation permit documentation, sign specifications, and maintenance records organized in a folder—you’ll need these if you relocate the sign or remove it later.
Step 4: Verify Signage Placement and Quality
Your sign is installed, but now comes the critical step of verifying it actually performs as intended. This verification ensures your sign is visible, readable, and positioned optimally to attract potential buyers.
Start by assessing visibility from key sight lines. Walk or drive the approach routes that potential buyers would use to reach your property. View the sign from the street, from different angles, and at various distances. Can you read the key information from 50 feet away? From 100 feet? The sign should be clearly visible before someone is directly in front of it.
Test sign legibility and visibility under different lighting conditions. Check how the sign looks during daylight hours, at dusk, and during early morning when light angles change. If your sign has illumination, verify the lighting is even and doesn’t create glare that makes text hard to read. Shadows from nearby trees or buildings shouldn’t obscure critical information.
Measure readability against standard visibility distances. Most drivers moving at typical residential speeds should be able to read your sign from at least 50 feet away. If text appears too small or colors don’t contrast enough, these issues need correction before your sign sits in place for months.
A sign that looks good in the sign shop might fail in the real-world environment where weather, shadows, and viewing angles create challenges.
Verify the physical installation quality and positioning. Check that the sign is level and straight, not tilted or leaning. Confirm it’s positioned exactly where you approved it. Look for any installation issues like fasteners showing, uneven seams, or damage from the installation process. Address any quality concerns immediately while you can make corrections easily.
Below is a summary of crucial signage verification checks after installation:
| Checkpoint | Why It Matters | What to Look For |
|---|---|---|
| Visibility Distance | Ensures drivers see key info early | Clear text from 50–100 feet |
| Lighting & Shadows | Maintains readability all day/night | No glare, balanced illumination |
| Placement Accuracy | Targets main buyer approach routes | Level, unobstructed view |
| Sign Condition | Reduces maintenance costs and risks | No tilting, damage, loose parts |
Evaluate placement effectiveness for your marketing goals:
- Primary visibility from the main traffic approach to your property
- Secondary visibility from alternative routes or parking areas
- Nighttime visibility if your market includes evening viewing traffic
- Competitor sign comparison ensuring your sign is more prominent than nearby listings
- Obstruction checks confirming nothing blocks the sign over time as landscaping grows
Document the sign’s condition with photographs taken from multiple angles and distances. These photos serve as your baseline for future maintenance assessments and insurance documentation. Take photos during favorable lighting to show the sign at its best.
Schedule a follow-up inspection after two weeks to check for any installation settling or damage. Weather exposure can reveal weaknesses that weren’t obvious immediately after installation. This early catch prevents small problems from becoming major issues.
Pro tip: Ask colleagues or clients unfamiliar with the property to view the sign and tell you what they notice first—this perspective reveals whether your sign is communicating your intended message effectively.
Unlock Your Property’s Potential with Custom Real Estate Signage
Choosing the right signage and ensuring proper installation can be overwhelming, especially when your property needs standout visibility that truly attracts buyers. If you want to avoid the frustration of unclear messaging or poorly placed signs, trust the professionals who specialize in bringing your real estate signage vision to life. From durable yard signs to eye-catching digital displays, every detail matters to make your listing impossible to miss.

Elevate your property marketing now by exploring expertly crafted options at Custom Signs Today. Our team offers tailored solutions to meet your specific property needs, aligned with the step-by-step approach you need for success. Visit our Uncategorized category to discover signage that fits your unique challenge. Don’t wait—make your real estate signs a powerful tool that works as hard as you do.
Frequently Asked Questions
What steps should I take to assess my property’s signage needs?
Start by analyzing your property’s visibility and traffic patterns. Walk around the property at different times to observe sight lines and the areas that require signage, then document your findings to guide sign selection.
How do I choose the right sign type for my real estate property?
Identify your primary marketing goals and the property’s unique characteristics to select the appropriate sign type. Consider options such as yard signs for suburban areas or digital signs for urban environments, and evaluate local regulations before finalizing your decision.
What design elements are essential for effective real estate signage?
Effective signage should prioritize readability and visual appeal. Use bold, sans-serif fonts, high-contrast colors, and include key information prominently, such as property addresses and your contact information, while ensuring branding does not overshadow crucial details.
How can I ensure my real estate signs are properly installed?
Verify local permit requirements and installation regulations before proceeding. Choose suitable mounting methods for your sign type and consider hiring professionals to ensure secure and compliant installation.
What should I check after installing my real estate signage?
After installation, assess visibility from multiple angles and distances to ensure key information is legible. Schedule regular inspections for any damage, and take photos for documentation to keep track of the sign’s condition.
How often should I maintain my real estate signs?
Conduct maintenance checks at least twice a year to look for wear and tear, especially before severe weather seasons. Address any fading or physical damage promptly to keep your signage effective and professional-looking.
Recommended
- 7 Expert Tips for Choosing Signage for Real Estate Success –
- Master Effective Real Estate Sign Placement for Results –
- How to Order Real Estate Signs for Fast and Easy Setup –
- Real Estate Signage Guide: Create Impactful Signs –
- 7 Essential Steps: Property Managers Renovation Guide – Astrotech Construction