
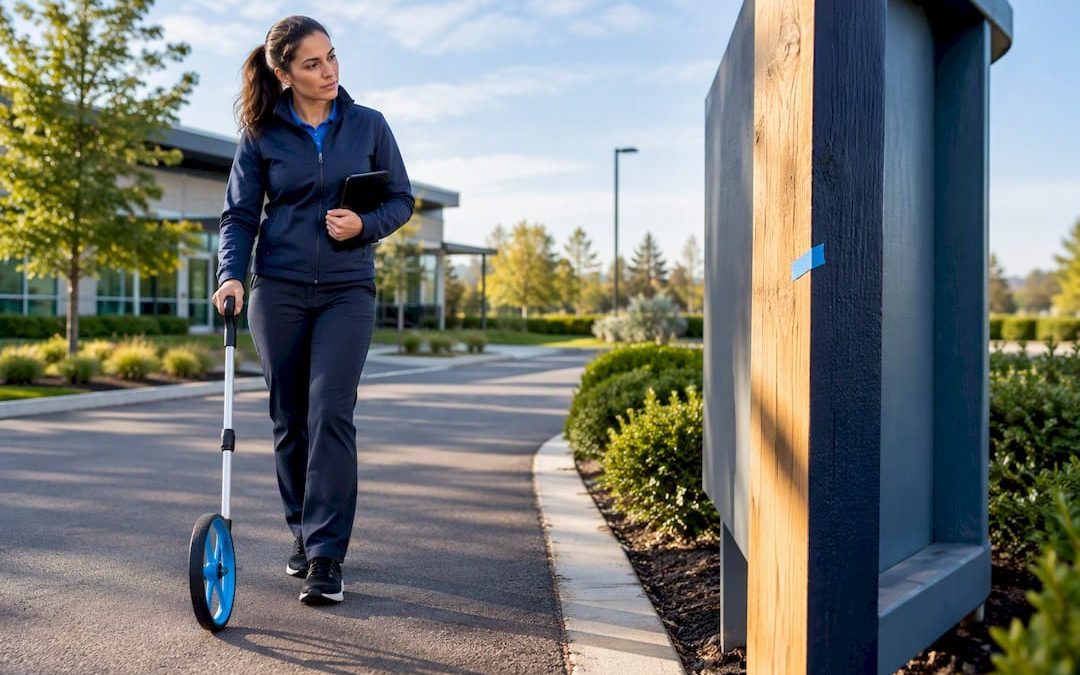
Before you contact a fabricator, prepare a one-page brief listing your sign’s exact size, intended viewing distance, mounting type, outdoor exposure, and any accessibility requirements. Handing over these specs up front lets a shop quote accurately, recommend the right substrate (MDO, treated plywood, or cedar), and propose a finish system that will actually hold up. Skip this step and you will get vague quotes, mismatched materials, and rework.
TL;DR:
- Providing detailed specifications—including size, viewing distance, mounting type, and exposure—is essential for accurate fabricator quotes and durability.
- MDO plywood is the preferred substrate for painted signs due to its paint-holding qualities and resistance to warping, especially in outdoor conditions.
- Sign lettering should be at least 1 inch tall per 25 feet of viewing distance, with perpendicular mounting improving readability for drivers.
- ADA compliance requires tactile characters, Grade 2 Braille, high contrast, and appropriate mounting height for interior and directional signs.
- Finishing options affect maintenance frequency; penetrating stains need more regular touch-ups, while high-quality paint lasts longer in direct sun.
Table of Contents
- Quick commissioning checklist: the exact specs a fabricator needs
- Material and substrate choices for commercial wood signs
- Finishes and weatherproofing: choose the right coating system
- How far away does your sign need to be read?
- ADA and accessibility essentials for commercial wood signs
- Design for branding: typography, contrast and artwork preparation
- Installation, durability and maintenance: what to expect after delivery
- How to get a reliable quote and work with a professional sign fabricator
- Design tools and software recommendations for creating wood sign layouts
- Common sign styles and design inspirations for wood signs
- Step-by-step process for creating and transferring designs onto wood
- Safety considerations and protective gear when making wood signs
- Budgeting and cost estimates for materials and labor involved in wood sign design and production
- Publisher perspective: why a full-service sign partner matters
- How Custom Signs Today can help with your wood sign project
- Sources
- FAQ
Quick commissioning checklist: the exact specs a fabricator needs
A fabricator can only quote as well as the information you give them. Before you request pricing, gather these details so the first quote is the right one.
- Exact sign dimensions and your preferred maximum line length for each row of text.
- Viewing distance and primary audience: pedestrians reading up close or drivers reading from the road.
- Mounting type, plus photos of the install location, whether the sign will sit flat against a wall, on a post, or perpendicular to traffic.
- Substrate preference or exposure notes, such as full sun, a sheltered entryway, or proximity to sprinklers and landscaping.
- Accessibility needs, including tactile or Braille elements, pictograms, and any permit or storefront restrictions that apply.
- Artwork files: vector logos, exact color codes, preferred fonts, and measurements or photos of the installation site.
Our guide to designing property signage walks through how to translate these specs into a working layout before you send anything to production.
Material and substrate choices for commercial wood signs
MDO (medium-density overlay) plywood and exterior-grade plywood are the standard substrates for painted commercial signs because they hold paint evenly and resist the swelling and warping that ruin cheaper panels. MDO in particular is commonly specified for exterior painted signage because its resin-treated overlay takes paint far better than standard smooth plywood, which tends to telegraph grain and absorb finish unevenly without extra prep.
If you want a natural wood look rather than a painted face, durable species like cedar or redwood pair well with penetrating stains that let the grain show through while still resisting decay. When a sign will sit in ground contact or face constant moisture, specify factory-preservative-treated stock, or ask your fabricator to apply water-repellent preservatives and seal all cut edges before finishing.
Whatever substrate you choose, insist on kiln-dried lumber at around 12% moisture content and sealed edges. Wood that goes into production too wet will shrink after installation, cracking paint and opening joints. Our page on MDO plywood and finishing tips covers how substrate choice interacts with the finish system you pick.
Finishes and weatherproofing: choose the right coating system
Your finish choice determines both appearance and how often you will pay for upkeep. Penetrating water repellents and water-repellent preservatives (WRPs) soak into the wood rather than forming a surface film, which means they resist the peeling and swelling that plague film-forming coatings when moisture moves through the panel, according to U.S. Forest Service research. Paints and other film-forming finishes block UV light more effectively and open up a full range of colors, but they demand careful surface prep and a stain-blocking primer to avoid early failure.
Semitransparent penetrating stains preserve the wood grain and are a common choice for saw-textured cedar faces, while solid-color stains and quality latex paints offer stronger UV protection for signs that will sit in direct sun for years. Application method matters as much as the product: brushing and back-brushing improve how the finish wets into rough or textured wood, and a two-coat approach, or dipping the panel entirely, extends service life, per Forest Products Laboratory guidance. Set expectations accordingly: a penetrating stain may need periodic touch-ups, while a painted sign can go longer between full refinishes if it was primed and coated correctly. Our weatherproofing guide breaks down which system fits which exposure.
How far away does your sign need to be read?
Letter size is not a design preference, it is math based on viewing distance. The International Sign Association recommends at least 1 inch of letter height for every 25 feet of viewing distance as a baseline rule of thumb.
- A sign read from 100 feet away needs letters at least 4 inches tall.
- A sign that must be legible at a long viewing distance common for moderate-speed multi-lane roads, where drivers need time to change lanes, requires proportionally large letters in height to ensure readability.
- Traffic speed and required reaction time both push the needed viewing distance up, which increases the minimum letter size.
1 inch of letter height per 25 feet of viewing distance is the baseline legibility formula the ISA uses to size roadway and storefront signage, and it is the single number worth writing into every brief.
Where possible, mount the sign perpendicular to the roadway rather than parallel to it. A perpendicular sign often reads clearly at a smaller size than a parallel one because drivers see it head-on rather than at a shallow angle. For night visibility, plan illumination with good color rendering and choose non-glare finishes so headlights or floodlights do not wash out the text.
ADA and accessibility essentials for commercial wood signs
Many permanent interior and directional signs, including room identification and exit signage, fall under accessibility rules that a wood sign must meet just like any other material. The 2010 ADA Standards, Chapter 7 require tactile characters with Grade 2 Braille on certain permanent signs, with baselines mounted between 48 and 60 inches above the finish floor.
Required signs also need non-glare finishes and strong contrast, either light characters on a dark background or dark characters on a light background, using conventional sans-serif letterforms rather than script or decorative typefaces. When a pictogram identifies a permanent room, it needs a field at least 6 inches high and must be paired with a text descriptor, not stand alone. Placement also has to account for clear floor space and door swing so a person using tactile reading can reach the sign without obstruction. Our page on ADA signage covers how these rules apply specifically to wood substrates and mounting hardware.
Design for branding: typography, contrast and artwork preparation
A sign that looks good on a screen can fail on a wall if the type is too decorative or the contrast too low. Prioritize your essential message, business name, key symbol, maybe a tagline, and choose a typeface that stays legible at a distance and meets ADA constraints where the sign requires them. Our guide to contrast and readability covers how to check that your color choices work for both branding and legibility.
Provide your fabricator with vector artwork and exact color specifications, either Pantone numbers or hex codes, rather than a low-resolution logo pulled from a website. Ask for a mockup or raster preview before production starts so you can catch spacing or color issues on screen instead of on the finished panel.
Decide early how your logo will be reproduced: painted by hand, routed into the wood, or applied as a separate metal or acrylic element. This decision affects which substrate and finish system make sense, since a routed logo exposes fresh cut edges that need sealing before the finish goes on. A semitransparent stain over routed letters reads very differently than a solid painted background with applied dimensional lettering, so settle on the look before you lock in materials.
Installation, durability and maintenance: what to expect after delivery
Confirm with your fabricator that the substrate was kiln-dried to around 12% moisture content and that all edges, especially any routed or carved cuts, were sealed before the finish went on. Skipping edge sealing is one of the most common causes of early checking and extractive bleed-through on wood signs.
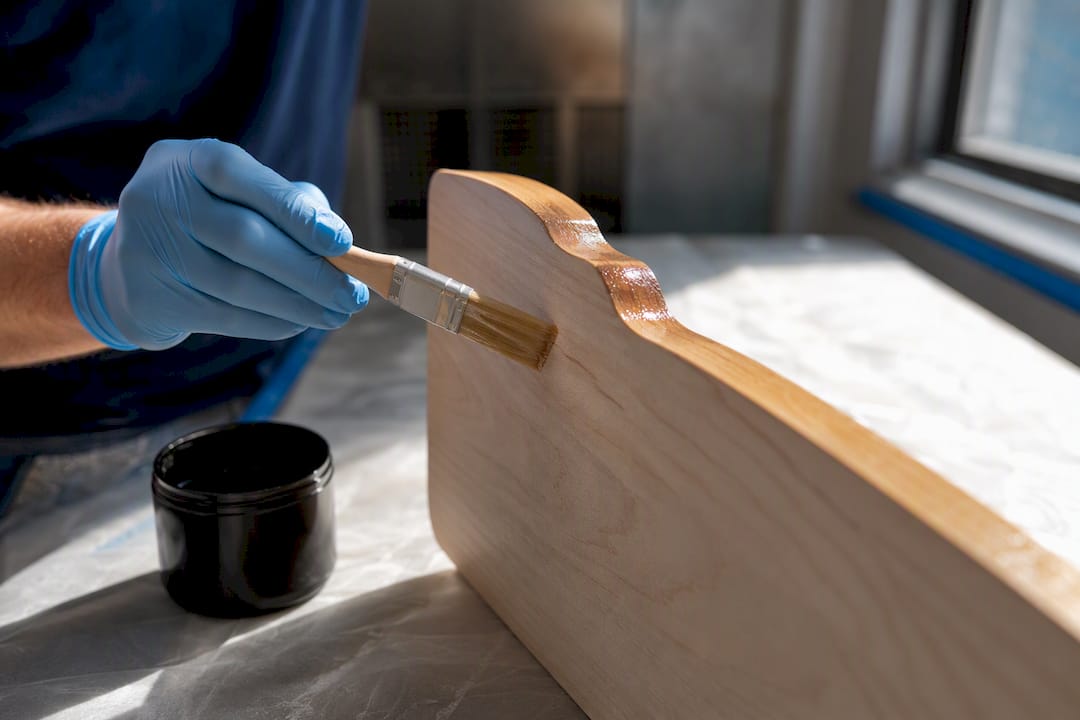
Ask about mounting hardware, wind load on larger panels, and whether the quoted price includes anchors or engineering sign-off for post-mounted signs in areas with local wind code requirements. Once installed, plan for periodic inspection and touch-ups rather than assuming the sign is maintenance-free. Full refinishing cycles vary by finish type and exposure, often running several years apart for a well-primed painted sign and sooner for a lightly finished natural wood face. Get the warranty scope and maintenance responsibility in writing so there is no ambiguity about who handles touch-ups after year one.
How to get a reliable quote and work with a professional sign fabricator
Turning your research into an actual sign starts with a clear conversation, not a guess.
- Send your one-page brief with dimensions, viewing distance, mounting photos, ADA needs, and finalized artwork files, then request a written quote with a firm lead time.
- Ask specifically about the finish system, the substrate brand or spec such as MDO or exterior plywood, edge treatment, and what maintenance schedule the fabricator recommends.
- Clarify installation scope: does the quote include mounting hardware, permitting support, and any required engineering sign-off, and who handles on-site approvals.
- Confirm the main cost drivers up front, square footage, substrate choice, finish complexity, and installation difficulty, so the final invoice matches expectations.
Pro Tip: Bring site photos and a tape-measure reading of the mounting surface to your first call: fabricators quote faster and more accurately when they can see the actual wall or post.
Design tools and software recommendations for creating wood sign layouts
You do not need professional design training to prepare a usable layout, but the file format matters more than the software you pick. Vector programs like Adobe Illustrator or the free, open-source Inkscape let you scale artwork to any sign size without losing edge sharpness, which matters once a logo gets routed or painted at 3 feet wide. Canva works for rough concepts and color testing, but export as a high-resolution file or, better, ask your fabricator whether they can work from your Canva layout directly, since it is not a true vector tool.
For anyone comfortable with basic layout work, Affinity Designer is a lower-cost alternative to Illustrator that still exports clean vector files a fabricator can scale directly to production size. If your sign will include routed or laser-etched elements, ask your fabricator what file format their equipment reads, commonly SVG or DXF, so your design translates without a manual redraw.
Whatever software you use, build your layout at the sign’s actual dimensions or a clean fraction of them, like half-scale, so letter heights and margins translate correctly. Include a simple ruler or dimension line in the file you send so there is no ambiguity about scale. If you are unsure how a design will look mounted, request a printed proof or an on-site mockup before the panel goes into production. Our guide to designing property signage has more on preparing layouts that hold up once they are enlarged to full sign size.
Common sign styles and design inspirations for wood signs
Commercial wood signs generally fall into a handful of recognizable styles, and picking one early keeps your brief focused. A routed and painted sign, where letters and logos are carved into the panel and filled with contrasting paint, gives a dimensional look that reads well in daylight and holds up to the elements when properly sealed. A sandblasted sign, which uses abrasive blasting to raise the background and leave letters flush, produces a similar carved effect with a slightly different texture.
Flat painted panels with applied vinyl lettering or dimensional letters mounted on top offer a cleaner, more modern look and are often faster and less expensive to produce than fully routed signs. For businesses that want the wood grain visible, a semitransparent stain over a smooth or lightly textured cedar face keeps the material itself as the visual feature, with logo and text kept minimal so the wood does the work.
Directional and wayfinding signs tend to favor simpler, high-contrast layouts since their job is speed of recognition rather than brand storytelling, while storefront and monument signs can carry more detail because pedestrians view them at closer range and for longer. Architectural cues from the building itself, trim color, roofline, existing materials, are worth factoring into scale and motif so the sign reads as part of the property rather than an add-on. Whichever style you land on, keep the message hierarchy simple: business name largest, supporting text smaller, and avoid crowding the panel with more than the essential words.
Step-by-step process for creating and transferring designs onto wood
Once artwork is finalized, a fabricator moves through a fairly consistent production sequence regardless of style.
First, the substrate is cut to size and, if it needs a specific shape, that shape is cut on a CNC router or by hand. Second, the design is transferred onto the panel. For hand-painted signs, this often means a paper or vinyl stencil is applied to mark letter and logo boundaries before paint goes on. For routed signs, the vector file is loaded into CNC software that carves the design directly into the panel at the specified depth. For laser-etched signs, the same type of vector file guides a laser that burns the design into the surface rather than cutting through it, which works well for fine detail and photographic-style images.
Third, any carved or etched surfaces are sanded to remove char or rough edges, and all cut edges are sealed before finish goes on. Fourth, the finish system is applied, whether that is paint filling routed letters, a stain over the full panel, or a clear topcoat protecting a laser-etched design. Finally, the sign is inspected for finish consistency and dried fully before it leaves the shop for installation. Each step depends on the one before it, so a rushed drying stage or an unsealed edge at any point shows up as a finish failure later.
Safety considerations and protective gear when making wood signs
Producing a wood sign involves cutting, sanding, and finishing steps that each carry their own hazards, whether the work happens in a professional shop or a smaller operation. Routing and cutting generate fine wood dust that should be controlled with dust collection and a properly rated respirator, since prolonged exposure to wood dust is a recognized respiratory hazard regardless of species.
Eye protection is standard during any cutting, routing, or sanding step, and hearing protection matters around routers and saws that run for extended periods. Laser etching equipment requires its own safety protocol, including proper ventilation for the fumes produced when the laser burns the wood surface, and operators should never leave a running laser unattended.
Finishing work introduces its own risks: solvent-based stains and paints require adequate ventilation and, in enclosed spaces, a respirator rated for organic vapors, while water-based products carry a somewhat lower risk profile but still benefit from good airflow. Gloves protect skin from prolonged contact with stains, sealers, and preservative treatments. A fabricator who handles these steps daily has systems in place for all of this, which is one practical reason many businesses commission a sign rather than producing one in-house.
Budgeting and cost estimates for materials and labor involved in wood sign design and production
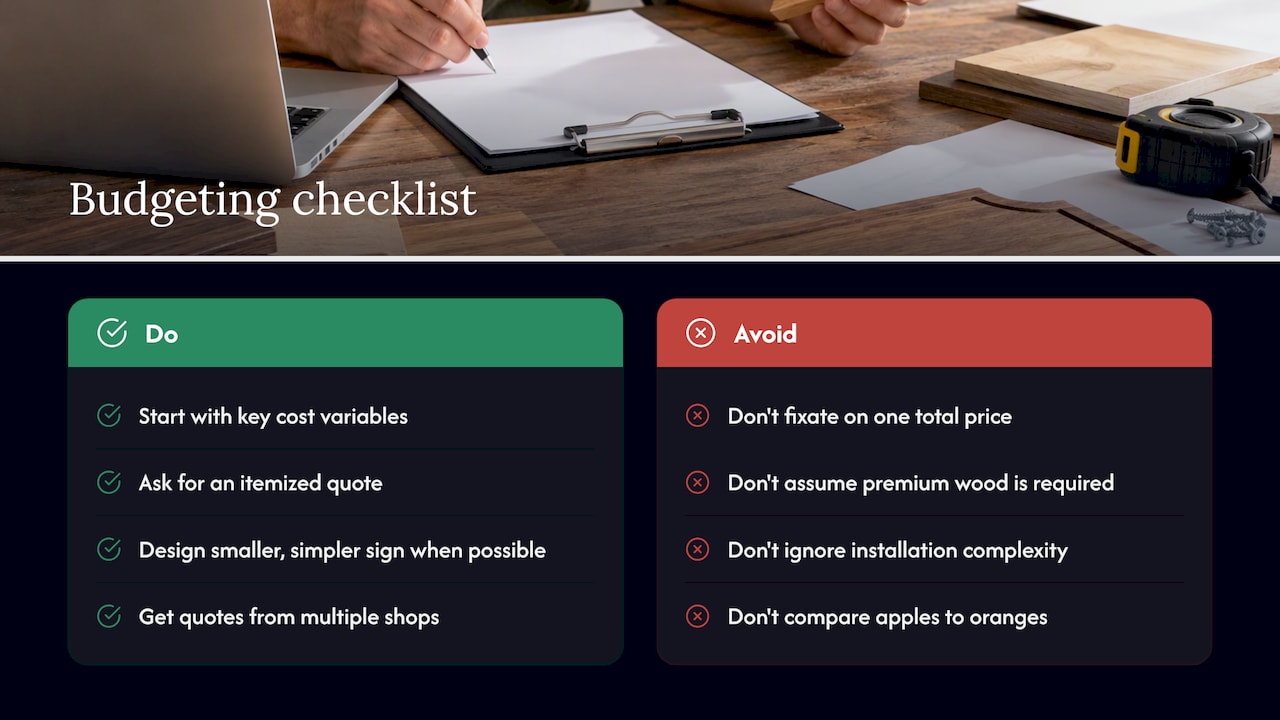
Wood sign pricing depends on a handful of variables that scale independently, so a useful budget conversation starts with those variables rather than a single number. Square footage is the most obvious driver: larger panels use more substrate and take longer to finish. Substrate choice matters too, since MDO or treated exterior plywood typically costs less than premium cedar or redwood, though the wood species affects both appearance and finish longevity.
Finish complexity is another major factor. A single-color painted sign with simple lettering costs less in labor than a multi-color routed design with hand-detailed painting in each letter, and a laser-etched photographic image adds machine time that a flat stain does not. Installation complexity adds its own cost layer: a wall-mounted sign is generally simpler than a post-mounted sign that requires footings, wind load calculations, or engineering sign-off in jurisdictions that require it.
Ask your fabricator to break the quote into these components, substrate, design and artwork prep, fabrication labor, finish application, and installation, so you can see where the budget is going and where there is room to adjust. A smaller sign with a simpler finish can meet the same legibility and branding goals as a larger, more elaborate one if the layout is designed well from the start. Getting quotes from more than one shop with the same one-page brief is the most reliable way to compare pricing on equal terms rather than comparing apples to oranges.
Publisher perspective: why a full-service sign partner matters
The businesses that get this right treat sign design, material selection, and installation as one connected decision, not three separate vendors. A fabricator who handles all three catches problems a designer working alone would miss, like a logo treatment that will not hold up on the substrate you picked, before they become an expensive redo.
— Yossi
How Custom Signs Today can help with your wood sign project
Custom Signs Today handles the full path from design through fabrication and installation, so the specs in your brief translate directly into a sign that performs, from MDO plywood selection to a weatherproof finish system matched to your sign’s exposure.

- Design support that helps prepare production-ready layouts sized for the required viewing distance.
- Guidance on substrate selection based on sign exposure.
- Recommendations for weatherproof finishing aligned with maintenance needs and budget.
- Installation coordination to reduce gaps between design and fabrication stages.
If you have a wall, post, or storefront that needs a sign, start with a custom signs quote request and send along your site photos and dimensions.
Sources
- International Sign Association (ISA) — design and placement guidance
- 2010 ADA Standards for Accessible Design — Chapter 7: Signs
FAQ
What size should a wood sign be for my business?
Sign size depends on viewing distance more than personal preference: the ISA rule of thumb calls for at least 1 inch of letter height per 25 feet of viewing distance. A storefront sign read from a sidewalk needs far smaller letters than a roadside sign read from a moving car.
What is the best wood for an outdoor commercial sign?
MDO plywood is a standard choice for painted exterior signs because it holds paint better than smooth plywood, while cedar and redwood work well when a natural wood look is desired with a penetrating stain. The right choice depends on whether the sign will be painted or left with visible grain, and on its exposure to sun and moisture.
Does my wood sign need to meet ADA requirements?
Only certain permanent signs, generally interior room identification and some directional signage, fall under the 2010 ADA Standards, which require tactile characters, Grade 2 Braille, and specific mounting heights. A general exterior storefront or wayfinding sign typically does not need tactile elements, but check with your fabricator if your sign identifies a permanent room or space.
How much does a custom wood sign cost?
Cost depends on square footage, substrate, finish complexity, and installation requirements, so pricing varies project to project rather than following a flat rate. Custom Signs Today provides pricing after reviewing your specific brief; request a quote through the custom signs page for project-specific numbers.
How often does a wood sign need to be refinished?
Refinishing frequency depends on the finish system and exposure: penetrating stains generally need more frequent touch-ups than a properly primed and painted panel. Ask your fabricator for a maintenance schedule specific to your sign’s finish and location when you receive your quote.

