{
“@type”: “Article”,
“image”: {
“url”: “https://csuxjmfbwmkxiegfpljm.supabase.co/storage/v1/object/public/blog-images/organization-6408/1775867836761_Designer-planning-banner-project-at-kitchen-counter.jpeg”,
“@type”: “ImageObject”,
“caption”: “Designer planning banner project at kitchen counter”
},
“author”: {
“url”: “https://customsignstoday.us”,
“name”: “Customsignstoday”,
“@type”: “Organization”
},
“@context”: “https://schema.org”,
“headline”: “Step-by-step guide to the promotional banner design process”,
“publisher”: {
“url”: “https://customsignstoday.us”,
“name”: “Customsignstoday”,
“@type”: “Organization”
},
“inLanguage”: “en-US”,
“articleBody”: “Follow this step-by-step promotional banner design process to boost visibility, choose the right materials, and measure real ROI for your business or event.”,
“description”: “Follow this step-by-step promotional banner design process to boost visibility, choose the right materials, and measure real ROI for your business or event.”,
“datePublished”: “2026-04-11T00:39:46.443Z”
}
TL;DR:
- A well-designed banner can significantly increase sales and foot traffic when planned properly.
- Preparation, clear messaging, contrasting visuals, and strategic placement are key to effectiveness.
- Choosing durable materials and proper installation ensures long-term impact and measurement of results.
A business opens its doors for a grand sale, balloons tied to the entrance, staff ready to help — but the banner out front is faded, cluttered, and unreadable from the sidewalk. Foot traffic walks right past. This scenario plays out constantly for small businesses and event organizers who invest in banners without a clear process behind them. A well-executed promotional banner can boost sales by 10 to 32% and drive measurable foot traffic, but only when designed and installed with intention. This guide walks you through every stage of the process so your next banner actually works.
Table of Contents
- What you need before starting the banner design process
- Step-by-step: Designing your promotional banner
- Selecting the right materials, size, and finishing options
- Installation, visibility, and measuring your banner’s impact
- Our take: The future of promotional banner design for SMBs and events
- Create high-impact banners with expert support
- Frequently asked questions
Key Takeaways
| Point | Details |
|---|---|
| Preparation is key | Gather all requirements and clarify your objectives before starting banner design. |
| Step-by-step drives results | Following a structured process ensures your banners are effective and error-free. |
| Material matters | Choose the right banner material and finishing to maximize impact and durability. |
| Measure your success | Track foot traffic or sales to see real ROI from your promotional banners. |
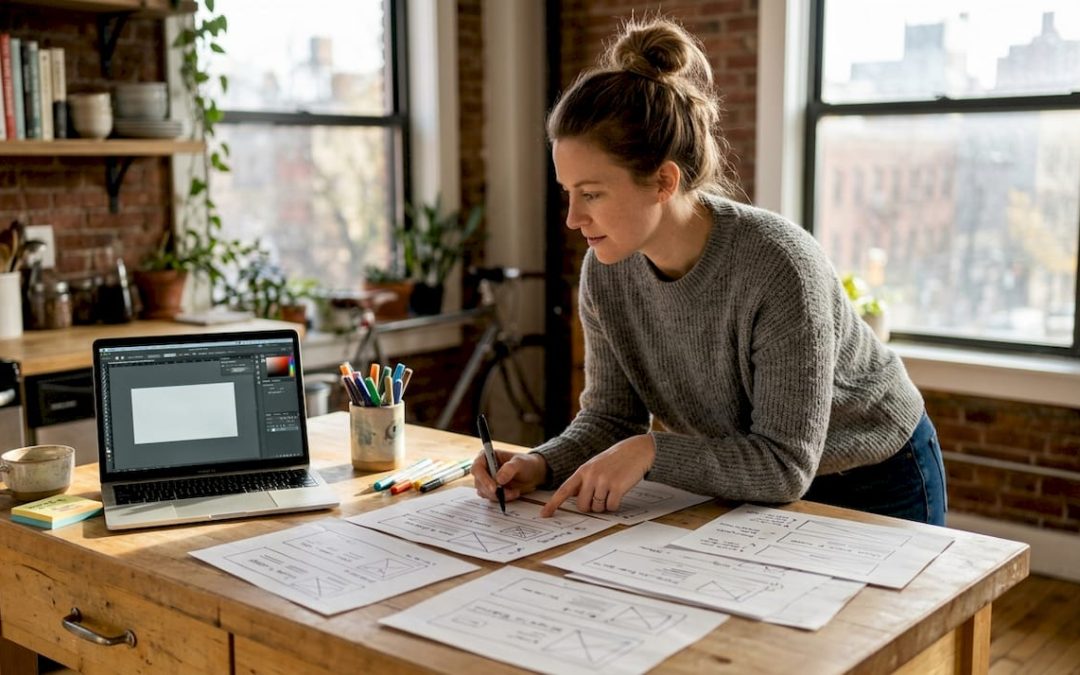
What you need before starting the banner design process
Before any design software opens or any artwork gets created, you need to organize your project requirements. The banner design process for small businesses and event organizers typically follows 5 to 6 structured steps, and skipping the preparation phase is the most common reason projects stall or go over budget.
Start with three core questions: What is the banner’s primary objective? Who is the target audience? Where exactly will it be installed? A banner promoting a weekend sale at a retail storefront has completely different requirements than one hanging inside a trade show booth or stretched across a festival entrance.
Here is a checklist of information and files to gather before you begin:
- Brand assets: Logo files in vector format (.AI, .EPS, or high-resolution .PNG)
- Brand colors: Exact hex codes or Pantone references
- Key message: One headline, one supporting line, and a clear call to action
- Event or promotion details: Dates, times, location, website, or QR code
- Installation specs: Dimensions of the mounting area, hardware available (poles, walls, grommets)
- Deadline: Print production time plus shipping or pickup window
Once you have those details locked, choose your size and material. The table below covers the most common combinations:
| Use case | Recommended size | Material | Finishing |
|---|---|---|---|
| Retail storefront | 3 x 8 ft | 13 oz vinyl | Hemmed, grommets |
| Trade show booth | 2 x 6 ft | Fabric or polyester | Pole pockets |
| Outdoor event entrance | 4 x 8 ft | 18 oz vinyl | Reinforced corners |
| Indoor event backdrop | 8 x 10 ft | Fabric | Velcro or frame |
| Fence or stadium wrap | Custom | Mesh vinyl | Sewn edges |
For a deeper look at what separates indoor from outdoor options, the guide to banner material types breaks down each category with practical use-case advice. If you want a more technical breakdown of what goes into each material, the banner materials guide is worth reviewing before you finalize your order.
Pro Tip: Always visit the installation location at the same time of day your banner will be seen most. Shadows, glare, and competing visual clutter can make a perfectly designed banner nearly invisible in real-world conditions.
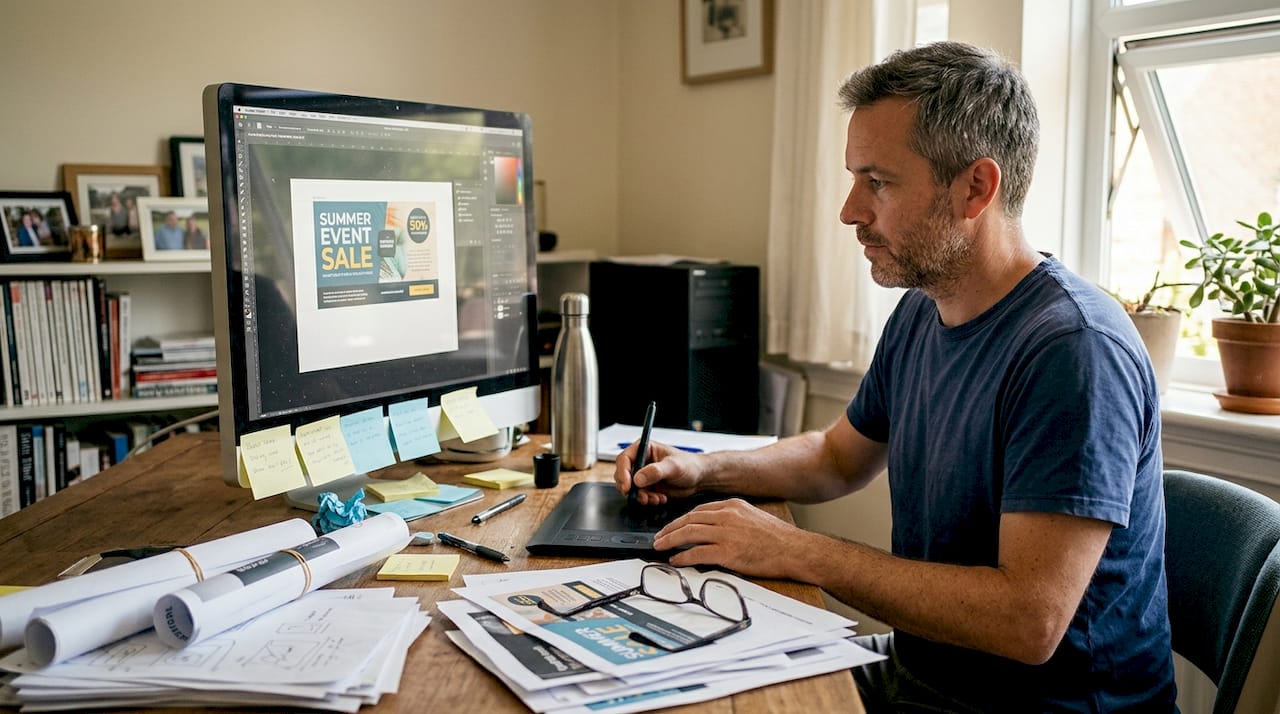
Step-by-step: Designing your promotional banner
With everything assembled, it is time to move through each step of actually designing your banner. The business banner creation steps outlined below follow the same 5 to 6 stage structure used by professional sign shops and in-house marketing teams alike.
Step 1: Write the creative brief. Define the message, audience, tone, and one measurable goal before touching any design tool.
Step 2: Sketch a layout. Even a rough pencil sketch helps you establish visual hierarchy before committing to digital work.
Step 3: Build the digital file. Use design software at the correct resolution (typically 100 to 150 DPI at full print size). Place your headline at the top or center, brand logo prominently, and contact or action details at the bottom.
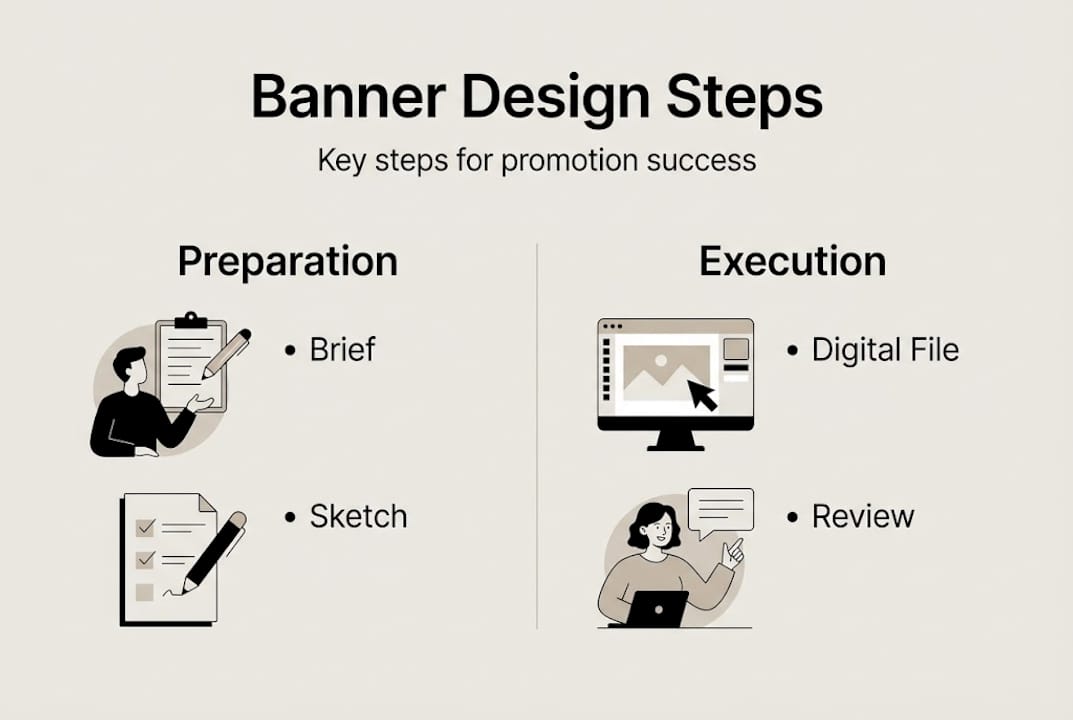
Step 4: Apply color and typography. Stick to two or three brand colors and no more than two font families. High contrast between text and background is non-negotiable for outdoor readability.
Step 5: Review for readability. Step back from your screen or print a scaled version. If you cannot read the headline in three seconds, simplify it.
Step 6: Submit for proof approval. Request a digital proof from your printer before production begins. Check spelling, bleed margins, and color accuracy.
Digital web banners and physical printed banners share some design principles, but their priorities differ in important ways:
| Factor | Physical banner | Digital/web banner |
|---|---|---|
| Resolution | 100-150 DPI at size | 72 DPI screen resolution |
| Viewing distance | 10 to 50+ feet | 18 to 24 inches |
| File format | PDF, AI, EPS | PNG, GIF, HTML5 |
| Animation | None | Optional and effective |
| Call to action | Phone, QR code, URL | Clickable button |
As web banner ad design research confirms, digital and physical banners require different visual strategies even when the brand message is identical.
“A banner that tries to say everything ends up saying nothing. Readability is not a design preference — it is the entire point.”
Pro Tip: Use a visual hierarchy of three levels: primary (headline), secondary (supporting detail), and tertiary (contact or action). Readers scan in that order, so make sure each level is visually distinct in size and weight. Strong signage design tips consistently point to hierarchy as the single biggest factor in banner effectiveness.
Selecting the right materials, size, and finishing options
With a design direction in hand, choosing high-quality materials and finishes ensures your banner performs in the real world. The material you select directly affects how long your banner lasts, how it looks in different lighting, and whether it survives weather or repeated handling.
Here are the most common durable banner materials and when to use each:
- 13 oz vinyl: The standard for most outdoor banners. Lightweight, affordable, and prints with vivid color. Best for short to medium-term campaigns of one to six months.
- 18 oz vinyl: Heavier and more tear-resistant. Ideal for high-traffic areas, long-term outdoor use, or banners that will be rolled and reused multiple times.
- Mesh vinyl: Has small perforations that allow wind to pass through. Essential for fence banners, stadium wraps, or any installation where wind load is a concern.
- Fabric (polyester or knit): Soft, wrinkle-resistant, and professional-looking. The top choice for indoor events, trade shows, and retail environments where a premium appearance matters.
- Scrim vinyl: A reinforced woven backing makes this the most durable option for long-term outdoor or semi-permanent installations.
For a full breakdown of how each option holds up over time, the banner materials explained guide covers durability ratings and environmental performance side by side.
Size matters just as much as material. Here are standard recommendations based on scenario:
| Scenario | Recommended size | Viewing distance |
|---|---|---|
| Storefront entrance | 3 x 4 ft or 2 x 6 ft | 10 to 20 ft |
| Parking lot or roadside | 4 x 8 ft | 30 to 60 ft |
| Indoor event backdrop | 8 x 10 ft | 5 to 15 ft |
| Stage or main stage banner | 6 x 20 ft | 50 to 100 ft |
| Trade show table banner | 2 x 3 ft | 3 to 8 ft |
Businesses that invest in well-made, durable signage report sales lifts of up to 32%, which makes the material upgrade from 13 oz to 18 oz vinyl a very easy decision when longevity matters.
Pro Tip: For any outdoor banner in a region with strong winds or storms, add grommets every 18 to 24 inches rather than the standard 24 to 36 inches. The extra hardware costs almost nothing but can prevent a banner from tearing free during bad weather.
Installation, visibility, and measuring your banner’s impact
Once your banner is ready, strategic installation and ongoing measurement ensure you get the maximum value from your investment. Even a perfectly designed banner loses impact if it is installed at the wrong angle, blocked by a tree, or mounted too high for pedestrians to read.
Follow these installation steps for a clean, safe result:
- Inspect the mounting surface. Check that walls, fences, or poles are structurally sound and can handle the banner’s weight and wind load.
- Measure and mark. Use a level and tape measure to position the banner evenly before drilling or tying off any hardware.
- Attach hardware first. Install grommets, clips, or bungee cords before lifting the banner into position.
- Hang and tension evenly. Pull the banner taut from all corners to prevent sagging, which distorts the printed image.
- Do a visibility check. Walk 20, 50, and 100 feet away to confirm readability from each likely approach angle.
For a more detailed walkthrough of hardware and mounting options, the safe signage installation guide covers both DIY and professional installation scenarios.
Key visibility factors to evaluate after installation:
- Viewing angle: Is the banner facing the primary direction of foot or vehicle traffic?
- Lighting: Is the banner lit naturally or artificially during peak viewing hours?
- Obstructions: Do trees, parked vehicles, or other signs block any part of the message?
- Contrast with background: Does the banner color stand out against the wall or environment behind it?
For businesses looking to maximize outdoor presence, exterior signs that combine banners with permanent signage create a layered visibility strategy that works around the clock.
“Improved signage boosts sales 10 to 32% and foot traffic by 22%. Digital signage alone delivers an ROI of over 314%.”
To measure your banner’s real-world impact, track sales volume, foot traffic counts, or event RSVPs during the two weeks before and after installation. Even a simple before-and-after comparison gives you data to justify future signage investments.
Our take: The future of promotional banner design for SMBs and events
Here is something most signage guides will not tell you: small businesses are actually better positioned than large brands to win with banner advertising right now. Large companies move slowly. They require approvals, brand committees, and agency timelines. You can design, print, and install a new banner in 48 hours if your process is dialed in.
The playing field is also shifting fast. AI design tools now offer prompt-to-layered design files in seconds, with reported time savings of 92% and click-through rate lifts of 12%. That means a solo event organizer with no design background can produce professional-grade artwork that would have required an agency three years ago.
But here is the part that matters most: technology does not replace clarity. The businesses that consistently get results from their banners are not the ones with the fanciest graphics. They are the ones with the clearest message, the strongest contrast, and the most strategic placement. Simplicity is a timeless competitive advantage.
ROI data is now accessible enough that every banner investment should be measured. Use the numbers to guide your next decision, not just your instincts. The signage design tips that drive results today are the same ones that will drive results in five years: clarity, contrast, and a single compelling call to action.
Create high-impact banners with expert support
You now have the full process, from gathering requirements to measuring results. Putting it into practice is where the real work begins, and having the right production partner makes every step faster and more reliable.
At Custom Signs Today, we produce custom banners built for real-world performance, from material selection through finishing and fulfillment. Whether you need a single event backdrop or a full campaign run, our team guides you through every decision. We also offer face change signs for businesses that need flexible, reusable display systems. Explore the full range of custom sign solutions or request a free quote today to get your next banner project moving.
Frequently asked questions
What size is best for a business or event banner?
Common sizes range from 3 x 4 ft for entrances to 4 x 8 ft for higher-visibility placements. Always factor in how far away your audience will be standing when they read it.
Which material lasts longest outdoors?
13 to 18 oz vinyl is the most durable choice for outdoor banners, offering strong weather resistance, tear strength, and long print life. Heavier weight means longer lifespan under sun, rain, and wind exposure.
How can I measure the impact of my promotional banner?
Track sales volume, foot traffic, or event RSVPs in the two weeks before and after your banner goes up. Sales improvements of 10 to 32% are documented when signage is upgraded or newly installed.
What are the most important design tips for banners?
Keep your headline clear and readable from a distance, use strong color contrast, and include your logo and a single call to action. Avoid crowding the layout with too many messages or competing visual elements.