
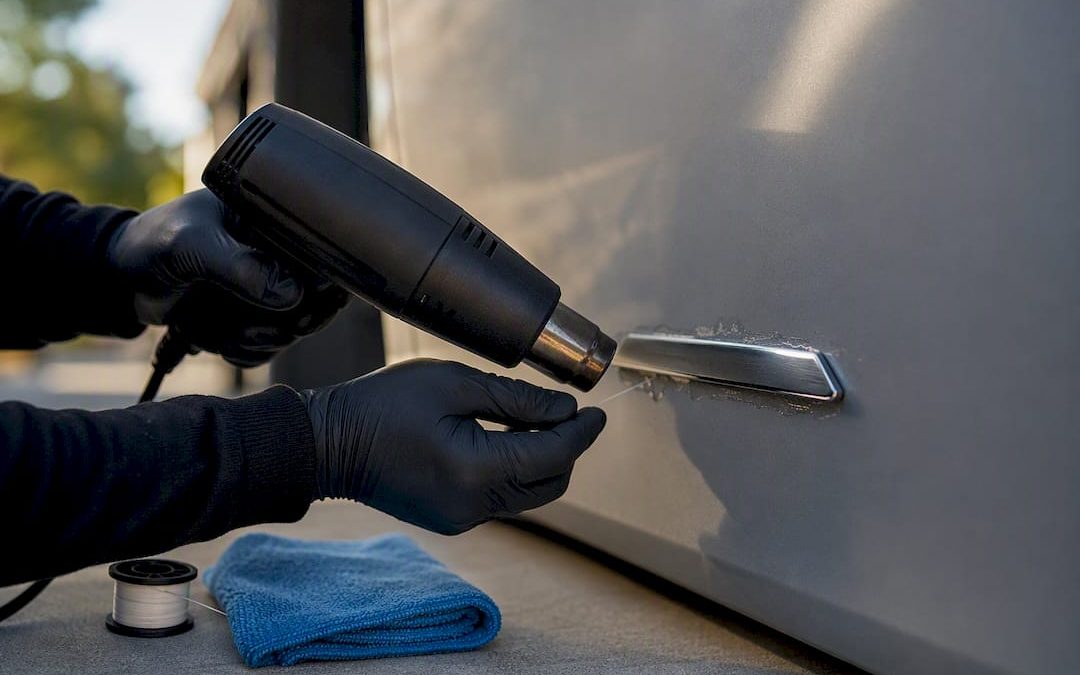
Yes, WD-40 can help remove car badges, but only as the residue-cleanup step in a process that starts with heat and a mechanical release, not as your first move. The safe sequence is: warm the badge with a hair dryer or low heat gun, saw through the softened adhesive with fishing line or dental floss, then wipe leftover glue with WD-40 on a folded cloth before washing and re-waxing the panel.
TL;DR:
- Heat the badge for one to two minutes on low to soften the adhesive before attempting to remove it with fishing line or floss.
- Use WD-40 on a cloth to clean residual adhesive after the badge is freed, ensuring you wash and prep the panel thoroughly afterward.
- Avoid metal tools or razor blades during removal, as they can gouge the clear coat and cause irreversible damage.
- For stubborn badges on recessed mounts or wraps, professional removal is recommended to prevent panel damage or misalignment.
- Proper cleaning and panel prep after removal are essential to ensure long-lasting wax or sealant bond, preventing dirt and oil buildup.
Table of Contents
- Tools You Need Before You Touch That Badge
- How Do You Remove a Car Badge Step by Step?
- WD-40 vs. Isopropyl Alcohol vs. Dedicated Adhesive Removers
- Cleaning Up and Protecting the Paint Afterward
- The Heat Technique Signage Pros Use, and When to Call One
- What DIYers Get Wrong About Badge Removal
- Want a Pro to Handle the Badge, Wrap, or New Graphics?
- Sources
- FAQ
Tools You Need Before You Touch That Badge
Grab everything before you start. Stopping halfway to hunt for a tool while a badge is half-lifted and the adhesive is cooling is how people end up reaching for a metal scraper out of frustration, and that’s the fastest way to gouge the clear coat.
Here’s what belongs in your kit:
- A hair dryer or heat gun with a low setting (heat guns run hotter and need more distance from the panel)
- 20 to 30 feet of fishing line or a length of unwaxed dental floss
- WD-40 Multi-Use Product, or WD-40 Specialist adhesive remover for heavier foam-tape badges
- Microfiber cloths, several, since you’ll dirty more than one
- Painter’s tape to mask surrounding trim and body lines
- Plastic trim tools (never metal) as backup, not primary tools
- Car shampoo, isopropyl alcohol, or a panel prep solution, and your usual wax or sealant
Skip the razor blade. It feels like the fast option, but one slip cuts straight through clear coat, and there’s no fixing that without repainting. Fishing line stays clear of the paint surface entirely because it rides along the adhesive layer underneath the badge, not across the finish.
Work in the shade with the panel above 70°F. Adhesive gets brittle and stubborn in the cold, and direct sun makes it tough to judge how hot the panel is actually getting under your heat source, according to AutoGuide’s step-by-step breakdown. A garage or a shaded driveway on a mild day is close to ideal.
How Do You Remove a Car Badge Step by Step?
The order matters more than the tools. Heat first to soften the adhesive, floss to cut it mechanically, then WD-40 only to finish off what the floss leaves behind.
Spot test and mask up. Dab a small amount of whatever solvent you’ll eventually use on an inconspicuous spot, like inside the door jamb, and wait a few minutes to check for discoloration. Tape off trim, seams, and neighboring panels so nothing drips where it shouldn’t.
Heat the badge for a short time until it is warm to the touch and the adhesive softens. Keep a hair dryer moving in slow circles, or hold a heat gun on low six to eight inches back. You’re aiming for warm-to-the-touch, not hot. Press a corner of the badge gently; if it flexes slightly, the adhesive underneath is softening.
Saw through the adhesive with floss or fishing line. Loop it behind one edge of the badge and work it side to side in short, steady passes, like flossing a very stubborn tooth. Keep the line flat against the panel and moving parallel to the surface, never angled up into the badge.
Reheat if the line stalls. If the floss starts dragging or feels like it’s grinding rather than gliding, stop. That resistance means the adhesive has cooled or was never fully softened, and forcing it is exactly what scores clear coat. A short 20 to 30 second reheat almost always frees it back up.
Lift the badge free. Once the line has traveled the full width, the badge should come away with light pressure from a plastic trim tool at most. If it’s still gripping, go back to step 2.
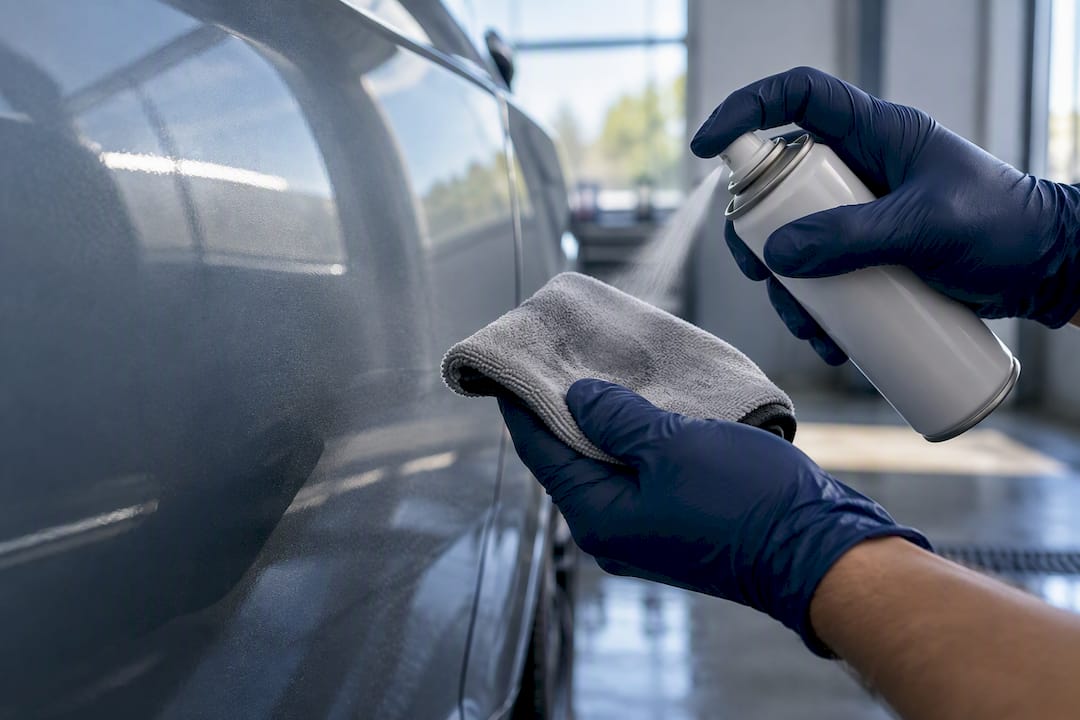
Treat leftover residue with WD-40, on a cloth, not straight from the can. Fold a microfiber cloth, spray the WD-40 onto the cloth, then dab and gently rub the residue. Let it sit for roughly a minute to break down the glue instead of scrubbing right away. WD-40’s own guidance on removing sticker residue confirms it works well for this, but flags that it leaves an oily film that has to be washed off before you’re done.
Wash, then panel-prep. A full car shampoo wash gets the bulk of the WD-40 off. Follow with isopropyl alcohol or a dedicated panel prep wipe to strip any last trace before you reapply wax or sealant.
Pro Tip: Work in short, patient passes rather than one long sawing motion. Detailers describe this as a gradual release, not a scraping contest, and reheating for a few seconds costs you far less time than buffing out a scratch later.
Know when to stop and call in help. Badges mounted on chrome studs, sunk into recessed housings, or sitting on a vehicle wrap are a different job entirely. Wraps in particular can lift or tear under the same heat that’s perfectly safe for factory paint, so treat those as a separate project.
WD-40 vs. Isopropyl Alcohol vs. Dedicated Adhesive Removers
WD-40 isn’t the only chemical option, and it isn’t always the best one for every stage of residue.
- WD-40 Multi-Use or Specialist: Good middle-ground choice. Effective on light to moderate residue, widely available, gentle enough for most clear coats when applied on a cloth, but it leaves an oily film that demands a proper wash afterward.
- Isopropyl alcohol: Cuts through thin glue films fast and evaporates cleanly, leaving less film behind than WD-40. It struggles more on thick foam-tape residue and can dry out trim or rubber if overused.
- Citrus-based removers: Gentler on the nose and on plastics, decent for light residue, but generally slower to work on stubborn multi-layer adhesive than either WD-40 or dedicated removers.
- Automotive adhesive removers (3M, Goo Gone, and similar): Formulated specifically for decal and badge foam tape, so they dissolve heavy residue faster and with less oily leftover than a general-purpose lubricant like WD-40.
The practical rule: start with the mildest option that’s likely to work, since escalating is easy and de-escalating a paint problem is not. Soap and water first, WD-40 or alcohol for average residue, dedicated adhesive remover only when you’re dealing with decades-old foam tape that laughs at everything else.
However you apply any of these, spray onto the cloth first, not the panel. Direct spraying lets solvent run into seams, trim, and adjacent panels where you have far less control over dwell time.
Cleaning Up and Protecting the Paint Afterward
The removal is only half the job. What you do in the next fifteen minutes decides whether that spot looks better or worse than the rest of the car six months from now.
- Wash the area with car shampoo using the two-bucket method, one bucket for soapy water, one for rinsing your mitt, to avoid dragging grit across the fresh surface.
- Follow with isopropyl alcohol or a panel prep spray to strip any last trace of WD-40 film. AutoGuide notes this step matters because leftover residue acts as a dirt magnet that shortens the life of whatever wax you apply next.
- If the surface still feels slightly rough or tacky under a clean palm, run a clay bar over the spot before waxing.
- Finish with a coat of wax or sealant to match the rest of the panel’s protection level.
A film you can’t see still counts. Even a faint oily residue left behind by WD-40 will noticeably cut down how long a fresh coat of wax lasts, because wax can’t properly bond to a surface that isn’t fully clean. Run your fingertips over the spot after washing; if it feels the least bit slick or greasy compared to the surrounding paint, it needs another alcohol wipe before you wax.
If you notice fine swirl marks or micro-marring where the badge used to sit, that’s usually from the flossing pass being too aggressive or the adhesive not being fully softened first. Light marring often buffs out with a machine polish; deeper marks are worth a professional paint correction rather than more DIY rubbing.
The Heat Technique Signage Pros Use, and When to Call One
Vinyl and decal work runs on the same principle as badge removal, just at a different scale. Custom Signs Today’s approach to pulling stubborn vinyl stickers relies on a focused 30 to 60 second heat application to soften adhesive evenly before any mechanical lifting starts, the same logic behind heating a badge before flossing it. The heat does the work; the tool just finishes the release.
That principle scales differently depending on the job, though, which is why some situations call for a professional rather than a weekend project:
- Badges seated on chrome studs or pins that go through the panel, where forcing removal risks bending the mounting hardware
- Recessed badge housings where a heat gun can’t get even coverage without also warming surrounding trim
- Panels covered in a full vehicle wrap, since wrap film reacts to heat very differently than factory paint
- Severely aged adhesive that’s hardened past the point where floss or a hand-held heat source can soften it evenly
- Any case where you’re planning to install new vehicle lettering or decals right after removal, since a pro can prep the surface to spec in the same visit
Custom Signs Today handles vehicle lettering, wraps, and decal work with materials built for outdoor durability, which matters if you’re removing an old badge to make way for new graphics rather than just cleaning up bare paint.
What DIYers Get Wrong About Badge Removal
The single most common mistake isn’t chemical, it’s impatience. People reach for a scraper the moment floss slows down, when the actual fix is thirty more seconds of heat. That reflex to force things is where nine out of ten paint-damage stories start.
WD-40 deserves its reputation as a useful residue solvent, but it was never meant to be the whole plan. Treat it as the cleanup crew that shows up after heat and floss have already done the heavy lifting, not the demolition tool. Skip the wash-and-panel-prep step afterward and you’ll trade a sticky badge outline for a dull, dirt-attracting patch that ages worse than the badge did.
If there’s one habit worth adopting, it’s working in short passes and reheating rather than pushing harder. A stalled saw stroke is the adhesive telling you it needs more warmth, not more muscle.
— Yossi
Want a Pro to Handle the Badge, Wrap, or New Graphics?
Custom Signs Today is the alternative to a full weekend of trial-and-error debadging: instead of testing solvents on your own paint, you hand the panel to a shop that already knows how heat, adhesive, and clear coat interact, and skip the risk of a scored finish entirely.

If your badge sits on a chrome stud, on a wrapped panel, or you’re planning to swap the old emblem for fresh vehicle lettering or a new wrap once the surface is bare, that’s exactly the kind of job worth handing off. DIY heat-and-floss works well for a straightforward factory badge on painted steel. It gets riskier fast once wrap film, recessed mounts, or decades-old adhesive enter the picture, and a small mistake there tends to cost more to fix than a professional job would have in the first place. A professional vehicle graphics team can work with durable, outdoor-rated materials and handle everything from clean badge removal to full lettering and wrap installation in one visit. Request a free quote through the vehicle wraps and vinyl signage page and describe what’s on the panel now. You’ll get a straight answer on whether it’s a same-day fix or a bigger job before you commit to anything.
Sources
The removal sequence and safety warnings in this guide draw on the AutoGuide badge removal walkthrough, WD-40’s official FAQ on removing its own product, and WD-40 UK’s guidance on sticker residue. For plastic and trim care after solvent use, see Diamondbrite’s guide to removing wax from plastic. Custom Signs Today’s pro heat method for vinyl stickers covers the same heat principle applied to decal work.
- The Clean Look: How to Remove Your Car’s Badges the Right Way | AutoGuide
- WD-40 FAQ — How do you remove WD-40® Multi-Use Product?
- How to remove sticker residue from a car | WD-40 UK
FAQ
Can You Use WD-40 to Debadge a Car?
Yes, WD-40 works well for dissolving the adhesive residue left behind once a badge has been physically lifted, but it shouldn’t be your first tool. Heat the badge and saw through the adhesive with fishing line or floss first, then use WD-40 on a folded cloth to clean up what’s left, following WD-40’s own residue-removal guidance.
What Is the Best Adhesive Remover for Car Badges?
There isn’t one single best product for every situation. WD-40 handles light to moderate residue well and is widely available, isopropyl alcohol cuts through thin glue films with less oily film left behind, and dedicated automotive adhesive removers like 3M’s products dissolve heavy foam-tape residue fastest on stubborn, aged badges.
Will WD-40 Damage My Car’s Paint?
Used carefully, WD-40 is generally safe on clear-coated paint when applied to a cloth rather than sprayed directly and wiped off promptly. Always spot test on an inconspicuous area first, since WD-40’s manufacturer guidance specifically recommends this step before broader use on any finish.
How Long Should I Heat a Badge Before Trying to Remove It?
One to two minutes with a hair dryer or heat gun on low is typically enough to soften the adhesive without overheating the paint. Test pliability by pressing a corner gently; if the badge flexes slightly, it’s ready for the fishing line or floss step.
What if the Badge Won’t Come off Even After Heating and Flossing?
That usually means chrome mounting studs, a recessed housing, or a wrapped panel underneath, all situations where forcing it risks real damage. At that point it’s worth having a specialist handle the removal, or having new vehicle lettering installed once the old badge and adhesive are professionally cleared.

