
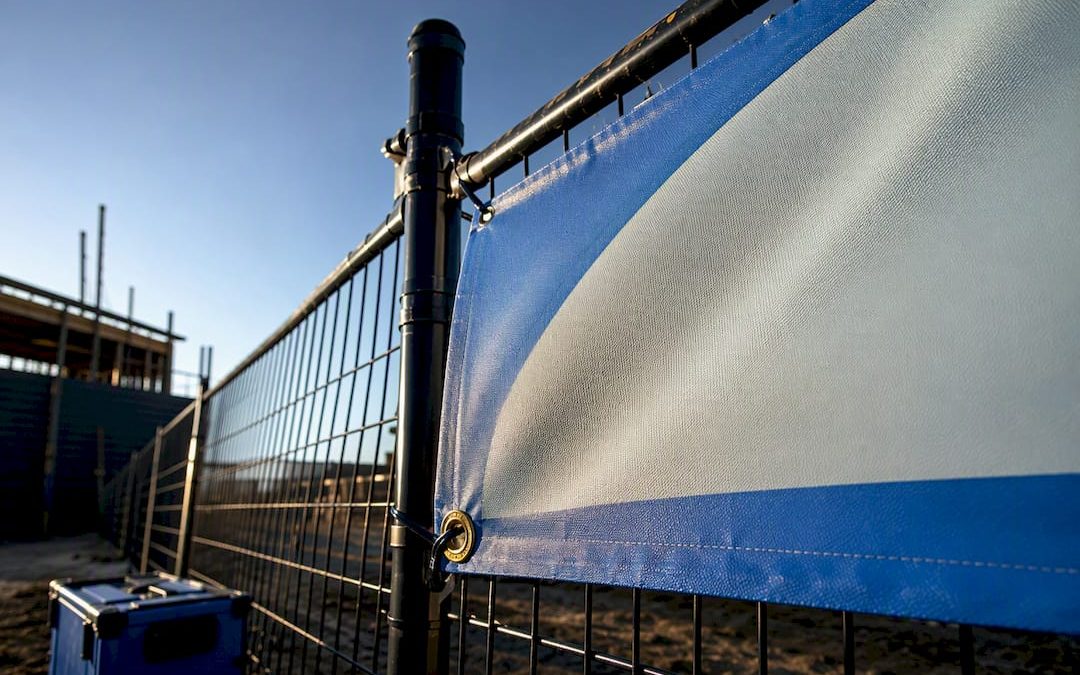
A scrim banner is a vinyl banner built around a woven polyester mesh core, which is what gives it the tear resistance a plain vinyl sheet can’t match. Pick scrim when your banner faces wind, weather, or months of outdoor duty, from a construction fence to a storefront that stays up all season. For a two-day trade show indoors, you probably don’t need it.
TL;DR:
- Heavier scrim vinyl, like 15 to 18 oz, is suitable for outdoor banners expected to last several months, while 13 oz is best for short-term use.
- Proper installation, including evenly spaced grommets and tensioned mounting, is critical to prevent tearing, regardless of material weight.
- Scrim banners are most effective for outdoor signage in wind-prone areas, construction fencing, or permanent displays, with weight and finish tailored to the environment.
- Lightweight 13 oz banners provide an optimal balance of cost and durability for event and seasonal indoor or outdoor applications.
- Ordering from suppliers who specify whether their scrim vinyl is laminated or coated ensures better color accuracy and finish quality.
Table of Contents
- What Is Scrim Vinyl, and How Are Scrim Banners Made?
- Banner Weights Explained: 13 oz, 15 oz, and Beyond
- Where Scrim Banners Actually Get Used
- Weighing the Upside Against the Trade-Offs
- Getting the Finish and Mounting Right
- How to Care for a Scrim Banner and Extend Its Life
- What Drives the Price of a Scrim Banner
- Where to Buy Scrim Banners and What to Look for in a Supplier
- Lead Times: How Long Scrim Banner Production Actually Takes
- Why Getting Scrim Right Is Less About the Material, More About the Job
- Get a Quote on Your Custom Scrim Banner
- Sources
What Is Scrim Vinyl, and How Are Scrim Banners Made?
The scrim itself is a grid of woven polyester threads, similar in concept to the mesh backing on drywall tape. On its own, it’s floppy and see-through. Sandwiched between two layers of PVC vinyl, it becomes something else entirely: a printable, weatherproof surface that resists ripping even when a grommet takes a hard gust.
Manufacturers build this in one of two ways. Most scrim vinyl is laminated, meaning the vinyl layers are bonded to the scrim under heat and pressure, sealing the mesh completely inside. Some producers use a coated method instead, running vinyl directly onto the fabric. The difference affects printability and finish, so it’s worth asking your supplier which process they use if color accuracy matters to you.
Where scrim differs from blockout material:
- Scrim vinyl: structural reinforcement from the mesh core, but not necessarily opaque
- Blockout vinyl: an added opaque layer that stops light transmission, useful for double-sided prints
- Standard vinyl (no scrim): lighter, cheaper, and far more prone to tearing at stress points
If you need a banner readable from both sides without one image bleeding through the other, blockout construction solves that, while scrim reinforcement helps prevent tearing.
Banner Weights Explained: 13 oz, 15 oz, and Beyond
Weight is the first spec anyone should check, and it’s measured in ounces per square yard of material. Heavier isn’t automatically better. It’s a trade-off between longevity, cost, and how the banner hangs.
13 oz scrim vinyl is the industry default for a reason. It’s light enough to ship and hang easily but tough enough to survive a weekend outdoors, a trade show floor, or a seasonal storefront promotion.
15 to 18 oz materials cost more and weigh more, but they’re the right call for anything staying outside for months rather than weeks: construction perimeter signage, permanent property banners, or anything mounted where replacement is a hassle.
A quick way to think about the numbers:
- Denier measures the thickness of the individual threads in the scrim, and higher denier generally means a stronger core
- Mil thickness refers to the vinyl face layers and affects both durability and how crisp the print looks
- Heavier weight often means better drape, which matters if the banner will be seen up close rather than from a distance
A useful rule of thumb: a 13 oz scrim banner tends to offer the best cost-to-performance ratio for most event and short-term outdoor jobs, while anything meant to survive a full season outdoors usually justifies stepping up in weight.
Reach for blockout when you’re printing different graphics on each face or hanging the banner somewhere with strong backlighting that would otherwise show ghosting through the material.
Where Scrim Banners Actually Get Used
Different jobs call for different builds, and matching weight to timeline saves money without sacrificing performance.
- Event banners. A weekend festival, a grand opening, or a sports tournament rarely needs anything heavier than 13 oz. It goes up, does its job for a few days, and comes down.
- Construction site signage. Fencing wraps and project identification signs sit outside for months in full sun and rain, which is exactly where 15 to 18 oz scrim earns its cost. Property developers running longer projects often pair this with other construction-site signage strategy when coordinating subcontractor visibility and perimeter branding.
- Trade show displays. Indoor use means less weather stress, so 13 oz scrim or even standard vinyl usually gets the job done, though scrim still helps if the booth travels between shows.
- Retail and storefront promotions. A seasonal sale banner mounted to a storefront for a month or two sits comfortably in the 13 to 15 oz range, especially if it’s exposed to wind coming off a parking lot or street.
- Perforated mesh applications. Fence wraps and building wraps in high-wind zones sometimes swap solid scrim for perforated mesh, trading some print solidity for airflow that keeps the material from acting like a sail.
Weighing the Upside Against the Trade-Offs
Scrim earns its reputation from three things: durability, water resistance, and versatility. That polyester core stops a small nick from turning into a foot-long rip, which is the single biggest failure mode for plain vinyl banners in wind.
The advantages, in practical terms:
- Tear resistance: the woven core stops small tears from spreading under tension
- Water resistance: the vinyl layers shrug off rain without degrading the print
- Versatility: works across weights and finish options, from festival signs to permanent property banners
- Print quality: solid vinyl face holds detailed graphics and color better than mesh alone
The trade-offs are straightforward too. Heavier weights cost more per square foot, add shipping weight, and take slightly longer to produce. Solid-faced scrim also catches more wind than perforated mesh, so a high-wind location may call for a different substrate altogether.
Pro Tip: Don’t assume the heaviest material automatically survives longest outdoors. A poorly mounted 18 oz banner can tear at the grommets just as fast as a well-mounted 13 oz one. Installation quality matters as much as material weight.
Getting the Finish and Mounting Right
Finishing choices affect how a banner performs almost as much as the material itself. Welded hems fuse the vinyl edge under heat, giving a clean, reinforced border. Stitched hems add thread reinforcement, which some installers prefer for very large banners. Grommets, spaced along the hem, are the most common mounting point, though pole pockets and Velcro strips work better for certain frame types.
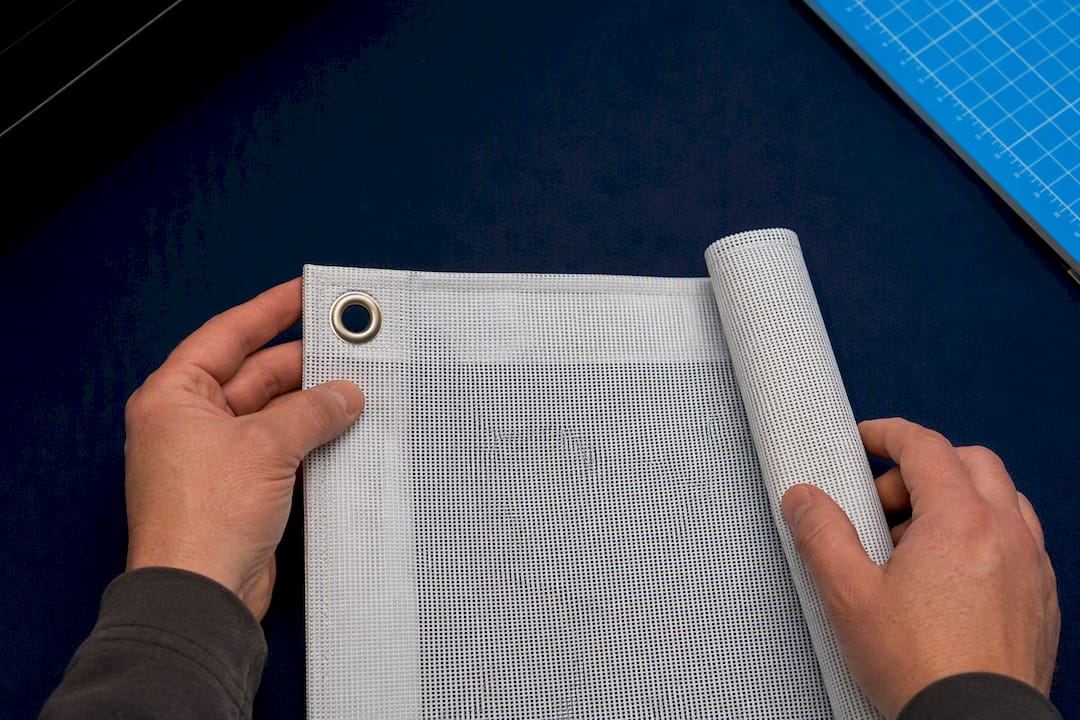
The real point of failure isn’t usually the fabric. It’s the mounting. Concentrated stress at a single grommet is what causes tearing, even on heavier material, when a banner is left loose enough to flap in the wind. Distributing tension across every attachment point, using spreader straps or turnbuckles where possible, keeps that stress from concentrating anywhere.
A few practices worth following on any outdoor install:
- Space grommets no more than 2 to 3 feet apart on larger banners
- Keep the banner taut rather than loose. A slack banner acts like a flag and stresses every grommet with each gust
- Add wind slits or choose reinforced corners for exposed sites
- Consider mesh instead of solid scrim if the location sees regular high winds
Pro Tip: Installation quality matters more than most buyers assume. Sign professionals emphasize distributed attachment points and proper tensioning over simply buying a heavier material, and it’s the cheaper fix too.
How to Care for a Scrim Banner and Extend Its Life
Cleaning is simple: mild soap, a soft brush, and a rinse does the job. Skip anything with solvents, which can strip the print or cloud the vinyl surface over time.
Before storing a banner, let it dry completely. Roll it loosely around a tube rather than folding it flat. Folds create creases that weaken the vinyl and can crack the print along the fold line after repeated use. Keep stored banners out of direct sun, since UV exposure over time fades ink even when the banner isn’t hanging.
Small tears are usually fixable with a vinyl patch kit or clear repair tape, and a torn grommet can often be reinforced rather than replaced outright. Our guide on weatherproofing outdoor signs covers longer-term protection steps if a banner is staying up for an extended run.
What Drives the Price of a Scrim Banner
Cost comes down to four variables: material weight, size, finishing, and printing complexity. A small 13 oz banner with basic grommet finishing at, say, 3 by 6 feet costs far less than a 15 oz double-sided blockout banner at 4 by 10 feet with pole pockets and reinforced corners.
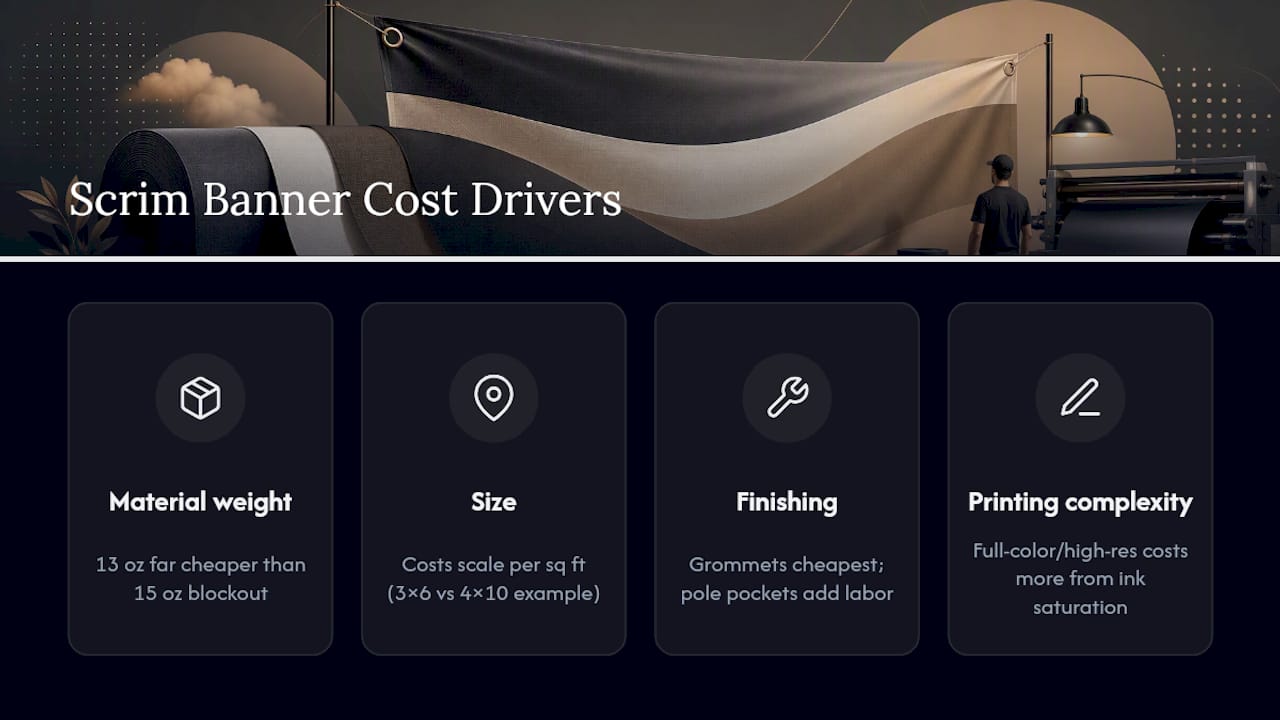
Size scales cost predictably since you’re paying per square foot of material and ink coverage. Finishing adds incremental cost. Welded hems and standard grommets are the cheapest option, while pole pockets, Velcro, and reinforced corners add labor time. Full-color, high-resolution printing costs more than simple text-and-logo layouts, mostly due to ink saturation.
Rush production is the other major lever. Standard turnaround pricing assumes normal production scheduling. Need it in 48 hours? Expect a rush fee on top of the base price. If you’re trying to understand exactly what’s bundled into a quoted price, what’s included in a custom sign quote is worth a read before you request pricing, since turnaround time, materials, and installation are often quoted separately rather than as one flat number.
Ordering in bulk, sticking to standard sizes, and choosing simpler finishing all bring the per-unit cost down. A property manager ordering ten identical construction banners will pay considerably less per unit than someone ordering one custom-shaped banner with a rush deadline.
Where to Buy Scrim Banners and What to Look for in a Supplier
Not every print shop actually stocks true scrim vinyl. Some advertise “heavy duty” banners that are just thicker standard vinyl without the mesh core, which won’t hold up the same way under tension. Ask directly whether the material is scrim reinforced and what weight it’s rated at before you order.
A supplier worth trusting for scrim banners should be able to answer a few basic questions without hesitation: what weight options they carry, whether their scrim is laminated or coated, what finishing choices are available, and what their production timeline actually looks like once your artwork is approved. If a supplier can’t answer those clearly, that’s a sign to look elsewhere.
Local sign shops have an advantage over big online print mills for anything site-specific, since they can advise on mounting conditions, wind exposure, and local permit rules for things like construction fencing signage. National online printers can be fine for straightforward, standard-size orders where you already know exactly what you need.
Check for real production capability too, not just a design tool on a website. A shop that fabricates in-house tends to have more control over material sourcing and quality checks than one that outsources printing to a third party.
Lead Times: How Long Scrim Banner Production Actually Takes
Standard production for a straightforward scrim banner, once artwork is finalized and approved, typically runs a few business days to about a week. Complex finishing like pole pockets, reinforced corners, or multi-panel banners for oversized installs adds time on top of that baseline.
The single biggest delay isn’t printing. It’s artwork. Files that need resizing, color correction, or revision cycles push a project back before production even starts. Sending print-ready artwork at the correct resolution and dimensions from the start is the easiest way to keep a timeline on track.
Rush service is usually available for an added fee if you’re working against an event date or a deadline, but availability depends on the shop’s current queue. If you know your event date months out, ordering early avoids paying a rush premium altogether, and it gives you room to fix any proofing issues without panic.
Installation, if you’re hiring it out rather than hanging the banner yourself, adds its own scheduling window on top of production, especially for large-format or elevated installs that need equipment or a crew.
Why Getting Scrim Right Is Less About the Material, More About the Job
Customsignstoday works with scrim vinyl daily across property signage, construction sites, and event banners, and the pattern holds up: most banner failures trace back to the wrong finishing choice or a rushed install, not a weak material.
Complex jobs, permanent outdoor installs, or oversized banners on exposed sites are where hiring a professional pays off. A signage provider can match weight, finish, and mounting hardware to your actual site conditions instead of guessing from a size chart. For a straightforward short-run event banner, most buyers can order confidently on their own once they know the basics covered here.
— Yossi
Get a Quote on Your Custom Scrim Banner
Customsignstoday cuts out the back-and-forth guesswork that comes with ordering banners from a generic print catalog. Instead of picking blind from a size chart, you get real guidance on weight, finish, and mounting hardware suited to where the banner is actually going up, whether that’s a construction fence, a storefront, or an event entrance.
A quote from Customsignstoday covers the material options that fit your timeline (13 oz for short runs, heavier scrim for anything staying up for months), realistic turnaround based on your artwork status, and installation guidance for tricky mounting conditions like high-wind sites or elevated fencing. The team handles everything from custom banners to full-service vinyl banner production and finishing, so you’re not juggling separate vendors for printing and hardware.
If you’ve got a project site that needs signage beyond banners, from site signs to permanent property displays, that’s worth mentioning in your quote request too. Ready to move forward? Request a free quote and get material and pricing details back before you commit to anything.
Sources
- What Are Scrim Vinyl Banners? Durable Guide
- Custom Vinyl Banners: Events & Business guide
- Advantages of Scrim Vinyl Banners
- Scrim vinyl banners explained in under 3 minutes

