
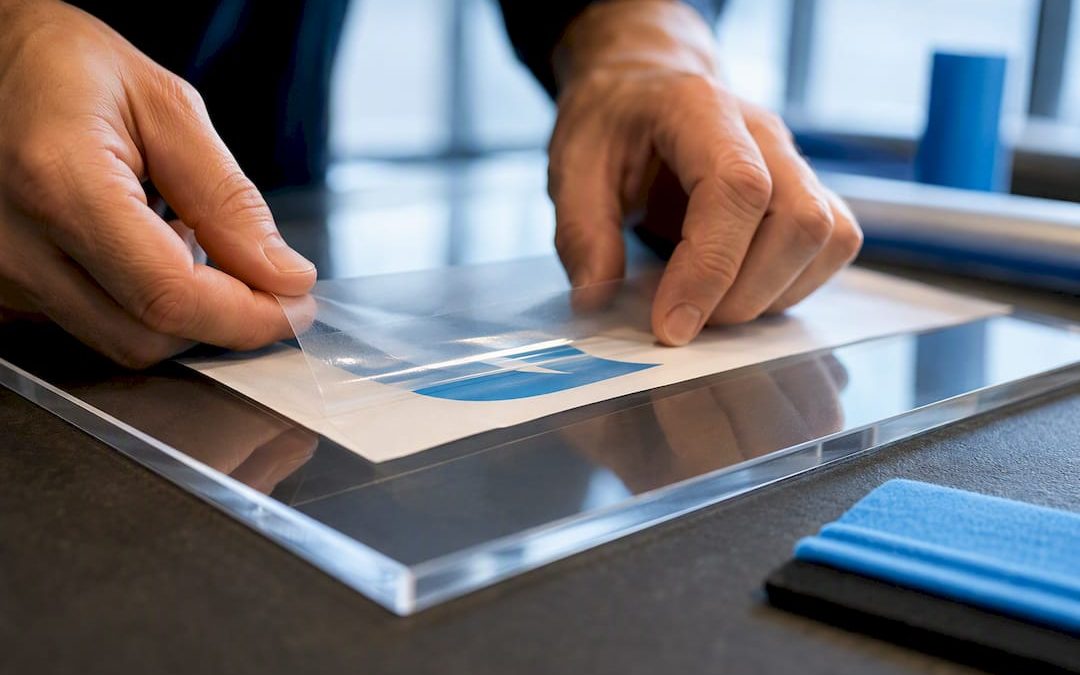
Use the dry method for small, flat decals, the wet method when you need to slide a graphic into perfect position, and the hinge method for anything larger than a sheet of paper. Before you touch the vinyl, clean the surface, dry it completely, and lay out your squeegee, application tape, and a lint-free towel. The full steps below cover all three techniques and the fixes for bubbles, lifting edges, and stubborn adhesion.
TL;DR:
- Proper surface cleaning and testing are crucial, as residual grease, dust, or wax significantly increase the risk of decal lifting or bubbling.
- The dry method is fastest and best suited for small decals on smooth surfaces, but hesitation can lead to difficult repositioning once adhesive contacts the surface.
- The wet method allows precise placement on textured surfaces or larger graphics that need sliding adjustments before bonding, especially in warm conditions above 65°F.
- Large decals and full vehicle wraps should use the hinge method to control bubbles and seams, with conforming tools for textured or riveted surfaces.
- Post-application steps, such as re-squeegeeing edges after tape removal and waiting at least 24 hours before washing, are essential for long-lasting adhesion.
Table of Contents
- Pre-Application Checklist Before You Apply Vinyl
- Tools and Materials You’ll Actually Need
- How Do You Apply Vinyl Stickers Using the Dry Method?
- When Should You Use the Wet Application Method?
- How Do You Install Large Vinyl Decals With the Hinge Method?
- Fixing Bubbles and Other Common Application Mistakes
- Professional Installer Habits Worth Copying
- What Beginners Get Wrong About Vinyl Application
- Get Professional Vinyl Decal Installation From Custom Signs Today
- Where These Application Steps Come From
- Sources
- FAQ
Pre-Application Checklist Before You Apply Vinyl
Skipping prep is the number one reason vinyl decals lift, bubble, or peel within days. Run through this list before you unroll any sticker.
- Clean the surface immediately before application. Grease, wax, and dust left behind create weak spots where contamination breaks the bond, so cleaning an hour ahead defeats the purpose.
- Use lint-free towels and swap them out the moment they pick up dirt. A dirty cloth just spreads grime around instead of removing it.
- Check the ambient and surface temperature against the manufacturer’s minimum, usually printed on the product packaging, and skip application on windy or dusty days.
- Gather your tools: painter’s tape, a squeegee or rigid card, a spray bottle, 70% isopropyl alcohol, application tape if your decal came with it, and a sharp utility knife for trimming edges.
Tools and Materials You’ll Actually Need
A squeegee is not optional gear. Felt-edged squeegees work well on painted walls and glass; harder plastic or rubber ones handle textured or curved surfaces better, and larger decals call for a wider blade so you cover more ground per stroke.
Painter’s tape and application (transfer) tape do different jobs. Painter’s tape holds the decal steady while you position it. Application tape lifts the printed design off its backing paper and carries it onto the surface in one piece, which matters most for multi-color or multi-layer graphics.
For cleaners, 70% isopropyl alcohol handles most grease and residue, but test it on a hidden spot first since some plastics and painted finishes react badly to solvents. Optional extras worth owning: a heat gun for stubborn curves, an air-release tool for popping trapped bubbles, and a rivet brush if you’re working around bolts or seams.
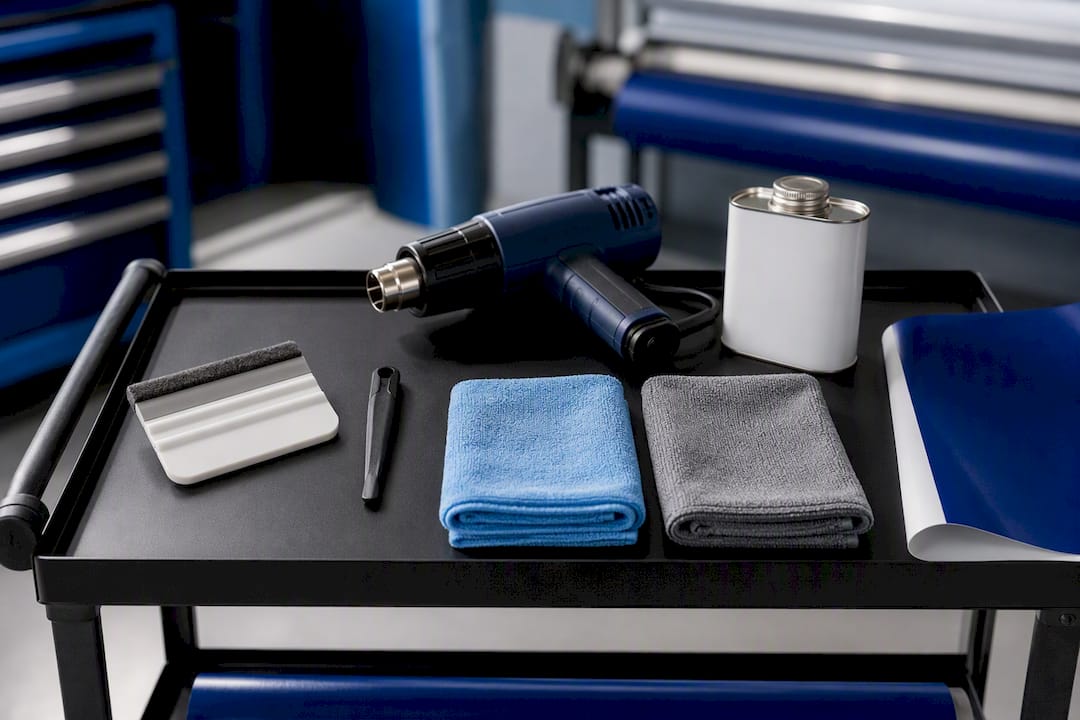
Pro Tip: Keep two towels on hand, one for cleaning and one dedicated to drying. Using the same cloth for both just rubs moisture and residue back into the surface.
How Do You Apply Vinyl Stickers Using the Dry Method?
The dry method suits small to medium decals on smooth, nonporous surfaces like laptops, water bottles, glass, and flat signage. It’s the fastest technique once you get the motion down.
- Position the decal where you want it and hold one edge with painter’s tape as a reference point.
- Peel back 2 to 3 centimeters of the liner from one edge, exposing a small strip of adhesive.
- Press that exposed edge down firmly onto the surface with your finger or squeegee.
- Squeegee outward from that pressed edge in overlapping strokes, working toward the opposite side.
- Peel the liner away gradually as you go, keeping the decal flat against the surface and maintaining squeegee pressure the whole time.
- Once the decal is fully down, remove the application tape slowly at a low angle, close to 180 degrees, rather than pulling it straight up.
- Re-squeegee every edge after the tape comes off, since removal can loosen spots that looked bonded seconds earlier.
3M’s installation bulletin documents this exact sequence for both interior and exterior graphics, and it’s the same process installers use on small plotter-cut text and logos. The dry method wins on speed, but it punishes hesitation: once vinyl adhesive touches a clean surface, repositioning gets difficult fast.
When Should You Use the Wet Application Method?
Reach for the wet method when you’re working with printed graphics, need room to slide the decal into exact alignment, or you’re applying to a slightly textured surface where dry application would grab too soon, typically in warm conditions above room temperature.
- Mix a mild soapy solution, a few drops of dish soap in a spray bottle of water, or use a dedicated low-surface-tension application fluid.
- Spray the surface lightly, and if the adhesive is compatible, mist the adhesive side too.
- Lay the decal onto the wet surface and slide it into position while the water keeps the adhesive from grabbing prematurely.
- Squeegee from the center outward, pushing water out from underneath rather than trapping it.
- Let the decal sit and begin to set before removing the application paper at a low, 180 degree angle.
- Squeegee the surface again once it’s dry to lock down any spots the initial pass missed.
ORAFOL’s application notes recommend working in warmer conditions, generally above 65°F, since cold water slows adhesive activation and stretches out your drying window unnecessarily.
Pro Tip: If you’re applying outdoors, work in the shade. Direct sun evaporates your wet solution before you’ve finished sliding the decal into place.
How Do You Install Large Vinyl Decals With the Hinge Method?
Big graphics, wall murals, and multi-panel vehicle wraps need a controlled approach or you’ll end up chasing air bubbles across a surface you can’t easily fix. The hinge method breaks the job into manageable sections.
- Tape the top edge of the decal to the surface as a fixed hinge point, then fold the rest of the decal back on itself.
- Peel the liner away in 20 to 30 centimeter sections rather than all at once.
- Squeegee each newly exposed section from the center outward using overlapping strokes, working from the hinge down toward the unapplied portion.
- Repeat section by section until the entire decal is down, checking seams as you go.
- Remove the application tape at a low angle and re-squeegee every edge and seam a final time.
- For riveted panels or contoured surfaces, warm the vinyl with a heat gun and work it around obstacles with a rivet brush or air-release tool.
Avery Dennison’s application bulletin points out that cast vinyl films conform better than calendered films on rivets and deep contours, which is worth knowing before you buy material for a vehicle project.
Fixing Bubbles and Other Common Application Mistakes
Small air bubbles are normal and fixable. Use a pin or the tip of an air-release tool to puncture the bubble at its edge, then push the trapped air out toward the hole with your squeegee rather than toward the center of the decal.
- If an edge won’t stay down, re-squeegee it immediately after removing application tape. Tape removal loosens marginal bonds that look fine until they’re not.
- If adhesion fails across a wider area, suspect wax, silicone, or old cleaning-product residue on the substrate and clean it again with the manufacturer’s recommended solvent.
- Use a heat gun to help vinyl conform around curves, but keep it moving and test on a small area first. Prolonged heat can blister paint or warp thin plastic.
- Let the decal cure before washing or flexing the surface. Most manufacturers recommend at least 24 hours before exposing a fresh application to water or heavy handling.
Pro Tip: If you’re removing an old decal to make room for a new one, take it slow and check out our guide to removing vinyl stickers safely before you start scraping.
Professional Installer Habits Worth Copying
A few habits separate a clean, long-lasting install from a decal that starts peeling within a month.
- Clean the surface immediately before sticking, not the night before. Dust and moisture resettle faster than most people expect.
- Keep several towels in rotation and retire one as soon as it picks up dirt or grease.
- On questionable painted surfaces, run a tape-snap test first. Press strong tape onto the paint and pull it sharply. If paint comes off with the tape, the surface isn’t ready for a permanent decal.
- Always re-squeegee edges after removing application tape. This single step prevents most of the late-stage lifting installers see.
- Call a professional for complex vehicle contours, painted surfaces you’re not sure about, or graphics larger than you can comfortably handle solo.
What Beginners Get Wrong About Vinyl Application
Most guides treat vinyl application like a single universal recipe, and that’s the wrong frame entirely. The method question comes first, always, because dry application on a printed graphic you need to align precisely will waste the decal, and wet application on a small dry-erase label just makes a mess you didn’t need.
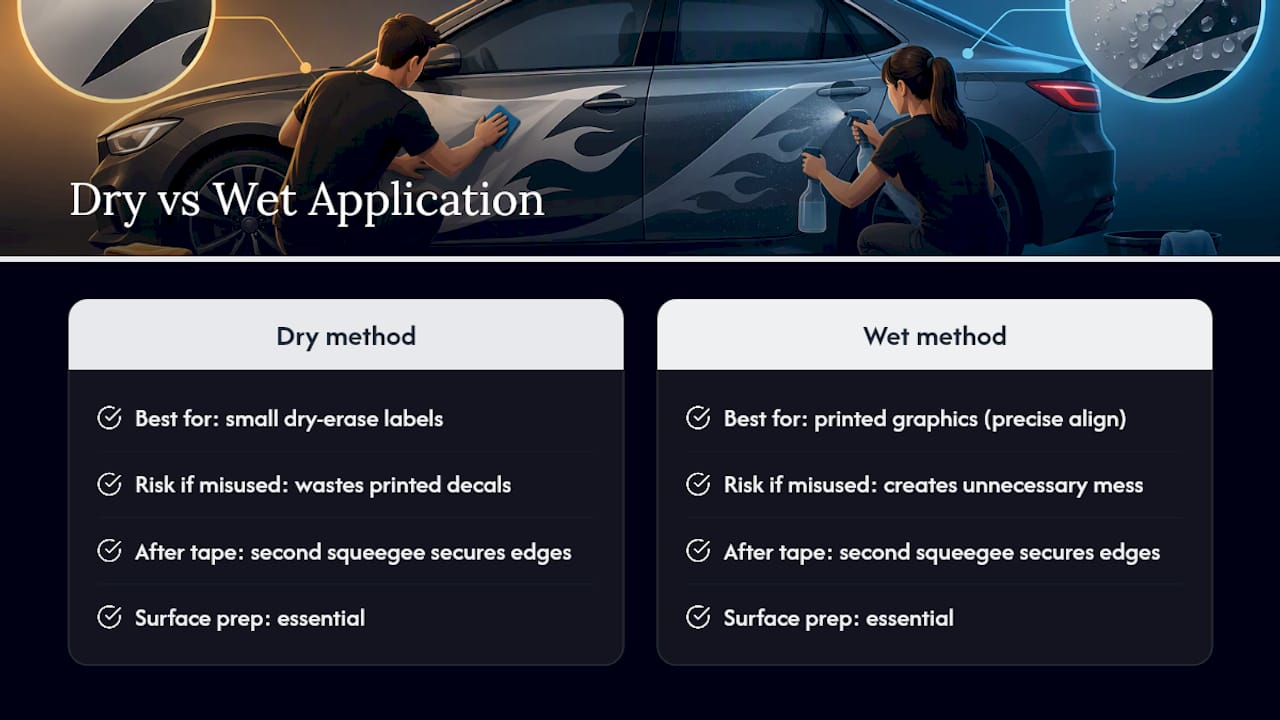
The bigger blind spot is what happens after the tape comes off. Beginners treat tape removal as the finish line. Installers treat it as the start of the real check, because edges that looked perfectly bonded during application can lift the moment adhesive-backed tape pulls away from them. That second squeegee pass isn’t optional polish. It’s the step that actually determines whether your decal survives contact with a car wash or a doorframe six weeks from now.
If there’s one thing worth prioritizing over everything else in this guide, it’s surface prep. Every method fails on a dirty or improperly tested surface, no matter how careful your squeegee technique is.
— Yossi
Get Professional Vinyl Decal Installation From Custom Signs Today
DIY application works well for small projects, but vehicle paint, large multi-panel wraps, and complex contours raise the stakes considerably. One bad squeegee pass on a vehicle hood or a business storefront window can mean reprinting an expensive graphic. Professional providers design and fabricate custom vinyl decals, vehicle lettering, and full vehicle wraps, then handle the install to help you avoid trial-and-error.

If you’re staring down a large-format graphic, a curved vehicle panel, or a storefront window that needs to look right the first time, professional installation saves both material and headaches. Experienced installation teams work from manufacturer-backed procedures covered in this guide, using the right tools for contoured surfaces and multi-panel jobs. Browse custom vinyl decal options or check the vehicle lettering and wrap services page, and request a free quote to get your project measured, designed, and installed correctly.
Where These Application Steps Come From
The procedures in this guide follow published installer bulletins from 3M, Avery Dennison, and ORAFOL, the three manufacturers most installers train against. When your specific vinyl or substrate comes with its own instructions, follow those over any general guide, including this one.
FAQ
What Is the Difference Between Dry and Wet Application?
Dry application presses the decal directly onto a clean, dry surface and works best for small graphics you can position in one try. Wet application uses a soapy water solution to let you slide and adjust the decal before it fully bonds, which suits larger or printed graphics needing precise alignment.
How Long Should Vinyl Stickers Cure Before Washing?
Most manufacturers recommend waiting at least 24 hours before washing or flexing a freshly applied decal. Vehicle wraps and large graphics installed by a professional, such as those from Customsignstoday, often come with specific curing guidance based on the film and adhesive used.
Why Do Bubbles Keep Forming Under My Vinyl Decal?
Bubbles usually form from trapped air or moisture that wasn’t pushed out during squeegeeing, or from surface contamination that prevented a full bond. Puncture small bubbles with a pin and push the air toward the hole, and always re-squeegee edges after removing application tape.
Can I Apply Vinyl Stickers in Cold Weather?
Cold surfaces and low ambient temperatures slow adhesive activation and make vinyl stiff and harder to conform, so most manufacturers set a minimum application temperature. Check your product’s packaging, and if you’re stuck applying below that threshold, warm the surface slightly with a heat gun first.
Does Customsignstoday Install Vinyl Decals Professionally?
Yes, Customsignstoday designs, fabricates, and installs custom vinyl decals, vehicle lettering, and vehicle wraps for businesses and individuals. Pricing depends on the project, so request a free quote for specifics on your job.

