
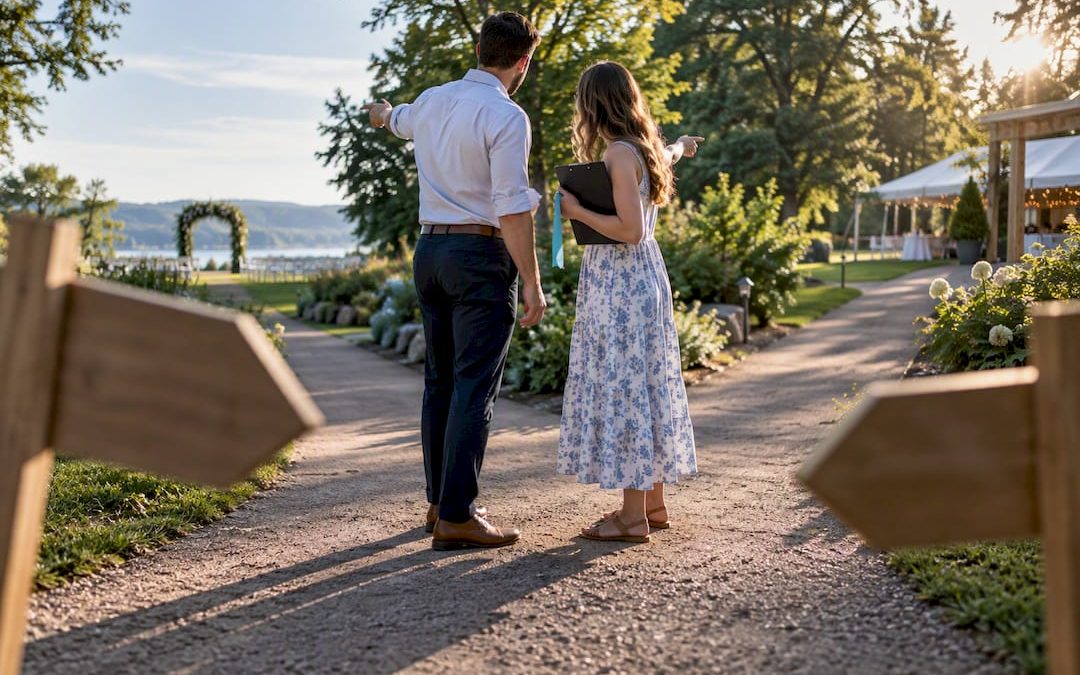
DIY wedding directional signs work well for most couples, especially when you keep the number of signs to five or ten and pick one reliable format. Painted wooden arrows and waterproof printed panels are the two easiest options to execute with basic tools. Before you start, confirm three things: the size needed for readability at a distance, how each sign will mount or stand, and whether the material can survive rain, wind, or dew.
TL;DR:
- Use durable materials like painted wood, coroplast, or acrylic for signs to ensure weather resistance and longevity during outdoor weddings.
- Map guest pathways beforehand to identify decision points that require signage and place signs before these points to guide guests effectively.
- Limit your sign set to five or ten pieces and choose one consistent style to avoid a cluttered appearance and maintain visual harmony.
- Allocate sufficient time for cutting, sealing, and drying, especially for DIY wooden signs, to prevent issues like bleeding paint or warping on the wedding day.
- Consider professional sign ordering if your venue has heavy exposure, you need precise color matching, or your wedding schedule is too tight for extensive DIY work.
Table of Contents
- Creative sign styles you can actually replicate
- Choosing your substrate, size, and tools
- How to build a painted wooden arrow sign
- Where signs actually need to go
- Weatherproofing and mounting that hold up
- When it makes more sense to order instead of build
- What to actually write on your signs
- Fonts and lettering that stay readable
- Lighting your signs after dark
- Fixing common DIY sign problems
- What actually matters when you plan your signs
- Where to order weatherproof signs if you’d rather skip the sanding
- Sources
- FAQ
Creative sign styles you can actually replicate
The right style depends on your venue, your patience level, and how much time you have before the wedding. Real-wedding examples show that couples successfully use wood, chalkboards, pallets, glass, and fabric, often matching the sign material to their invitation suite or overall decor.
- Rustic wood arrows and pallet boards: easy to assemble, high visual impact, and forgiving of imperfect paint lines.
- Chalkboard or painted plywood: reusable across multiple events and simple to redo if you make a lettering mistake.
- Coroplast or laminated poster panels: the cheapest option per sign, easy to print at home or at a copy shop, best for short-term outdoor use.
- Acrylic or glass-look signs: a cleaner, modern finish that usually requires a vendor print job or careful hand-painting with enamel markers.
- Fabric banners or flags: lightweight and ideal for hanging or suspending between trees or rafters.
Pick one primary format and stick with it across all your signs. Mixing three or four different materials across a small sign set tends to look scattered rather than curated, even when each individual sign looks fine on its own.
Choosing your substrate, size, and tools
Your substrate choice determines both your budget and your weather risk. Plywood or MDO board holds paint well and lasts through a full outdoor season, but it needs cutting, sanding, and sealing. Pallet wood is free or nearly free if you can source it, though boards vary in thickness and finish quality. Coroplast (corrugated plastic) is light, cheap, and naturally water-resistant, making it a strong pick for temporary outdoor signs. Heavy cardstock is the least durable choice: a commercial poster set sold at 19 by 13 inches is a common size, but the listing itself notes the cardstock version is not waterproof. Acrylic gives the most polished look but is harder to cut and letter without practice or a vendor’s help.
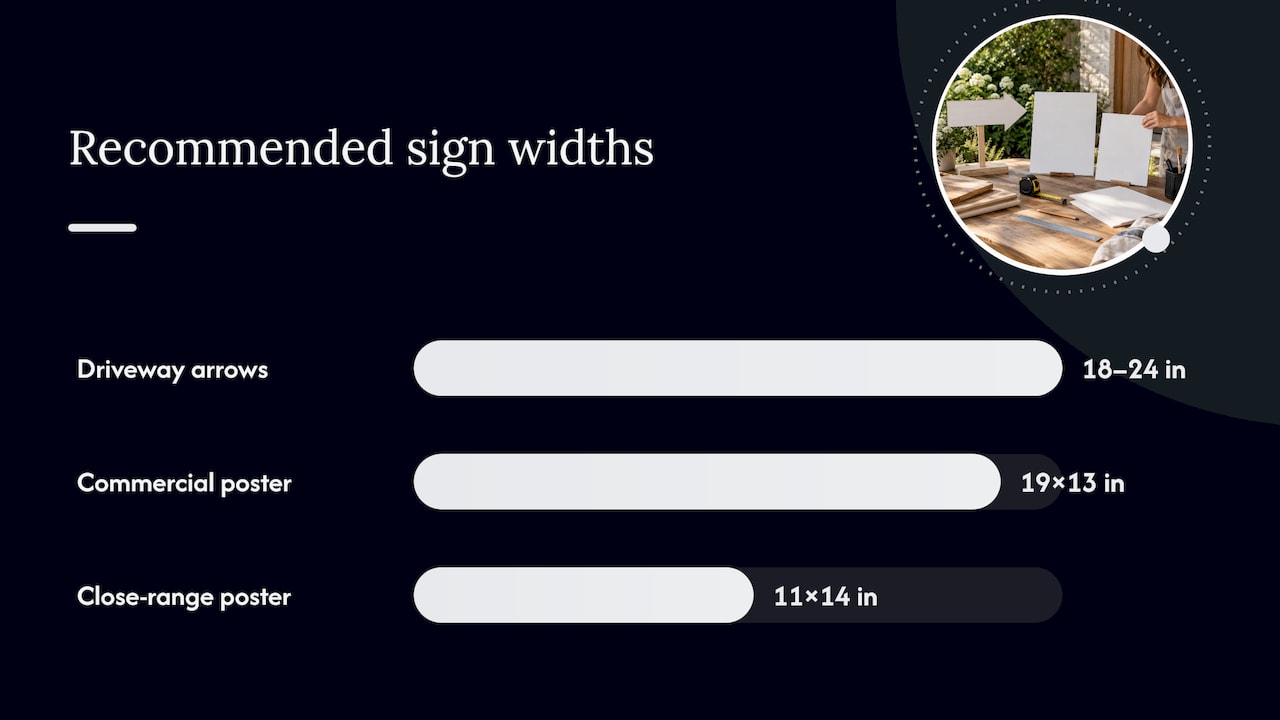
For sizing, plan 18 to 24 inches wide for arrows placed along a long driveway or approach, and stick to smaller 11-by-14 or similar poster sizes for close-range signs near an entrance or check-in table.
A basic stencil kit, a can of exterior spray paint, and a pre-cut board from a hardware store can replace a full workshop setup for a first-time DIY sign maker.
- Sandpaper works nearly as well as a power sander for a single small project.
- Pre-cut boards save the most time if you don’t own a saw.
- Paint pens are more forgiving than a brush for straight lettering.
- Adhesive vinyl letters look cleaner than hand lettering but cost more per sign.
DIY signage costs less only when the tools and time are already on hand; once you add sealant, transport, and setup labor, the savings shrink fast.
How to build a painted wooden arrow sign
This method works for a single arrow and scales easily once you have the process down.
- Measure and cut your board, or buy a pre-cut arrow shape from a craft or hardware store. Sand the edges smooth and apply a coat of primer.
- Transfer your layout using a printable template, a pencil grid, a stencil, or peel-and-stick vinyl letters. Keep the wording short: a destination name and an arrow direction is usually enough.
- Paint or letter the design and let it dry fully between coats. Use high contrast, white lettering on a dark background or dark lettering on a light background, so the sign reads clearly from a distance.
- Seal the finished piece with an exterior-rated sealant or polyurethane, then attach your mounting hardware: a stake pocket on the back, a wire loop, or a D-ring for hanging.
Pro Tip: Paint your base coat and let it cure for a full day before adding lettering. Rushing this step is the most common reason DIY signs end up with bleeding edges or peeling paint.
If wood isn’t practical, three variations follow the same logic. Print your design on coroplast and add grommets at the corners for stake mounting. Use chalkboard paint on a plain board if you want to reuse the sign for future events. Or letter directly onto acrylic with an oil-based paint marker for a glass-like finish without the fragility.
Where signs actually need to go
Before you design a single sign, walk your venue and map how guests will move through it. Signs work best when they mark real decision points, the parking area, the entrance, a fork in the path, the reception entry, restrooms, or a shuttle pickup spot, rather than every corner of the property.
- Place each sign before the decision point, not after it, so guests see it while they still have a choice to make.
- Test visibility by walking the actual guest approach at eye level, ideally at the time of day the event will happen.
- Use an easel at the entrance, a stake along lawn paths, an A-frame in a parking or driveway area, and a hanging sign for venues with exposed beams or rafters.
A single well-placed arrow at a genuine fork in the path does more work than four decorative signs scattered around a space guests were never going to miss.
Weatherproofing and mounting that hold up
Outdoor signs face more risk from wind and moisture than most couples expect, so match your protection method to your substrate. Wood needs an exterior sealant or outdoor-rated paint. Printed posters need lamination or outdoor-rated inks to resist rain and humidity. Coroplast and acrylic are naturally weather-resistant on their own, which is part of why they show up so often in outdoor wedding sets.
- Stakes work well in soft lawn areas, while wire stands and A-frames suit hard surfaces like patios or driveways.
- Add sandbags or another weight to the base of any freestanding sign on a windy day.
- Label the back of each sign with its intended placement so setup runs smoothly on the wedding day.
- Bring spare fasteners, tape, and rope, and plan who handles teardown before the event ends.
For a closer look at sealant options and finish choices by material, see this guide to weatherproofing outdoor signs.
When it makes more sense to order instead of build
Some setups call for a professional rather than a weekend project. Consider ordering when you need more than a handful of signs, when the venue has heavy sun or rain exposure, when you need exact color matching to your invitation suite, or when your timeline is too tight for cutting, painting, and sealing.
A sign shop can deliver weatherproof substrates in exact sizes with installation support built in, which often works out faster than a rushed DIY run the week of the wedding. Custom Signs Today offers this route for couples who want the look of custom signage without the sanding and sealing.
What to actually write on your signs
Keep the wording short enough to read at a glance from a moving car or a walking pace. Most directional signs need only a location name and an arrow: “Ceremony,” “Cocktail Hour,” “Reception,” “Parking,” or “Restrooms.” Add a simple modifier when a path splits in a way that isn’t obvious, such as “Guest Parking” versus “Vendor Entrance.”
Avoid long sentences or multiple lines of small text. A sign that says “This Way to Where We’re Tying the Knot” might photograph nicely, but a guest trying to find parking in the rain needs a word and an arrow, not a caption. Save the playful, longer phrases for signs guests read while standing still, like a welcome sign or a seating chart header, and keep the moving-traffic signs blunt and clear.
If your venue has a tricky layout, a “You Are Here” style sign near the entrance, paired with a few arrows down the line, usually solves more confusion than adding extra decorative signs at every turn.
Fonts and lettering that stay readable
Choose a font that reads clearly from at least 15 to 20 feet away rather than one that looks elegant up close. Bold sans-serif fonts, like Montserrat or Futura, hold up better outdoors than thin script fonts, which tend to blur together at a distance or in low light.
If you want a script accent, save it for a single word, like a couple’s name, and pair it with a bolder font for the directional text itself. Stencils and printable templates give the most consistent results if your hand lettering is shaky. Vinyl letters offer the cleanest line but cost more per sign and take longer to apply than paint.
Whatever font you pick, keep spacing generous between letters and lines. Cramped lettering is one of the fastest ways to make an otherwise well-built sign hard to read from a car window or a dim path.
Lighting your signs after dark
Evening weddings need a lighting plan for directional signs just as much as they need one for the dance floor. Battery-powered LED puck lights or small clip lights work well for signs mounted on stakes or easels, since they avoid trailing extension cords across a lawn.
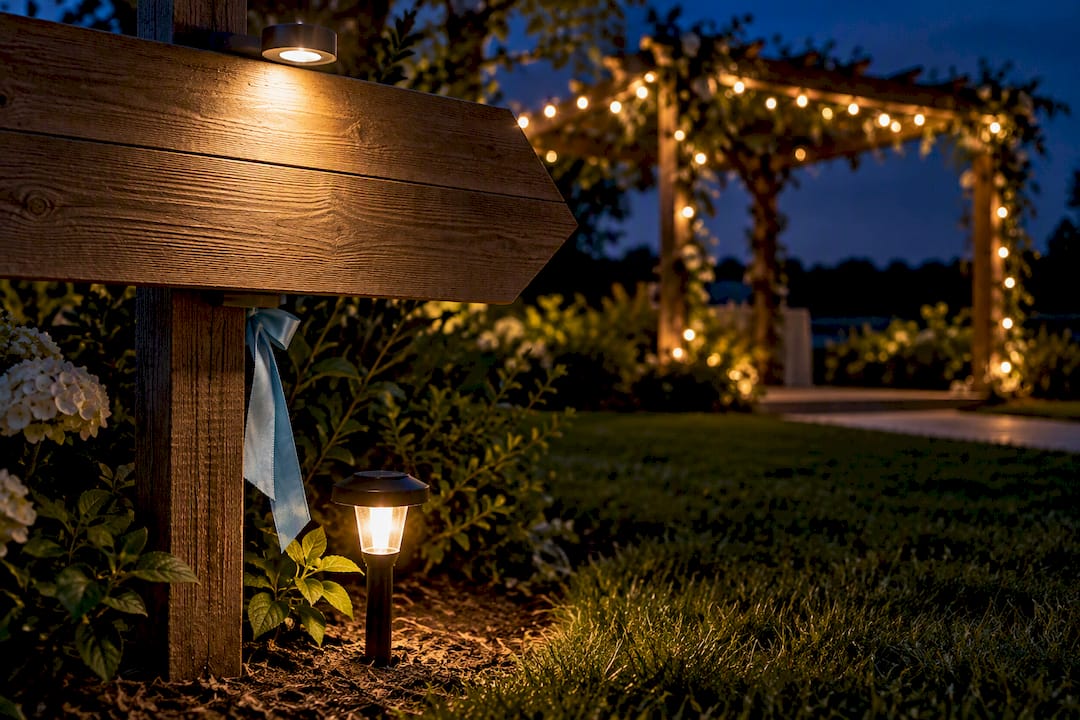
Solar path lights placed near the base of a sign add a soft glow without any wiring, though they need a few hours of daylight to charge before dusk. For signs mounted higher, like a hanging sign under a pergola, a simple string of warm white fairy lights along the frame keeps the sign visible without competing with the venue’s main lighting.
Avoid harsh white flashlights or spotlights aimed directly at a sign’s surface, since glare can make painted or printed text harder to read rather than easier.
Fixing common DIY sign problems
Paint bleeding under a stencil is one of the most frequent issues, and it usually comes down to too much paint on the brush or a stencil that wasn’t pressed flat. Use a stippling motion with a mostly dry brush, and tape the stencil down fully before you start.
Uneven lettering often comes from skipping a pencil grid or guideline. Lightly sketch your layout first, check the spacing, then commit to paint or marker. If a line comes out crooked, a quick sand-down and repaint is usually faster than trying to fix it in place.
Warping is common with pallet wood that wasn’t fully dried before painting. Seal both sides of the board, not just the front, to reduce moisture absorption that causes bowing. If a finished sign already looks uneven, a second coat and a steady hand with the sealant can often smooth out minor flaws before the wedding day arrives.
What actually matters when you plan your signs
The advice that gets repeated most often, browse a gallery, pick a cute font, and start painting, skips the part that actually determines whether your signs work: mapping where guests will get confused before you design anything. A beautiful arrow pointing at the wrong decision point is worse than no sign at all, because it adds visual clutter without solving the problem it was meant to solve.
The DIY guides that focus purely on aesthetics also undersell the cost in time. Cutting, priming, painting, sealing, and mounting five to ten signs is a multi-day project, not an afternoon one, even for a confident crafter. Readers who treat it as a quick weekend task often end up with wet paint on the morning of the wedding.
If you take one thing from this, plan your guest flow first, choose one durable material, and build in a full day of drying and sealing time before you ever think about styling. The signs that work best on the wedding day are rarely the fanciest ones. They’re the ones placed exactly where a guest needed them.
— Yossi
Where to order weatherproof signs if you’d rather skip the sanding
If cutting boards and waiting on paint to dry isn’t how you want to spend your final wedding-planning weeks, ordering weatherproof, venue-sized directional signs is a straightforward alternative.

A typical order includes guidance on material choice, help sizing signs to your venue’s approach distance, and advice on mounting or installation. Consultation and production services can deliver signs sized and finished for outdoor conditions without the DIY learning curve. Request a free quote for custom directional signs to see options for your wedding.
Sources
- The Knot — Every Wedding Sign You Need to Direct Guests Efficiently
- Martha Stewart — Signs from real weddings
- Brides — The average cost of wedding decorations (includes signage)
FAQ
How do I make signs for wedding directions?
Pick one durable material, such as painted wood, coroplast, or acrylic, then measure your venue’s approach distances to size each sign for readability. Map your guest flow first so you only build signs for real decision points like parking, entrances, and path splits, following the 5 to 10 sign guideline most planners recommend.
How much does wedding signage typically cost?
Signage costs vary widely depending on materials, quantity, and customization, and decor budgets can climb quickly once several custom pieces are added. DIY signs cost less upfront but only save money when you already own or can borrow the tools and have time to spare.
How should I display signs at a wedding?
Match the display method to the location: use an easel near the entrance, stakes along lawn paths, an A-frame for parking or driveway areas, and hanging mounts for venues with rafters or beams. Add weight, like a sandbag, to any freestanding sign if wind is a concern on the day.
What size should a directional wedding sign be?
Plan for 18 to 24 inches wide on arrows placed along a long driveway or approach, and use smaller formats, similar to an 11-by-14 poster, for close-range signs near an entrance. Confirm your material is weatherproof, since some visually similar options, like plain cardstock, are not.
Should I order custom signs instead of making my own?
DIY works well for most couples handling five to ten signs with basic tools and a few days to spare. If you need exact sizing, guaranteed weatherproofing, or professional installation on a tight timeline, ordering from a sign shop like Custom Signs Today is often the faster, more reliable route.

