
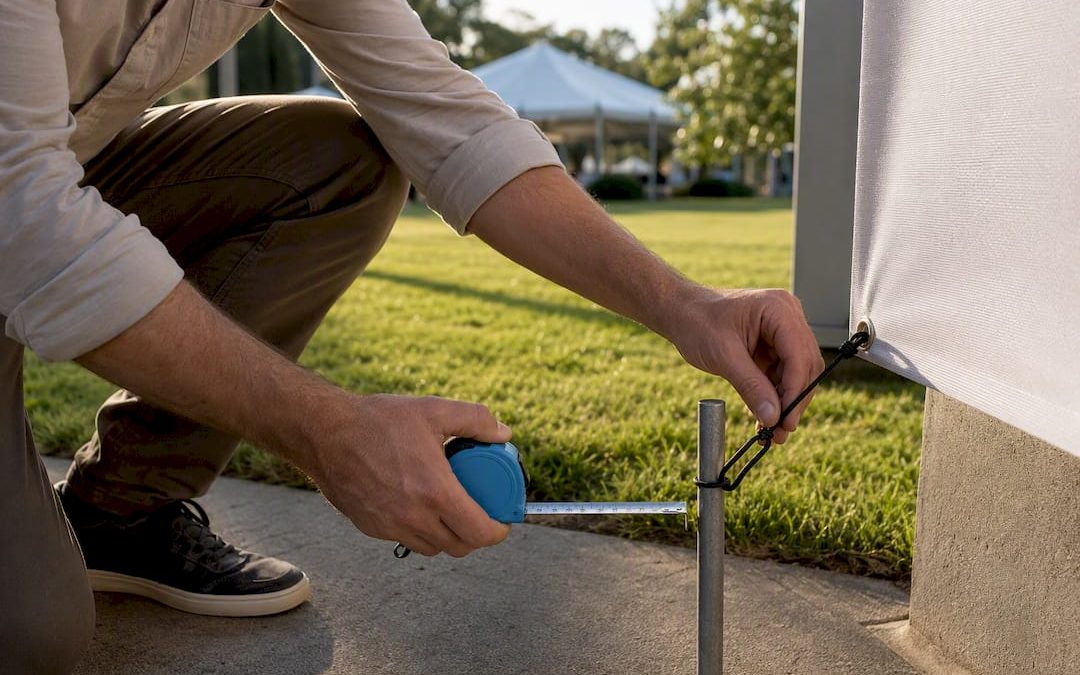
Every well-run outdoor event leans on five sign categories: wayfinding and directional markers, an entrance or welcome display, branded photo backdrops, durable banners and flags, and ground graphics or informational boards, with digital screens added where the budget and venue allow. Each type solves a different problem, navigation, first impressions, social sharing, and safety, so skipping one usually shows up as a bottleneck on event day. The one rule that ties them together: match the material to the wind, weather, and length of your event before you match it to your design.
TL;DR:
- Flexible signage types like mesh banners and inflatable arches are best suited for windy outdoor venues to withstand gusts and maintain visual integrity.
- Using a three-tier wayfinding system that includes long-, medium-, and short-range signs reduces attendee confusion and improves flow at large events.
- Contrast and font size are critical for readability outdoors, with a recommended one inch of letter height for every 10 feet of viewing distance, and icons for universal identification.
- Signage should be fabricated from durable materials like 510gsm PVC, heavy PVC, or mesh, with specific weights and features chosen based on event duration and environmental conditions.
- Proper on-site installation, secure fastenings, and careful storage practices between events extend the lifespan of reusable signage and ensure safety.
Table of Contents
- 20 Outdoor Event Signage Ideas Planners Actually Use
- Materials and Printing: Matching Substrate to Conditions
- Placement and Wayfinding: Where Signs Actually Belong
- Design and Readability: Rules That Actually Hold Up Outdoors
- Lighting and Digital Options: When Screens Beat Print
- Budget and Procurement: The Brief That Gets You an Accurate Quote
- Installation Day: The Checklist That Prevents Failures
- Maintenance, Storage, and Sustainability
- Creative Activations Worth Stealing
- How a Signage Supplier Actually Scopes a Project
- Why Planners Work With Customsignstoday for Outdoor Events
- Sources
20 Outdoor Event Signage Ideas Planners Actually Use
This is the working idea bank, organized so you can scan for a category and copy the production tip straight into a supplier brief. Some entries cost almost nothing to execute; others need a fabrication partner and a few weeks of lead time.
- Arch or gateway entrance sign. Sets the tone before attendees reach the ticket booth. Print on 510gsm PVC and stake it with cross-braced legs so wind gusts don’t tip it.
- A-frame directional signs. Cheap, reusable, and fast to reposition when a layout changes overnight. Use double-sided prints so both approach directions get a cue.
- Feather flags along the entry path. Great for guiding foot traffic from a parking lot to the gate. Anchor with a ground spike, not just a cross base, on grass or gravel.
- Branded photo backdrop wall. Drives organic social reach when the design includes a hashtag and logo repeat pattern. Fabric with a matte finish photographs better than glossy vinyl under direct sun.
- Step-and-repeat banner. Standard for sponsor-heavy events and press check-ins. Keep logo rows evenly spaced so crops from phone cameras still read clean.
- Sponsor mesh banners on fencing. Ideal where wind load is a real risk, like open fields or waterfront venues. Mesh with a hole ratio that allows significant airflow keeps the graphic visible while letting gusts pass through, according to guidance on durable banner materials.
- Vinyl fence wrap. Turns a plain chain-link barrier into branded real estate. Order in continuous panels to avoid visible seams at eye level.
- Ground decals for queue lines. Keeps social distancing or line order intact without staff intervention. Use slip-resistant laminate; standard vinyl gets dangerous when wet.
- Directional floor arrows near restrooms and exits. Removes guesswork in crowded walkways. Place at every intersection, not just the main path.
- Yard signs for parking and overflow lots. Low-cost and disposable if needed. Corrugated plastic with wire stakes handles a weekend event without warping.
- Inflatable arch or tunnel. Reads well from a distance and photographs as a landmark. Confirm the blower has a backup power source if it runs on electricity.
- LED marquee letters or numbers. Spells out an event name or year for a strong photo moment. Works best after dusk; daylight visibility drops fast.
- Vehicle wraps on staff or shuttle vans. Turns transport into a moving billboard for the event brand. A vehicle lettering package is often cheaper than a full wrap for short-term use.
- Retractable banner stands at info booths. Portable and reusable across multiple events. Choose a wide base for outdoor stability.
- Directional door and room ID signs. Useful for multi-tent or multi-building layouts. Directional door signage works indoors and out with the right mounting hardware.
- Safety and emergency exit signage. Non-negotiable at any ticketed or permitted event. Use reflective or high-contrast panels so they read at night.
- Sponsor flag rows near stages. Groups sponsor visibility in one sightline instead of scattering logos. Space flags evenly and check local flagpole footing rules before installing in soft ground.
- Custom-shaped cutout signs. A logo-shaped or mascot-shaped sign stands out against a field of rectangles. Rigid PVC board holds a die-cut edge better than banner vinyl.
- Digital sponsor rotation screen. Replaces a bank of static banners with rotating ads. Best at high-traffic, multi-day events where sponsor inventory changes often.
- Ground-mounted site or venue map board. Anchors attendees who just arrived and haven’t found their bearings yet. Laminate against rain and mount at a slight forward tilt to cut glare.
Materials and Printing: Matching Substrate to Conditions
PVC and vinyl remain the default outdoor substrate because they hold up across heat, rain, and repeated handling. The industry’s common middle ground is a medium-weight PVC, heavy enough to resist tearing and light enough to install without extra crew, according to the same durable banner materials guide. For a sign that stays up for a season or longer, heavier grades are recommended.
Quick reference: material weight and use case A roughly 30% mesh hole ratio is the benchmark for wind-prone sites, since it cuts wind load while keeping large-format graphics readable from a distance.
- Standard PVC/vinyl (440 to 510gsm): Best for single-event banners, entrance signs, and step-and-repeat walls.
- Heavy PVC (610 to 900gsm): Suited to multi-week installs or anything mounted where reprinting mid-event isn’t an option.
- Mesh banner (approx. 30% hole ratio): The right call for fencing, building wraps, and open-field sites where gusts are a real factor.
- Dye-sublimated fabric: Bonds ink into polyester fibers for a matte, scratch-resistant finish that’s noticeably lighter to transport than PVC, a detail worth flagging for premium backdrops.
On ink, solvent and latex prints dominate outdoor work for color stability under UV exposure, while UV-cured ink dries instantly and holds up well on rigid substrates. Finish every outdoor piece with grommets or pole pockets, and specify nickel-plated brass grommets if the sign will sit near saltwater air or high humidity. A laminate topcoat adds scuff resistance for anything at ground level. If you’re still deciding between substrates, a side-by-side materials comparison is worth reviewing before you finalize a brief.
Placement and Wayfinding: Where Signs Actually Belong
Wayfinding works best as a three-tier system, not a single sign type repeated everywhere. Planners who treat long-, medium-, and short-range cues as one continuous chain report fewer lost attendees, per wayfinding and attendee experience research.
- Long-range (entrance arches, large banners): Visible from the parking lot or street; sets initial direction.
- Medium-range (eye-level directional signs): Guides attendees at each fork or intersection along the main path.
- Short-range (room IDs, table numbers, small placards): Confirms the final destination once someone is close.
- Consistent color-coding by zone: Reduces cognitive load, especially at festivals with multiple stages or areas.
- Advance cues before decision points: Place a directional sign before an intersection, not at it, so attendees have time to react.
Pro Tip: Walk your own route the week of the event, at the actual time attendees will move through it. Shadows, glare, and crowd density change what’s visible far more than a floor plan suggests, and a quick wayfinding test walk will catch blind spots before they cost you.
Design and Readability: Rules That Actually Hold Up Outdoors
Contrast beats color choice every time daylight is involved. Dark text on a light background, or the reverse, reads faster in full sun than any color combination that relies on hue alone. Test your final design outdoors at midday before it goes to print, not just on a monitor indoors.
- Contrast first, brand colors second: If your palette doesn’t hold contrast in daylight, adjust the background before the logo.
- Type size tied to distance: A rough guide is one inch of letter height for every 10 feet of intended viewing distance.
- Sans-serif fonts for scanning speed: Serif fonts slow reading at a distance and in motion.
- Icons over text for universal signs: Restroom, parking, and exit icons cross language barriers instantly.
- Accessible height and placement: Keep critical information within a sightline that works for wheelchair users and children, not just average adult eye height.
Lighting and Digital Options: When Screens Beat Print
LED and digital signage usually wins on cost-per-update when your content changes often, whether that’s a rotating sponsor lineup, a multi-day schedule board, or a program that tours across several cities. Cost-per-update analysis of LED versus print shows LED pays for itself faster once you’re reprinting the same message multiple times annually.
- Check content-change frequency first. If the message is fixed for the whole event, print almost always costs less.
- Confirm power and mounting at the venue. LED needs a stable power source and secure ground or truss mounting; not every outdoor site has both.
- Test ambient light conditions. Bright midday sun washes out lower-brightness screens; check the display’s nit rating against your venue’s light levels.
- Model cost across the full program year, not one event, since a single-use screen rental rarely beats print on a one-off booking.
Budget and Procurement: The Brief That Gets You an Accurate Quote
Most quoting problems trace back to an incomplete brief, not a pricing disagreement, according to guidance on managing print and signage orders. A supplier can’t price what is not specified.
- Exact dimensions for every sign, not a range.
- Substrate and gsm (or let the supplier recommend one, but state the use case and wind exposure).
- Finish details: grommets, pole pockets, hem type, lamination.
- Quantity per design, including spares.
- Installation scope: does the supplier install, or does your crew?
- Delivery date, counted backward from your artwork sign-off date, not the event date.
Standard turnaround on large-format prints often runs three to five working days after final artwork approval, per event printing budget guidance, and that clock doesn’t start until you sign off.*
Installation Day: The Checklist That Prevents Failures
A sign that looks perfect on a screen can fail in minutes outdoors if it’s not secured properly. Run through this on-site before the event opens.
- Inspect on delivery. Unroll and check for shipping damage, color accuracy, and finishing quality before installers start.
- Tension banners fully to prevent flapping, which stresses grommets and shortens their lifespan.
- Choose bungees over rope on mesh and fabric, since bungees flex with wind gusts instead of tearing the material.
- Recheck tension and stakes every few hours, especially if wind picks up or temperatures shift.
- Get installer sign-off confirming every sign is secure, level, and unobstructed.
- Keep emergency exit and safety signage completely clear of tents, vendor tables, or crowd overflow at all times.
Maintenance, Storage, and Sustainability
Signs that survive multiple events pay for themselves fast, but only if they’re stored correctly between uses.
- Dry fully before rolling. Moisture trapped in a folded banner causes mildew and color transfer.
- Roll, don’t fold. Creases become permanent stress points and eventually crack the print.
- Store print side out on the roll to avoid pressure marks on the graphic.
- Consider PVC-free polypropylene or recycled polyester for a lower environmental footprint on repeat-use signage.
- Rotate sponsor names on modular panels instead of reprinting the whole banner each time a sponsor changes.
A weatherproofing and durability guide covers seasonal storage in more depth if your signage inventory needs to survive year over year.
Creative Activations Worth Stealing
- DIY photo wall with a fabric backdrop and string lights, run entirely on a low budget and a fold-up frame.
- Branded inflatable tunnel at the main entrance, built for a strong first impression on arrival, best paired with a visual storytelling approach so the design actually earns shares.
- Interactive ground graphic with a QR code, driving attendees to an app or schedule without extra staff.
- Sponsor flag row synced to stage sightlines, maximizing logo exposure during the event’s highest-traffic moments.
- Custom cutout mascot sign near the entrance, built as a dedicated photo stop that generates organic tagging.
How a Signage Supplier Actually Scopes a Project
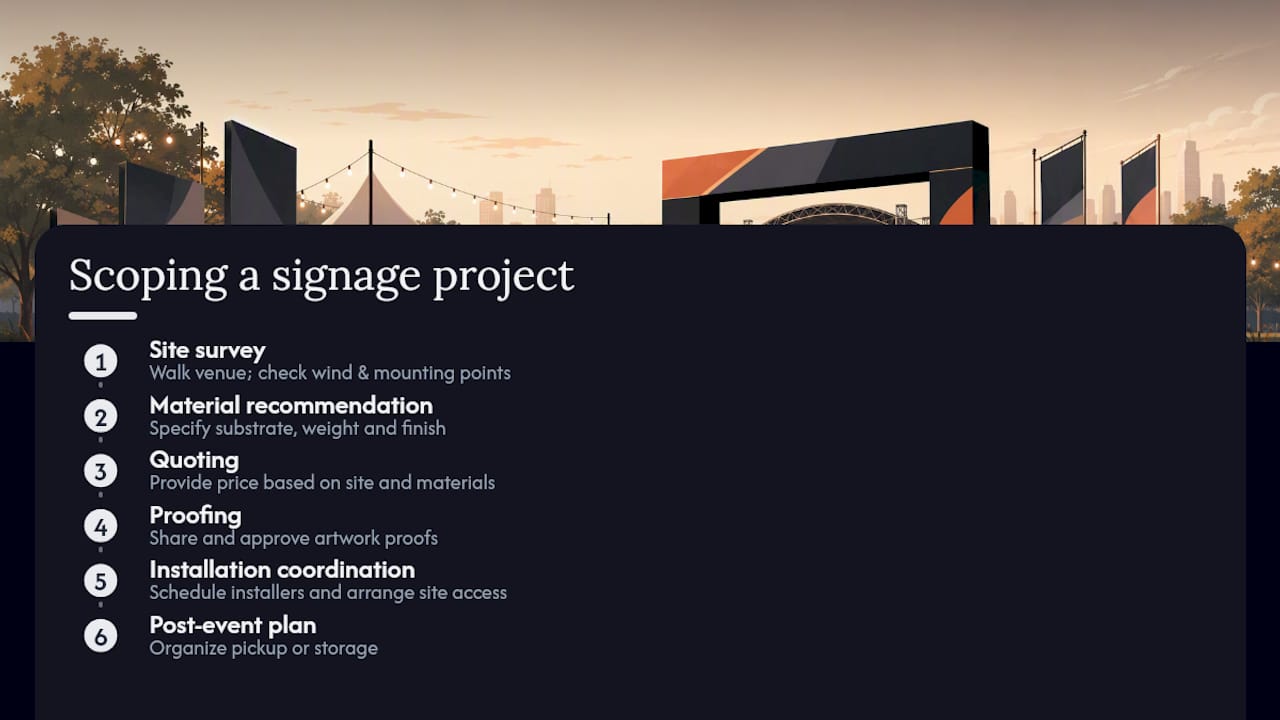
A proper outdoor signage project starts with a site survey, not a design file. [brand_signal] A supplier worth hiring walks the venue, checks wind exposure and mounting points, then recommends material weight and finish before quoting. Proofing comes next, followed by installation coordination and a post-event pickup or storage plan.
Ask any vendor three questions before signing: What substrate do you recommend for this specific site, and why? Who handles installation and teardown? What happens if artwork needs a last-minute change?
Why Planners Work With Customsignstoday for Outdoor Events
Some signage suppliers offer to handle material selection, finishing, and installation guidance under a single order, providing one point of contact for various signage needs instead of requiring coordination across multiple vendors.
Before requesting a quote, have your dimensions, quantities, substrate preference (or your venue’s wind exposure, if you’re not sure), installation scope, and delivery date ready. A signage supplier’s team can recommend suitable materials once they have the necessary details. Start with the custom sign quote process to see exactly what information gets you the fastest, most accurate pricing, and request a free quote for your event’s signage lineup today.
Sources
- The guide to choosing durable banner printing materials for outdoor events
- Event Signage: Wayfinding, Branding, and Attendee Experience
- How to Quote and Manage a Print and Signage Order

