
{
“@type”: “Article”,
“image”: {
“url”: “https://csuxjmfbwmkxiegfpljm.supabase.co/storage/v1/object/public/blog-images/organization-6408/1776213683849_Designer-sketching-custom-signage-in-bright-studio.jpeg”,
“@type”: “ImageObject”,
“caption”: “Designer sketching custom signage in bright studio”
},
“author”: {
“url”: “https://customsignstoday.us”,
“name”: “Customsignstoday”,
“@type”: “Organization”
},
“@context”: “https://schema.org”,
“headline”: “Custom Signage Step-by-Step: Boost Brand Visibility”,
“publisher”: {
“url”: “https://customsignstoday.us”,
“name”: “Customsignstoday”,
“@type”: “Organization”
},
“inLanguage”: “en-US”,
“articleBody”: “Learn how to create custom signage step by step, from goal setting and materials to fabrication, installation, compliance, and maintenance for maximum ROI.”,
“description”: “Learn how to create custom signage step by step, from goal setting and materials to fabrication, installation, compliance, and maintenance for maximum ROI.”,
“datePublished”: “2026-04-15T00:41:31.883Z”
}
TL;DR:
- Effective signage significantly influences customer engagement and sales. Proper planning, design, material choice, compliance, installation, and maintenance are critical for signage success. Avoid common errors like overcrowding, poor contrast, and neglecting permits to maximize signage ROI.
Picture this: a potential customer walks past your storefront or event booth, glances up, and keeps walking. Not because they aren’t interested, but because your sign failed to communicate anything meaningful in the two seconds they gave it. Generic, cluttered, or poorly placed signage costs businesses real money every single day. 76% of consumers enter a business based on its signage alone. That one statistic should change how seriously you take this. This guide walks you through every stage of creating custom signage that actually works, from goal setting and material selection to fabrication, installation, compliance, and long-term maintenance.
Table of Contents
- What you need before starting: Goals, requirements, and materials
- Step-by-step custom signage: From design to fabrication
- Installation, permits, and compliance: Ensuring safe and legal setup
- Testing, maintenance, and verification: Guaranteeing results
- Why most custom signage fails — and how to ensure yours succeeds
- Take the next step for unforgettable custom signage
- Frequently asked questions
Key Takeaways
| Point | Details |
|---|---|
| Clarity drives results | Clear, high-contrast, professionally designed signage increases visibility and customer engagement. |
| Material matters | Choose materials based on location and environment to ensure durability and compliance. |
| Compliance prevents setbacks | Obtaining permits, ADA compliance, and professional installation are essential for safe signage. |
| Track ROI effectively | Measure traffic and sales before and after installation to confirm signage value. |
| Regular maintenance pays off | Routine testing and care extend signage lifespan and ensure ongoing results. |
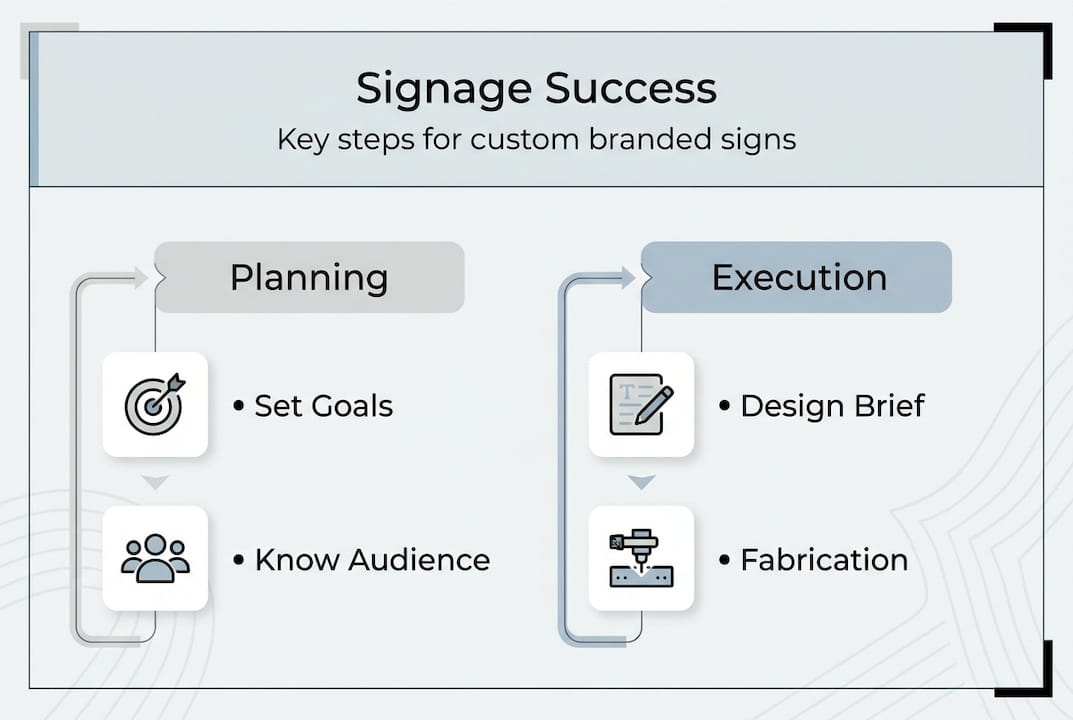
What you need before starting: Goals, requirements, and materials
Before you touch a design tool or order materials, you need to know exactly what your sign is supposed to do. That sounds obvious, but most signage failures start right here. Is your sign meant to build brand awareness, promote a specific offer, guide foot traffic, or communicate safety information? Each purpose demands a different approach to size, placement, and message.
Next, think about your audience. A sign aimed at pedestrians two feet away needs completely different specs than one targeting drivers at 60 mph. Sign visibility depends on location, audience, and viewing distance, and the Rule of 10 is your baseline: for every 10 feet of viewing distance, you need 1 inch of letter height. A sign read from 50 feet away needs letters at least 5 inches tall.
Location and environment shape every material decision you make. Outdoor signs face UV exposure, wind load, rain, and temperature swings. Indoor signs deal with glare, lighting conditions, and foot traffic wear. Material choice and environmental factors directly impact how long your sign lasts and how well it performs.
Here is a quick comparison of the most common signage materials:
| Material | Best use | Durability | Cost range |
|---|---|---|---|
| Aluminum | Outdoor, long-term | Very high | Moderate to high |
| Acrylic | Indoor, backlit | High | Moderate |
| PVC-free board | Temporary/event | Moderate | Low to moderate |
| Vinyl | Banners, wraps | Moderate to high | Low |
For a deeper look at how lawn sign materials compare for outdoor use, or to explore your full range of outdoor signage options, those resources can help you narrow down your choice before ordering.
Key requirements to gather before you start:
- Purpose: Branding, promotion, navigation, or safety
- Audience: Pedestrian, driver, or event attendee
- Environment: Indoor, outdoor, coastal, high-wind, or UV-heavy
- Viewing distance: Use the Rule of 10 to calculate minimum letter height
- Budget: Material and fabrication costs vary significantly
Pro Tip: Leave at least 40% of your sign’s surface as white space. Crowded signs lose readability fast, especially at a distance. White space is not wasted space; it is what makes your message land. You can find additional custom signage design tips to sharpen your layout before fabrication.
Step-by-step custom signage: From design to fabrication
Once your requirements are clear, here is how to bring your signage idea to life, step by step.
Step 1: Write your design brief. Lock in your core message, brand colors, font choices, and layout priorities before opening any software. A brief keeps your design focused and prevents scope creep. Your message should be no more than 10 words for maximum readability, using high contrast and sans-serif fonts.
Step 2: Sketch and refine. Start with pencil and paper. Rough sketches are faster to iterate than digital files. Once you have a layout you like, move it into a tool like Canva for quick mockups or Adobe Illustrator for print-ready files. Always design at the actual output size so you can judge proportions accurately.
Step 3: Apply the Rule of 10 and check contrast. Before finalizing, verify your letter sizes against your expected viewing distance. Then check your color contrast ratio. Dark text on a light background (or vice versa) is not just a design preference; it is a readability requirement. Poor contrast is one of the most common and most avoidable signage mistakes. Check out business sign tips for contrast and layout guidance from experienced designers.
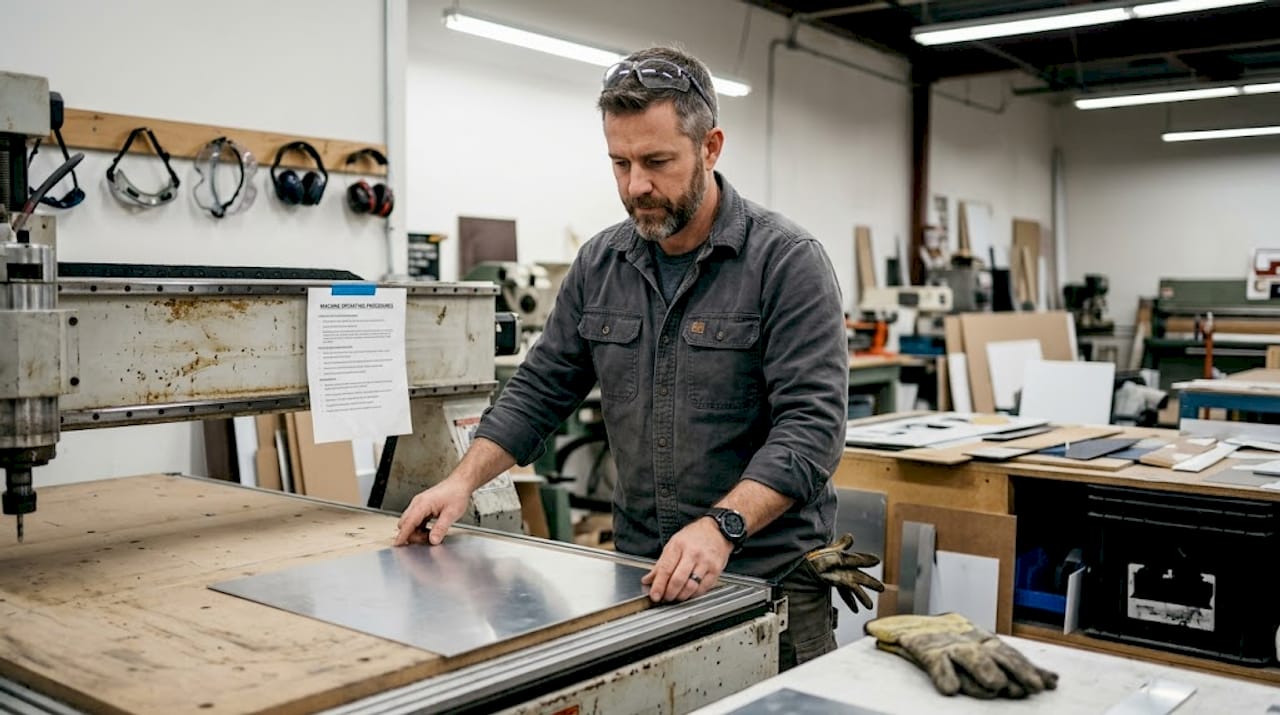
Step 4: Choose your fabrication method. The three most common methods are CNC routing (for dimensional letters and rigid signs), UV flatbed printing (for full-color graphics on rigid substrates), and vinyl cutting (for lettering and decals). Each method has different cost points and finish qualities. Sign fabrication includes CNC, UV printing, and vinyl application, and testing surfaces before installation prevents adhesion failures.
Here is a quick reference for fabrication methods:
| Method | Best for | Finish quality | Turnaround |
|---|---|---|---|
| CNC routing | Dimensional letters | Premium | Longer |
| UV flatbed printing | Full-color rigid signs | High | Moderate |
| Vinyl cutting | Lettering, decals | Good | Fast |
Important: If your sign will be installed in a public space, ADA compliance is not optional. This means non-glare surfaces, high contrast ratios, and specific font and spacing requirements. Skipping this step can result in fines and forced removal.
Pro Tip: Keep your sign’s text to 7 to 10 words maximum. Every word you add cuts the time a viewer has to absorb your message. For a detailed walkthrough of the full process, the custom sign workflow and interior signage steps guides cover fabrication specifics for different sign types.
Installation, permits, and compliance: Ensuring safe and legal setup
With your custom signage fabricated, proper installation and legal compliance are essential for lasting results.
Installation is where many business owners cut corners, and it is almost always a mistake. A sign that falls, fades prematurely, or violates local codes costs far more to fix than it would have to do right the first time. Start with a site survey before anything goes up.
Your pre-installation checklist:
- Site survey: Check surface type, anchor points, electrical access (if illuminated), and sight lines
- Surface prep: Clean, prime, and dry all mounting surfaces before applying adhesive or hardware
- Permits: Permits are essential for large or illuminated signs; ADA compliance requires high contrast and non-glare surfaces; site surveys prevent unexpected issues
- ADA compliance: Required for any public-facing sign, including font size, spacing, and finish requirements
- Environmental edge cases: Coastal and windy regions require corrosion-resistant materials; high-speed traffic areas need larger letters and illumination
For signs near highways or high-traffic roads, letter size requirements increase significantly and illumination is often mandatory for nighttime visibility. Coastal environments demand marine-grade aluminum or stainless steel to resist salt corrosion. If sustainability matters to your brand, PVC-free and recyclable materials are now widely available and just as durable.
Critical: Skipping permits or ignoring ADA requirements is not a gray area. Non-compliant signs can be ordered removed by local authorities, and fines can exceed the original sign cost. Always verify local regulations before installation.
For a full breakdown of what the business signage installation process looks like in practice, or to review exterior signage basics before your first install, those guides walk through each stage in detail. You can also review signage safety best practices to make sure your setup meets current standards.
Testing, maintenance, and verification: Guaranteeing results
With your sign installed, regular testing and maintenance are critical for maximizing your investment.
Too many businesses treat signage as a set-it-and-forget-it purchase. That mindset leads to faded graphics, loose fasteners, and missed revenue. The good news is that a simple maintenance routine dramatically extends sign life and keeps your brand looking sharp.
Start with a post-installation audit. Walk the viewing path your audience will take and check legibility from every relevant distance and angle. Test lighting functionality if your sign is illuminated. Check that all fasteners are tight and that no edges are lifting on vinyl or adhesive applications.
Ongoing maintenance checklist:
- Cleaning: Wipe down sign faces monthly with a non-abrasive cleaner to prevent buildup
- Fastener checks: Inspect mounting hardware quarterly, especially after storms or high winds
- Graphics updates: Swap out promotional panels or overlays when offers change
- Lighting: Replace bulbs or check LED drivers annually for illuminated signs
- Surface integrity: Look for cracking, peeling, or fading that signals it is time to reprint or replace
Signage ROI by the numbers: Sidewalk signs boosted café foot traffic by 25%; retail sales rose 32% with digital signage, and ROI can be achieved in as little as 14 months. Those are not outliers. They are what well-executed, well-maintained signage delivers consistently.
For practical routines, the outdoor sign maintenance guide and event signage maintenance resource both cover specific scenarios for different sign types. Additional signage ROI case studies show what realistic returns look like across business types.
Pro Tip: Schedule a full sign inspection every quarter. Businesses that follow a quarterly maintenance routine report up to 50% longer sign lifespan compared to those that only address problems when they become visible.
Why most custom signage fails — and how to ensure yours succeeds
Here is the uncomfortable truth most signage guides skip: the majority of custom signs underperform not because of bad design software or cheap materials, but because of decisions made before the design even starts.
Overcrowded designs, poor contrast, and skipping professional installation are the primary causes of signage failure. DIY approaches often look fine on screen and fall apart in the real world, where lighting, distance, and weather expose every shortcut.
The businesses that get real results from their signage treat it as a system, not a one-time purchase. They test legibility before final installation. They match materials to their specific environment. They check compliance early, not after the sign is already up. And they track results so they know what is working.
Hybrid approaches are worth considering too. Combining a durable permanent sign with interchangeable printed panels or digital displays gives you the best of both: long-term brand presence and the flexibility to update messaging without replacing the whole sign. New PVC-free materials make this more sustainable than ever.
“Signage isn’t just decoration; it’s a direct driver of foot traffic and revenue.”
Stay current with what is working in 2026 by reviewing signage trends 2026 before your next project. The gap between signage that blends in and signage that converts is almost always execution, not budget.
Take the next step for unforgettable custom signage
You now have a complete framework for creating signage that gets noticed, stays compliant, and delivers measurable results. The next step is putting it into practice with solutions built for your specific goals.
At Custom Signs Today, we specialize in turning these steps into finished signs that work hard for your business. Whether you need exterior lightbox signs that command attention day and night, a full range of custom signs tailored to your brand, or a deeper look at strategy through our signage guide for businesses, we have the expertise and product range to match. Request a free quote today and see what the right sign can do for your visibility.
Frequently asked questions
How do I calculate the correct letter size for my sign?
Use the Rule of 10: for every 10 feet of viewing distance, your letters need to be at least 1 inch tall. A sign viewed from 40 feet away needs 4-inch letters at minimum.
What are the most durable materials for outdoor signs?
Aluminum and stainless steel resist weather and corrosion best for outdoor use, while acrylic works well for illuminated indoor signs where impact resistance is less of a concern.
Do I need a permit for my business or event signage?
Permits are required for large, illuminated, or exterior signs in most jurisdictions. Always check your local zoning and building codes before installation to avoid fines or forced removal.
How can I measure the ROI of my custom signage?
Track foot traffic and sales figures for 30 to 60 days before installation, then compare them to the same period after. ROI can be achieved in 14 months for well-placed, well-maintained signage investments.
What common mistakes should I avoid when creating custom signage?
Avoid overcrowded designs and poor contrast, and never skip site surveys, permits, or professional installation. Ignoring your environment, whether that means wind, UV exposure, or viewing distance, is equally costly.
Recommended
- Retail Signage Explained: Boosting Business Visibility –
- Custom Sign Workflow for Businesses: A Step-by-Step Guide –
- Branding With Custom Signage: Boost Your Business Impact –
- How to Design Business Signs That Boost Visibility –
- Étapes branding agence : +25% conversion avec méthode 2026 – Vamyr Studio
- Amazon SEO Step by Step: Boost Your Product Visibility