TL;DR:
- Proper safety signage significantly improves hazard detection and compliance in workplaces.
- Selecting durable materials and adhering to design principles ensures signs remain effective over time.
- Ongoing installation verification and updating signage foster a strong safety culture beyond mere compliance.
Poor safety signage is not a minor oversight. When signs are missing, faded, or placed where workers cannot see them, the consequences range from OSHA fines to serious injuries. Research confirms that optimized signs improve compliance by 37.8% and hazard detection by 42.3%, which means the design choices you make directly affect how safe your workplace is. This guide walks you through a data-driven, step-by-step process for creating safety signs that meet regulatory requirements, hold up in real environments, and actually change behavior on the floor.
Table of Contents
- Understand regulatory requirements and sign types
- Select materials and tools for lasting signage
- Design principles for effective safety signage
- Install and verify signage placement
- Beyond compliance: What truly effective safety signage achieves
- Your partner for better safety signage
- Frequently asked questions
Key Takeaways
| Point | Details |
|---|---|
| Start with regulations | Always review OSHA and ANSI rules before designing any safety signage. |
| Choose the right materials | Durable, weather-resistant materials ensure signs remain effective and compliant over time. |
| Design for visibility | Strong color contrast and clear symbols capture attention and can increase compliance by over 35%. |
| Be proactive with maintenance | Routine checks and timely replacements prevent small issues from becoming safety hazards. |
Understand regulatory requirements and sign types
Before you order a single sign, you need to know which rules apply to your facility. Two frameworks govern workplace safety signage in the United States: OSHA (Occupational Safety and Health Administration) and ANSI (American National Standards Institute). Understanding the difference between them is the foundation of any compliant signage program.
OSHA sets the legal minimums. If your signs do not meet OSHA standards, you face citations and fines. ANSI Z535 goes further by establishing best practices for color coding, symbol use, and layout that improve how well people actually read and respond to signs. Following ANSI on top of OSHA is not legally required in every case, but it is the smarter move. Symbols boost recognition by 43% compared to text-only signs, which is a measurable safety gain you should not leave on the table.
Here are the four core safety sign types you need to know:
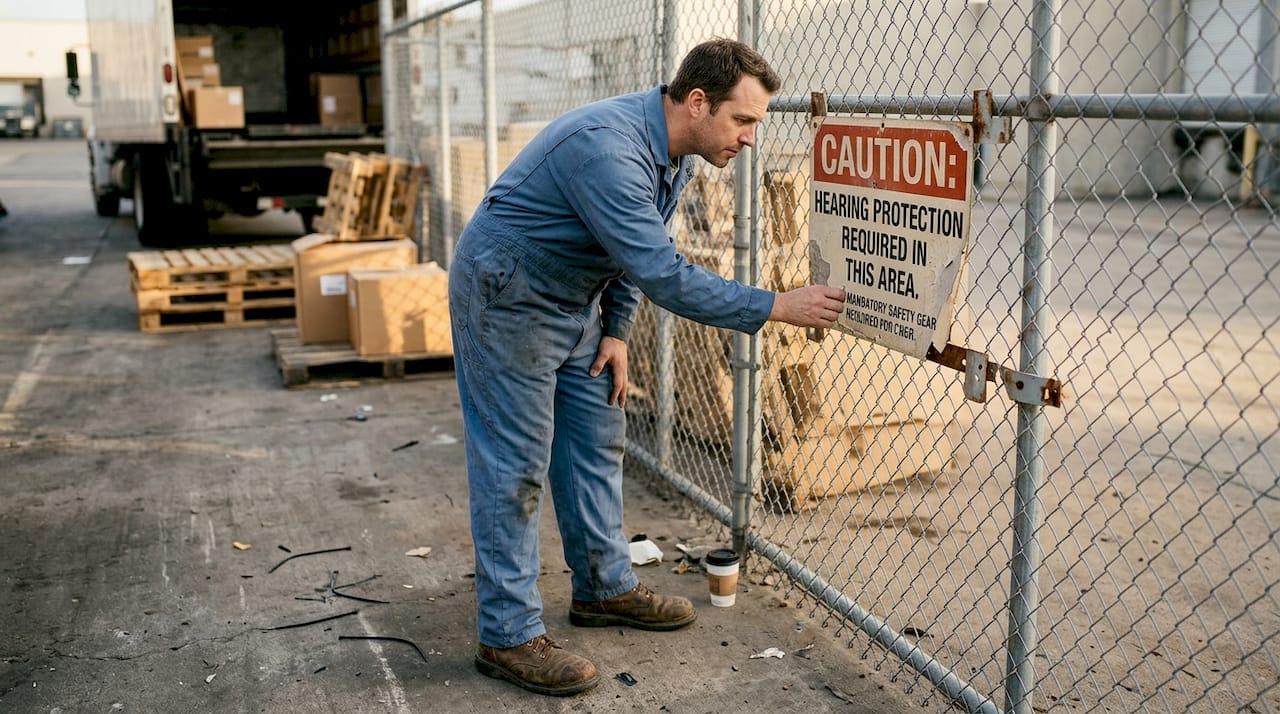
- Warning signs (orange/yellow): Alert workers to hazards that could cause serious injury if not avoided.
- Mandatory signs (blue): Indicate required actions, such as wearing PPE (personal protective equipment).
- Prohibition signs (red/white): Communicate what is not allowed, such as no smoking or no entry.
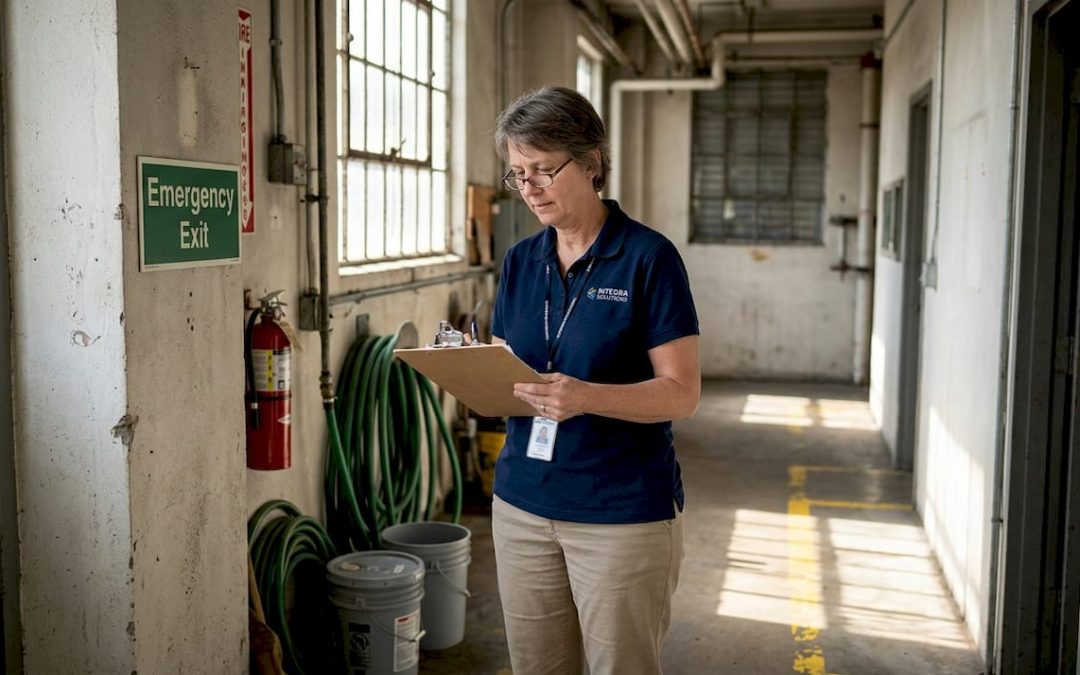
- Emergency signs (green): Mark evacuation routes, first aid stations, and emergency exits.
| Standard | Legal requirement | Focus | Symbol use |
|---|---|---|---|
| OSHA | Yes | Minimum safety thresholds | Optional |
| ANSI Z535 | Recommended | Effectiveness and clarity | Strongly encouraged |
Pro Tip: Review your safety signs compliance obligations annually. Regulations update, and a sign that was compliant three years ago may no longer meet current standards.
Mapping your facility room by room and listing every hazard, required action, and emergency route gives you a complete sign inventory before you spend a dollar on production.
Select materials and tools for lasting signage
Knowing what types of signs you need is only half the battle. Choosing the wrong material means your signs fade, warp, or peel within months, leaving you with a compliance gap and a wasted budget. Color contrast and material durability both correlate strongly with sign effectiveness, so material selection is a design decision, not just a purchasing one.
Here is a quick comparison of the three most common sign materials:
| Material | Best environment | Durability | Cost |
|---|---|---|---|
| Aluminum | Outdoor, industrial | 10+ years | Medium to high |
| Rigid plastic (PVC) | Indoor, light outdoor | 3 to 5 years | Low to medium |
| Vinyl (adhesive) | Indoor walls, equipment | 2 to 5 years | Low |
For outdoor and industrial settings, aluminum is the gold standard. It resists rust, handles temperature swings, and holds color well when printed with UV-resistant inks. Rigid plastic works well for indoor areas where signs are not exposed to chemicals or direct sunlight. Vinyl decals are cost-effective for equipment labeling and wall-mounted instructions, but they need to be inspected more frequently for peeling or fading.
A solid sign materials guide will help you match substrate to environment, but here are the essentials to gather before production:
- UV-resistant ink or laminate for any sign exposed to sunlight
- Anti-graffiti coating for high-traffic or public-facing areas
- Mounting hardware rated for the surface type (concrete, drywall, metal)
- Retro-reflective sheeting for low-light or nighttime visibility areas
Pro Tip: For durable signage in chemical or wash-down environments, specify a polycarbonate substrate with solvent-resistant inks. Standard vinyl will degrade quickly under those conditions.
Spending a little more upfront on the right material almost always costs less than replacing signs every two years. Factor in the labor cost of reinstallation and the compliance risk of a sign that fails mid-cycle, and the math becomes obvious.
Design principles for effective safety signage
With your materials selected, the next task is making sure your signs actually communicate. A sign that meets regulatory minimums but is hard to read at a glance is still a liability. Proven design principles close that gap.
Follow these steps to lay out an effective safety sign:
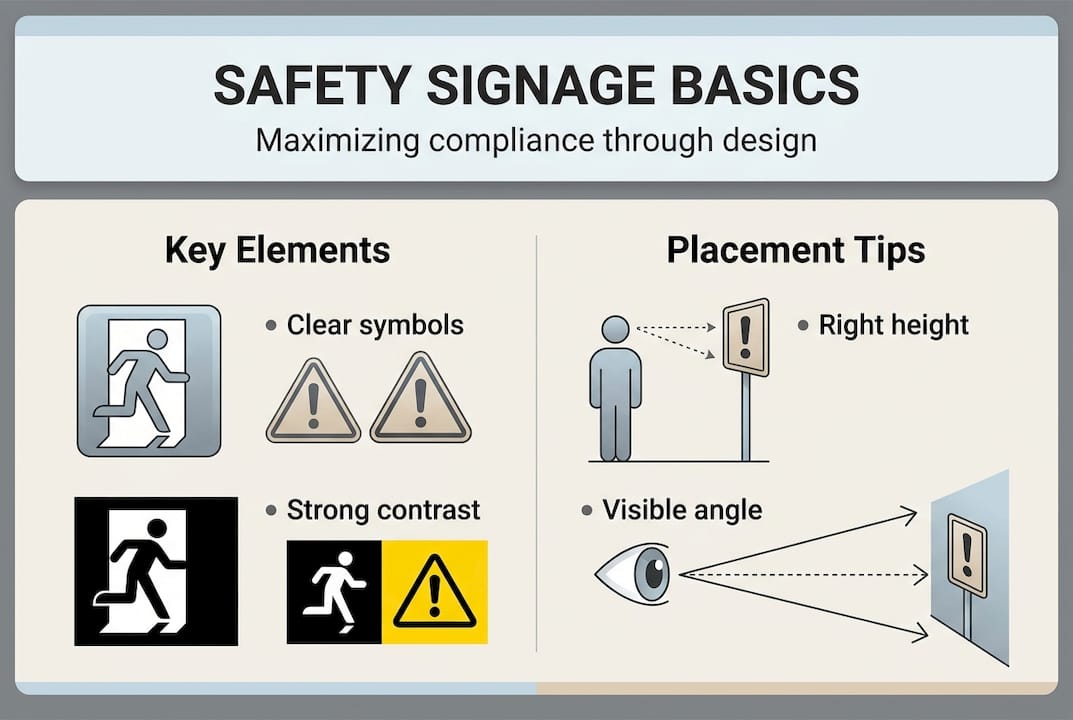
- Choose the correct signal word. ANSI specifies “DANGER” for immediately life-threatening hazards, “WARNING” for serious injury risks, and “CAUTION” for minor hazards. Using the wrong word undermines the sign’s credibility.
- Apply the correct color coding. Red for danger and prohibition, orange for warning, yellow for caution, blue for mandatory action, green for emergency and safety.
- Use a standardized symbol. Place the symbol in the upper left or center panel. Symbols improve hazard recognition by 43% over text-only layouts.
- Write a short, direct message. Keep the text under ten words. Use active voice and simple language.
- Check contrast ratios. Dark text on a light background or light text on a dark background. Avoid color combinations that look similar to people with color blindness.
Key stat: Color contrast shows a correlation of r=0.78 with sign effectiveness, making it the single strongest design variable you can control.
Size matters too. A sign that is technically present but too small to read from the approach distance is functionally useless. The ANSI Z535 standard provides letter height tables based on viewing distance. For a sign read from 50 feet away, minimum letter height is approximately 2.5 inches.
Pro Tip: Before finalizing your layout, print a test copy at full size and tape it to the wall at the intended viewing distance. What looks clear on screen often looks cluttered or small in the real environment. Check out property signage design principles for additional layout guidance.
Install and verify signage placement
Even a perfectly designed sign fails if it is mounted behind a shelf, above eye level in a dim corridor, or on a surface that vibrates it loose over time. Installation and ongoing verification are where many safety programs fall short.
Follow this process for every sign you install:
- Identify the point of hazard approach. Mount the sign where workers will see it before they reach the hazard, not at the hazard itself.
- Check the mounting height. Eye level for most signs is between 5 and 6.5 feet. Emergency exit signs follow specific height codes that vary by jurisdiction.
- Verify unobstructed sightlines. Walk the approach path and confirm no equipment, shelving, or doors block the sign at any point.
- Use appropriate fasteners. Screws for permanent signs, tamper-resistant hardware in public areas, and chemical-resistant adhesive for signs near solvents or cleaners.
- Document the installation. Photograph each sign in place with a timestamp. This record supports compliance audits and insurance claims.
“Improper sign placement reduces hazard detection and compliance, regardless of how well the sign itself is designed.”
After installation, schedule a quarterly walk-through using a simple checklist. Look for signs that are faded, damaged, obstructed, or no longer relevant to the current layout. The signage installation process for outdoor signs requires additional attention to anchoring and weatherproofing. An outdoor signage installation guide can help you avoid the most common anchoring mistakes. For ongoing upkeep, a structured signage maintenance guide keeps your program on track between major reviews.
Replace any sign that is more than 25% obscured, visibly faded, or physically damaged. A compromised sign is worse than no sign in some situations because it creates a false sense of compliance.
Beyond compliance: What truly effective safety signage achieves
Here is something most compliance checklists never tell you: a workplace full of technically correct signs can still have a terrible safety culture. We have seen facilities where every OSHA box is checked and workers still ignore signage entirely because the signs feel like wallpaper. Nobody reads them anymore.
The difference between a sign that gets ignored and one that changes behavior is not just design quality. It is whether the signage program is treated as a living system or a one-time installation. Signs that are updated when hazards change, removed when they are no longer relevant, and discussed during safety briefings carry authority. Signs that stay on the wall for a decade, faded and forgotten, teach workers to tune out everything on the wall.
Proactive signage also builds a measurable safety culture. When employees see that management invests in clear, current, well-placed signs, they internalize the message that safety is taken seriously. That perception alone reduces near-miss incidents. Research on signage and safety outcomes consistently supports this connection. Treat your signage program as an ongoing training tool, not a compliance formality, and the results will show up in your incident logs.
Your partner for better safety signage
Creating signage that genuinely protects your team and satisfies regulators takes more than printing a warning label. It requires the right materials, precise design, and expert production.
At Custom Signs Today, we work directly with business owners and property managers to produce safety signs that meet OSHA and ANSI standards while holding up in real-world environments. From exterior lightbox signs for building entrances to custom signs for specific hazard zones, we handle the full process. Not sure where to start? Our signage guide walks you through the options. Contact us today for a free quote and let us help you build a signage program that actually works.
Frequently asked questions
What is the most important factor in effective safety signage?
Studies show color contrast is the strongest predictor of sign effectiveness, with a correlation of r=0.78, making it the first design element to get right.
How often should workplace safety signs be inspected or replaced?
Inspect signage quarterly and replace any sign that is damaged, faded, or unreadable immediately. Well-maintained signage links directly to higher compliance rates in workplace studies.
Are symbols or text more effective for safety signs?
Standardized symbols improve hazard recognition by 43% compared to text-only signs, so always include a recognized symbol when one exists for your hazard type.
What materials last longest for outdoor safety signage?
Aluminum with UV-resistant ink and UV-resistant vinyl are the most durable choices for outdoor safety signs, with aluminum lasting 10 or more years in most environments.
Can I design my own safety sign or must it be professionally produced?
You can design your own sign if you follow OSHA and ANSI Z535 guidelines, but professional production ensures consistent color accuracy, correct material selection, and full compliance with current standards.